
Nothing disrupts a Windows Hyper-V environment like a checkpoint that refuses to delete. The error typically occurs when users attempt to delete a checkpoint through Hyper-V Manager or PowerShell, only to encounter a generic failure message. However, this is nothing to fret about. In this article, we will explore the possible reasons for this frustrating error and find practical solutions to resolve it for good.
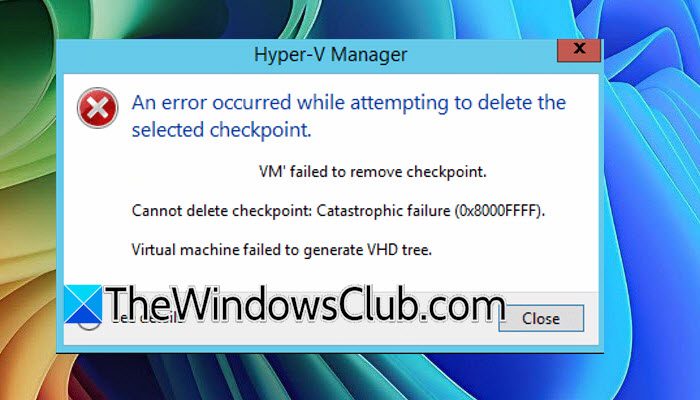
An error occured while attempting to delete the selected checkpoint.
VM’ failed to remove checkpoint
Cannot dete checkpoint: Catastrophic failure (0x8000FFFF).
Virtual Machine failed to generate VHD tree.
What causes Hyper-V Checkpoint operation failed error?
The error is triggered when Hyper-V cannot merge an AVHDX differencing disk back into its parent VHDX. Some of the common causes of this include insufficient disk space on the host volume, orphaned or corrupted checkpoint chains often left behind by failed backup software, or a stalled Hyper-V Virtual Machine Management Service.
Hyper-V Cannot delete checkpoint: Catastrophic failure (0x8000FFFF)
If Hyper-V fails to remove the checkpoint, execute the solutions mentioned below.
- Shut down the VM and refresh the Hyper-V management service
- Create a new checkpoint and delete the entire subtree
- Use PowerShell with the -Force parameter
- Manually merge orphaned AVHDX files and clear stale state files
- Remove lingering backup-software recovery checkpoints
Let’s get started with the troubleshooting guide.
1] Shut down the VM and refresh the Hyper-V management service
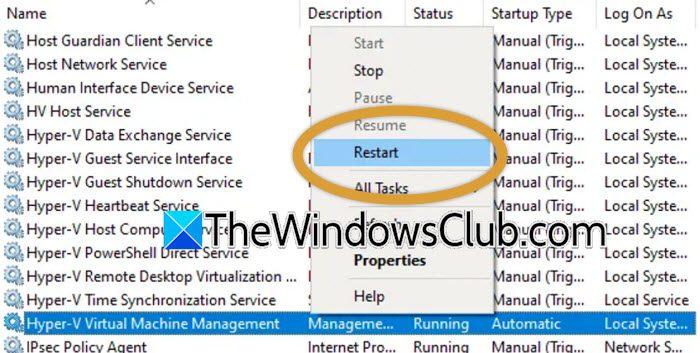
Deletion failures can often stem from a stale VMMS job state or file locks held by the guest OS. In such situations, shutting down the VM to release all guest-level handles and restarting it allows Hyper-V to re-evaluate and complete a clean merge without interference.
- Open Hyper-V Manager, right-click the affected VM, and select the Shut Down option.
- Wait for the VM to enter the Off state completely, and then press Win + R to open the Run dialog box.
- Type services.msc, hit Enter, and locate and right-click on Hyper-V Virtual Machine Management in the Services window.
- Select Restart, wait for the service to restart, then return to Hyper-V Manager and right-click the VM.
Attempt to delete the problematic checkpoint again via the Delete Checkpoint or Delete Checkpoint Subtree button.
2] Create a new checkpoint and delete the entire subtree
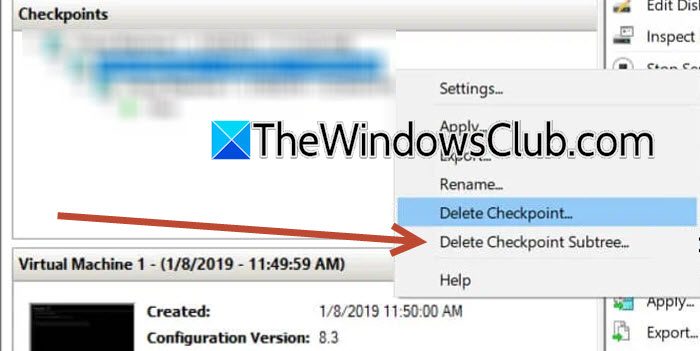
When a checkpoint tree becomes inconsistent, but Hyper-V still has a valid base, users need to create a new checkpoint to rebuild the checkpoint hierarchy and allow Hyper-V to process pending merges from a fresh checkpoint. From the current VM state. Then, they need to delete the new checkpoint’s subtree to trigger a merge that overwrites faulty pointers with fresh metadata.
- First and foremost, ensure the VM is active, and then go to the Hyper-V Manager and right-click the VM.
- Select the Checkpoint option to create a new standard checkpoint, and then go to the checkpoint tree.
- Right-click the newly created checkpoint and select Delete Checkpoint Subtree.
Hyper-V will now attempt to merge all checkpoints in the tree, including the one that was originally stuck. Check whether the error is resolved, and proceed to the next solution accordingly.
Read: Error occurred while attempting to checkpoint the selected virtual machines
3] Use PowerShell with the -Force parameter
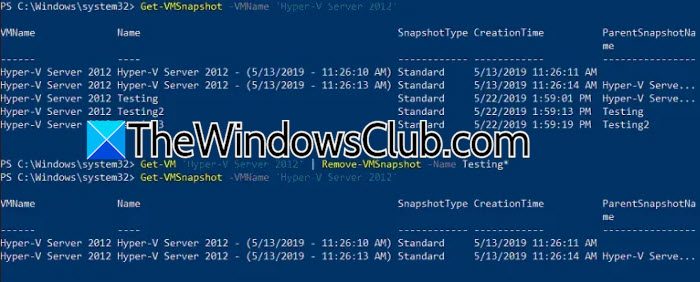
The GUI imposes strict validation checks that often produce false positives and block deletions. To bypass these validations and directly instruct WMI to initiate the merge, we are going to use PowerShell’s -Force switch to disregard in-use flags.
Open PowerShell as Administrator and run the following command to list all checkpoints for the virtual machine:
Get-VMSnapshot -VMName "YourVMName"
Review the output and note the exact name of the checkpoint you want to remove. To delete a specific checkpoint, run.
Remove-VMSnapshot -VMName "YourVMName" -Name "ProblemCheckpointName"
If you want to remove all checkpoints associated with the virtual machine, execute:
Get-VMSnapshot -VMName "YourVMName" | Remove-VMSnapshot
Once the operation completes, verify that the checkpoints have been removed by running:
Get-VMSnapshot -VMName "YourVMName"
Check the output, and if the verification shows no checkpoint, you are done. However, if the verification shows that the checkpoint still exists, try the next solution.
4] Manually merge orphaned AVHDX files
If automatic checkpoint merging fails, an orphaned AVHDX differencing disk may prevent Hyper-V from deleting the checkpoint. In such cases, manually merging the differencing disk into its parent VHDX can help consolidate the disk chain and remove the dependency on the failed checkpoint.
Ensure that the VM is completely turned off, then open PowerShell as Administrator and identify the virtual hard disk attached to the VM by running the following command:
Get-VMHardDiskDrive -VMName "YourVMName"
This displays the path to the VHDX or AVHDX file currently in use. Next, determine the parent disk for the differencing disk by running:
Get-VHD -Path "C:\Full\Path\to\Child.avhdx"
Verify that the ParentPath shown in the output points to the correct parent VHDX. Then merge the child AVHDX into its parent by executing.
Merge-VHD -Path "C:\Full\Path\to\Child.avhdx" -DestinationPath "C:\Full\Path\to\Parent.vhdx"
Note: Keep the virtual machine powered off throughout the merge process. Depending on the size of the AVHDX file, the operation may take some time to complete.
After the merge finishes successfully, start the virtual machine and return to Hyper-V Manager. Check whether the checkpoint has been removed automatically.
5] Remove lingering backup recovery checkpoints
Some backup applications create temporary recovery checkpoints during a virtual machine backup. If a backup job fails or is interrupted, these checkpoints may not be removed properly, preventing Hyper-V from deleting the original checkpoint. Removing the recovery checkpoint and ensuring no backup process is holding the VM can help resolve the issue.
Open PowerShell as Administrator and list all checkpoints associated with the virtual machine by running the following command:
Get-VMSnapshot -VMName "YourVMName"
If the output shows a checkpoint created by a backup application, note its name and remove it using:
Remove-VMSnapshot -VMName "YourVMName" -Name "CheckpointName"
If you no longer need any checkpoints for the VM, you can remove them all by running:
Get-VMSnapshot -VMName "YourVMName" | Remove-VMSnapshot
Next, open the console of your backup software and verify that no backup or recovery job is currently running for the virtual machine. If necessary, stop or disable the job temporarily, then restart the Hyper-V host to release any lingering file locks.
After the host restarts, attempt to delete the checkpoint again using Hyper-V Manager. If the issue persists, proceed to the next solution.
Read: Enable, create, rename, delete, restore Checkpoints in Hyper-V
How do I delete a checkpoint in Hyper-V Manager?
To delete a checkpoint in Hyper-V Manager, open the console, select the VM and expand the Checkpoints section. Right-click the specific checkpoint and choose the Delete Checkpoint button. Alternatively, right-click any checkpoint and select Delete Checkpoint Subtree to remove that checkpoint and all its children at once.
Also Read: Restored Hyper-V Virtual Machine not starting.
