
You can turn on or off Night Light or enable Blue Light Filtering in Windows 11/10 via Windows Settings. You can now also control the brightness of your computer display screen here. The Night Light feature is something like F.lux or SunsetScreen that allows users to dim their screen and make the display warmer over time, automatically. It reduces the blue light of the monitor and uses yellowish light to make the screen look warmer. You can either turn on Night Light manually or schedule it using the given options. In this post, we will see how to enable Night Light in Windows 11/10.
Enable Blue Light Filtering or Turn On or Off Night Light in Windows 11
In Windows 11, there have been few changes to the Display settings’ specifications; however, their location and method of access have changed. So is the case with night light settings. The procedure to access the Night Light settings in Windows 11 is as follows:
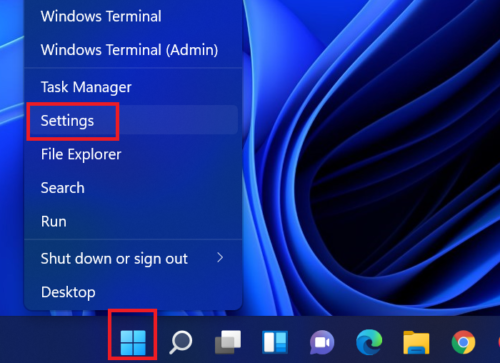
Right-click on the Start button and select Settings from the menu.
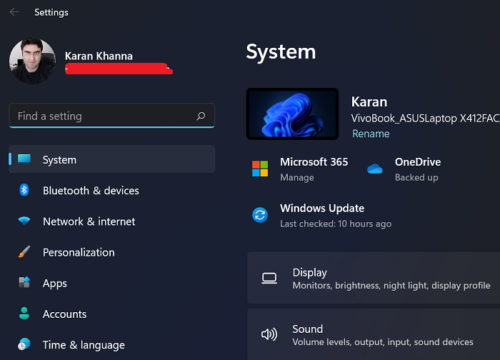
In the Settings window, click on the System on the list on the left-hand side. In the right-pane, select Display.
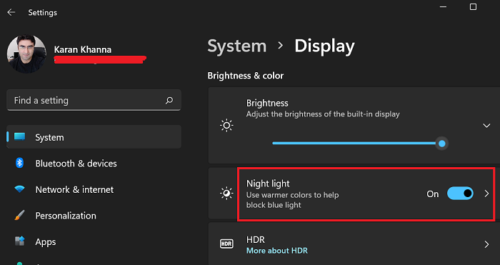
You would find the Night light option. Turning it ON changes the screen color to yellowish.
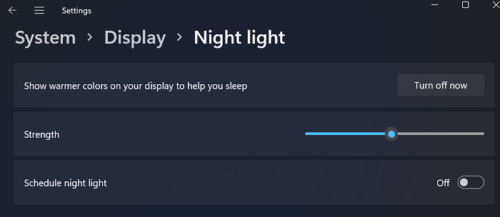
Alternatively, you could click the forward-pointing arrow next to the Night Light menu and choose from the options to adjust the strength of blue light filtering or schedule the Night Light.
Why is using Night Light better than using Dark Mode?
It depends. The Dark Mode is way better for users who don’t mind inverted colors. But the thing is, most users aren’t yet comfortable with the concept. The Night light simply makes the screen color warmer.
Earlier, external screen filters were popular. The users would attach a blue-screen filtering film to their computer screen. But then, since the Night mode has been added, that extra purchase isn’t necessary.
How to change Night Light Strength in Windows 11?
To change the Night Light Strength in Windows 11, open Windows Settings > Display > Night Light and move the slider to the left or right to change the strength.
Turn On Night Light in Windows 10
To turn on Night Light in Windows, open the Settings panel. If you do not know how to open that, you can press Win+I buttons together. Alternatively, you can find the Settings option in Win+X menu.
After opening the Settings panel, go to System > Display. On the right-hand side, you can see an option called Night light under Brightness and Color settings.
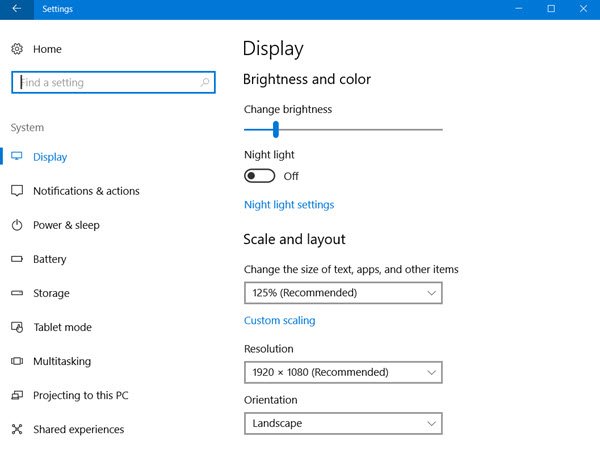
Before toggling the switch, click on Night light settings to set it up correctly and according to your requirements. On the next screen, you will find a bar that helps users select the color temperature level.
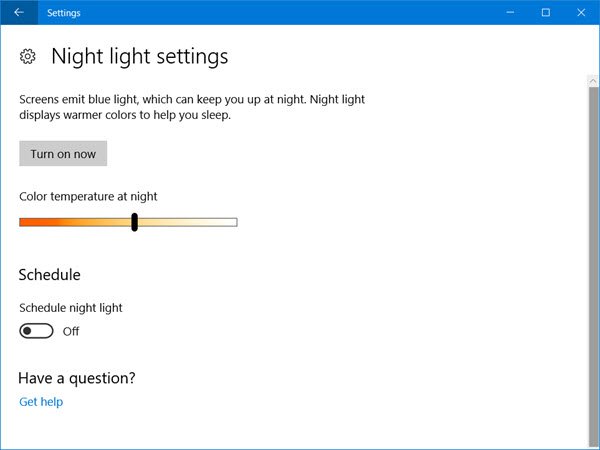
If you move the bar to the left, your screen will look warmer. So select a color temperature level using that bar.
Next, you can set a schedule to follow. If you do not want to turn it on or off manually, but instead want to activate Night Light automatically, you can use this option. To activate “Schedule”, toggle the corresponding button that says Schedule night light under Schedule option. Now, you will see two different options i.e. Sunset to sunrise and Set hours.
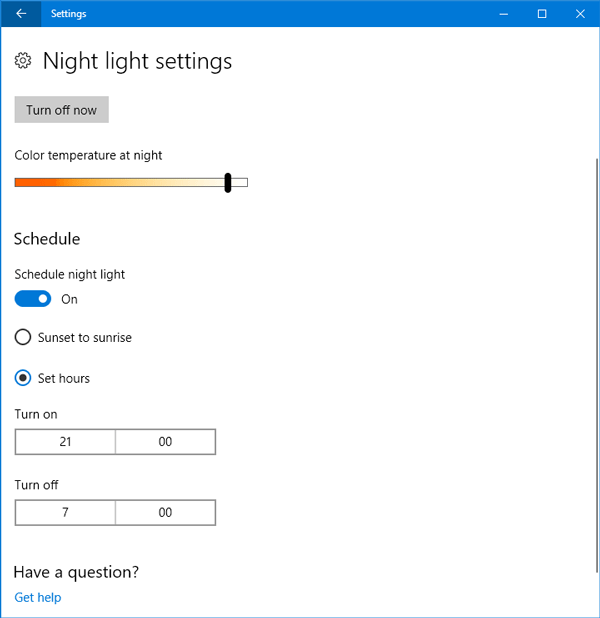
If you want to use Night Light from sunset to sunrise, you can opt for the first option. Otherwise, click select Set hours and enter the desired times. Also, make sure your time is set correctly.
Finally, hit the Turn on now button. Alternatively, you can go back and toggle the Night light button to activate it.
In case you want to turn off the Night light in Windows during the Active Hours, go to the same Display settings location and toggle the Night light button again to deactivate it.
Why should we make it a habit to use Night Light mode before sleeping?
Blue light suppresses the production of the sleep-inducing hormone melatonin. Most people do not know that the cause of their insomnia and messed-up schedule is using computers and phones till late at night. While it is understandable that most users cannot change this practice since they need to work until they crash, this small change can help solve the problem mentioned.
Hope you find this feature useful for reducing eye strain.
