System Restore in Windows is one of the oldest and essential features which can help you recover a deleted file, and take you to the point where everything was working fine. But what if System Restore doesn’t work and fails? One such error we have noticed is — System restore failed to extract the file, error 0x80071160, or appxstaging. This problem occurs because of permission issues and fails when trying to extract files from the System Restore backup.

In this case, it is WdBoot.sys, which is the Microsoft antimalware boot driver OS file.
System restore failed to extract the file, error 0x80071160
If System Restore has failed, then to fix this System Restore error, you will need to use an admin account as you will have to change permission. Then follow these suggestions:
- Disable Antivirus Software
- System Restore from Advanced Recovery Environment
- Rename WindowsApps Folder
- Repair Windows using DISM and SFC Commands
It is always a good idea to have a backup in place along with System Restore. In the case of System Restore failure like in this case, the backup can be used to restore missing files.
1] Disable Antivirus Software

Some of our users have reported that antivirus is one of the most prominent causes of this error. Temporarily disable Windows Defender or any other antivirus programs you may have installed.
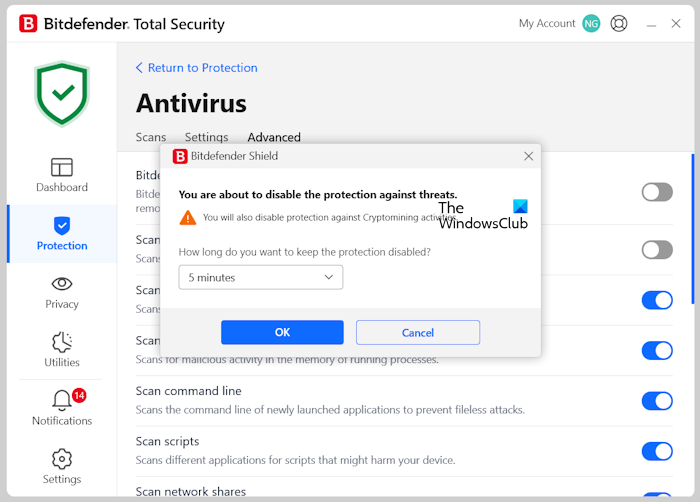
If you use third-party antivirus software, you should disable it.
Once it is through, you can enable it again.
2] System Restore from Advanced Recovery Environment\
Since it’s probably because of permission issues, the Advanced Recovery Environment offers better support in this case. You can boot into Advanced Startup Options from within Windows or using a Windows 11/10 Bootable USB drive.

- Open Windows 11/10 Settings (Win + I)
- Navigate to Update and Security > Recovery, then click on the Restart now button under Advanced Startup. In Windows 11, the Recovery option is available on the Windows Update > Advanced options page in Windows 11 Settings.
- When in Recovery, click on Advanced Options > Troubleshoot > Advanced Options
- Click System Restore, and see if you can go back to an earlier time.
If this works, you will be all set. But if it does not, you have the option to perform startup repair in the Recovery Environment. Do that, and later, try to perform a system restore.
3] Rename WindowsApps Folder
You can also try to rename the Windows Apps Folder in the Programs Folder in the Windows installation drive. It will usually be at ” C: Program Files.” However, the folder is hidden, so make sure to check the box next to Hidden Items under the Show/Hide section of the view tab.
This has been known to help many. So create a system restore point first and then rename the WindowsApps folder either in Safe Mode or using the Advanced Recovery Environment. In the latter, you must choose the command prompt and execute the following commands.

Safe Mode Method
Boot into Safe Mode and log in with an admin account. Find and open Command Prompt, and execute the following commands. This assumes that your Windows is installed in the C drive.
cd C:\Program Files
takeown /f WindowsApps /r /d Y
icacls WindowsApps /grant “%USERDOMAIN%\%USERNAME%”:(F) /t
attrib WindowsApps -h
rename WindowsApps WindowsApps.old
Reboot Windows normally, and try System Restore again.
Advanced Recovery Method
Boot into Advanced Recovery mode, and navigate to Troubleshoot > Advanced Options > Command Prompt. Execute the following command:
cd C:\Program Files
attrib WindowsApps -h
rename WindowsApps WindowsAppsOld
Reboot Windows normally, and try System Restore again.
Read: System Restore stuck or hung up.
4] Repair Windows System Image using DISM
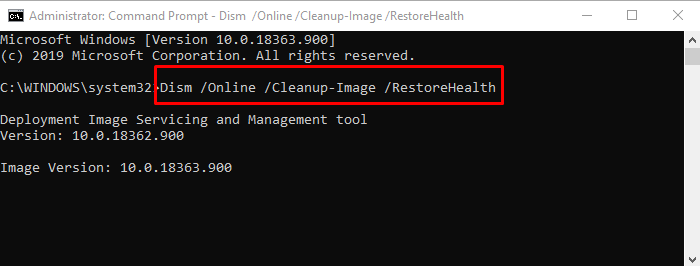
If nothing else is working, the last thing we can suggest here is to run the DISM command to fix any form of corruption that might have happened to system files. Open Command Prompt or Power Shell with admin privileges, and execute the following commands
DISM.exe /Online /Cleanup-image /Scanhealth
DISM.exe /Online /Cleanup-image /Restorehealth
DISM.exe /online /cleanup-image /startcomponentcleanup
Like anything else, system restore is prone to corruption and permission issues. It should work without issues, but Windows has its share of drawbacks and problems. This is the primary reason why there should be at least two backups in place, so in case one doesn’t work, you can always fall back to the second.
I hope the post was able to help you resolve the System Restore Error 0x80071160.
How do I fix error 0x80071160?
The error code 0x80071160 is associated with Windows Update and prevents your computer from installing Updates. If you encounter the Windows Update error 0x80071160, first, run Windows Update Troubleshooter. It is an automated tool in Windows 11/10 that helps users fix issues associated with Windows Update. If the troubleshooter does not help, you can try other fixes, like clearing the Software Distribution Folder, resetting the Windows Update Components, etc. You can also try to install Windows Update in a Clean Boot state.
How do I fix a failed System Restore?
A System Restore fails or does not work properly due to corrupted system image files or some bad sectors on a hard disk. However, some other causes also exist for failed System Restore. You can repair your system image files with the help of SFC and DISM tools and run the CHKDSK scan to repair the bad sectors on your hard disk.
Read next: System Restore disabled or greyed out.