Windows was created to build an operating system that enhances a user’s productivity. Hence, modern computers running Windows 11/10 have capabilities to project their screen to an external display wirelessly. Microsoft has a pre-installed and dedicated app — Connect, which helps another device project their screen on the computer. But this feature is really delicate. It will not work properly if not configured properly. And if some configuration does not work out well, it will display an error – Something went wrong with the projection.
This error is caused due to issues with the Display driver, hardware error, damaged system files, and more.

Fix Something went wrong with the projection error in Windows 11/10
The following methods are effective to fix this issue with projection on Windows 11/10:
- Update, Rollback, or Reinstall the Display Driver.
- Run Network Troubleshooters.
- Run Video Playback Troubleshooter.
- Undo any recent changes.
-
Reset Windows
without deleting any files.
1] Update, Rollback or reinstall the Display driver
There is a possibility that the driver got updated in the background, and hence, a flawed installation might have caused the issue. Else, an outdated and incompatible driver might also trigger the same issue. Lastly, a corrupted or improper installation would do the same.

The Display driver is the backbone of this feature on Windows 10. You can either update the Graphics Driver or rollback or reinstall it. These actions can be performed from the Device Manager under the section of Display adapters.
Also, you can try to update, rollback, or reinstall the Network drivers. They can be found under the section of Network Adapters.
3] Use the Network Adapter troubleshooter
The issue can also be caused due to an issue with the Network Adapter settings. You can use the Network Adapter troubleshooter to fix the error.
4] Use Video Playback troubleshooters
Inside the Settings app for Windows 10, navigate to Update & security > Troubleshoot.
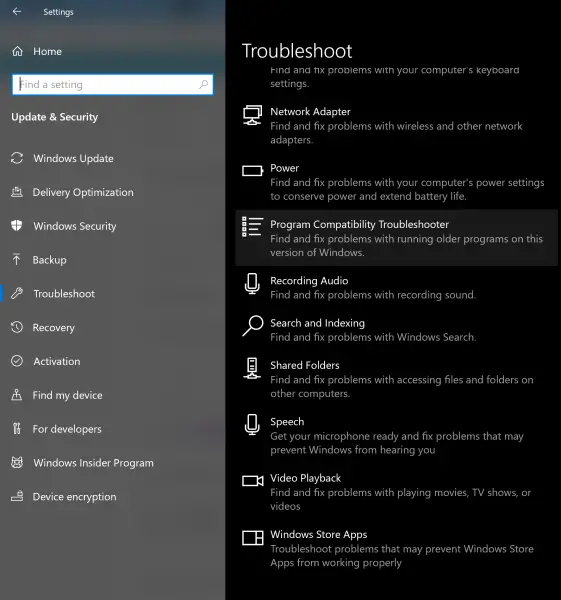
And run the Troubleshooter for Video Playback.
This should automatically detect and fix any problems you face on your computer.
4] Undo any recent changes
If the Projection worked earlier and after a few software or hardware changes that you made, the feature is not working and throwing the Something went wrong with the projection error, there is something you can do about it.
Installing a new software might modify the projection configurations.
So, you have to undo all these changes and check if that fixes your issues. For that, uninstall any new software installed or remove any hardware you inserted to your computer safely. Ensure that any hardware you remove is when the computer is turned off.
5] Reset Windows without deleting any files
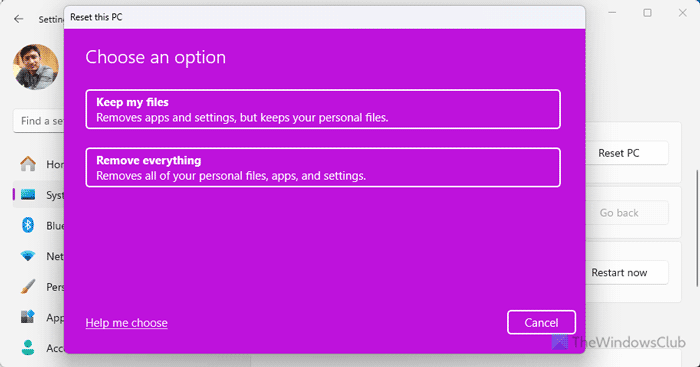
In some cases, as the last option, resetting Windows 11/10 without deleting any files have helped resolve this issue. While performing a reset, make sure you Keep all the personal files.
This should have made the projection feature working on your computer.
Why is Miracast not working in Windows?
Miracast may not work on Windows 11/10 due to outdated Wi-Fi or display adapter drivers. Ensure these drivers are updated to resolve the issue. Additionally, ensure your device supports Miracast and runs the latest Windows updates for optimal compatibility and performance.
Why is my computer not detecting my projector in Windows?
If your Windows 11/10 computer is not detecting your projector, first ensure all cable connections are secure and the correct input is selected on the projector. Then, right-click the desktop, select “Display Settings,” and click “Detect” to prompt Windows 10 to find the projector. Adjust display settings as needed for proper connection.
Leave a Reply