If your goal is to secure your customer’s data and enable efficient teamwork, you need to set up territories, roles and data sharing rules in Zoho CRM for proper data access. In this guide, we will discuss them and provide a step-by-step guide to set up these things easily.
What are Territories in Zoho CRM?
In Zoho, Territories represent geographical or market-based segments of your business (e.g., “North America” or “Enterprise Clients”). Territory management allows you to assign sales teams to specific segments and control data visibility based on those assignments.
Roles define a user’s position within your organisational hierarchy (e.g., “Sales Manager,” “Sales Executive”) and determine what data a user can see based on that position. For instance, a manager can usually see their team’s records, while an executive sees only their own.
Whereas, Profiles control what actions a user can perform on the data they can see, such as creating, reading, editing, or deleting records. A Sales Executive’s profile may allow them to edit leads, whereas a Support Agent’s profile may be set to read-only.
Set up Territories, Roles and Data Sharing rules in Zoho CRM
Before setting up territories, roles and data sharing rules in Zoho CRM, we need to understand what they are.
To set up territories, roles, and data sharing rules in Zoho CRM, follow the steps outlined below.
- Create a plan
- Configure Roles and Hierarchies
- Set up Territory Management
- Configure Data Sharing Settings
Let’s discuss them in detail.
1] Create a plan
When setting up a new environment, it’s essential to have a plan in place first. Start by planning your hierarchy. Map out the different job roles, their levels of data access, and the territories your business operates in. Clearly document which roles and profiles are needed and what territories you will create. Once you have a clear picture of how your environment will look, we can proceed with setting things up.
2] Configure Roles and Hierarchies
The role hierarchy establishes the reporting relationships between these roles. The core principle is that users in higher-level roles can access the data of users in roles below them in the hierarchy, but not vice versa.

To get started, follow the steps outlined below.
- Log in to your Zoho account.
- Click on the gear icon to open Settings.
- Now, go to Setup > Security Control.
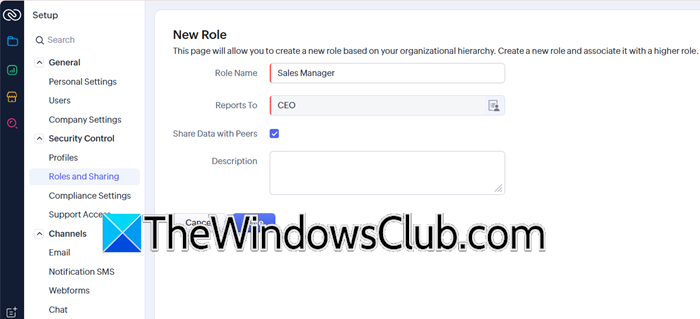
- From the Roles and Sharing tab, you need to click on New Role.
- A pop-up window will appear where you need to fill in the following key information.
- Role Name: Enter a clear name (e.g., “Sales Manager”).
- Reports To: This is the most critical field for building the hierarchy. Select the parent role that this new role reports to (e.g., the “Sales Manager” role would report to “VP of Sales”).
- Share Data with Peers: Check this box if you want users with the same role to be able to view each other’s records. Leave it unchecked if they should only see their own data.
Create roles like “VP of Sales,” “Sales Manager,” and “Sales Executive,” placing them in the correct hierarchical order. This ensures that managers can access their subordinates’ data.
Read: Best Free CRM Software for Windows 11
3] Set Up Territory Management

Territory Management organizes sales teams and data access by geographical region, product line, or customer segment. While Roles dictate data visibility based on hierarchy, Territories focus on business segments. To achieve the same, follow the steps outlined below.
- In Zoho, go to Settings.
- Then, go to Setup > Security Control or Users and Control (in older versions)> Territory Management.
- Now, click on New Territory. Create your territory structure (e.g., North America > West Coast > California). You can have multiple levels for a detailed hierarchy.
- You need to fill in the following details in the form that appears upon clicking New Territory.
- Territory Name: Give a name based on the geolocation.
- Territory Manager: Owner of the territory.
- Parent Territory: Select the parent of this territory; it has to be an existing territory. Leave it if you are creating a parent territory.
- Add Users: Add existing users to this territory.
- You then have to go to the Account Rule section and set it up. It can be populated manually by assigning accounts to a territory, or automatically using Assignment Rules based on criteria like Billing State or Account Type.
Once set up, any user assigned to a territory will automatically have access to all accounts and related records, like contacts and deals, in that territory based on their profile permissions. This access is granted regardless of who owns the records, making it great for team-based selling in specific areas or segments.
Read: Zoho Vault Password Manager Free Review and Extension
4] Configure Data Sharing Settings
For more efficient management of the environment, we recommend you configure Data Sharing Settings, as they are for granting exceptional access that falls outside the standard role or territory hierarchies.
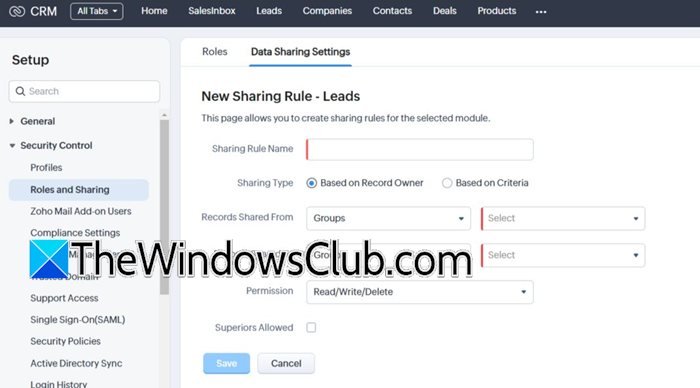
To create one, go to Settings, then to Setup > Security Control > Data Sharing Settings or Setup > Security Control > Rules and Sharing > Data Sharing Settings. You then have to click on New Data Sharing Rules.
Finally, fill out the mentioned form and click on Save.
That’s it!
Read: Create custom Email ID with domain name with Zoho Mail
What is the difference between profiles and roles in Zoho CRM?
In Zoho CRM, roles identify a user’s position in the organisation and determine what data they can see. Profiles define the permissions and decide what actions users can take on that data. A role indicates which records a user can access based on their position (for example, a manager can view a sales executive’s records). A profile specifies whether they can create, edit, view, or delete those records.
Also Read: Best AI CRM tools.