Windows 11/10 includes a feature that lets you reset your network and fix connectivity issues with a click. Network Reset will reset Network settings and components to default and reinstall your Wi-Fi, Bluetooth and All Network Adapters in Windows 11/10.
Reset network components & reinstall Network adapters in Windows 11
Windows 11/10 already offers the Network Troubleshooter that can help you, if you cannot connect to the Internet. But if this tool is unable to fix your connectivity problems, you need to reset all networking components & settings to their default value and reinstall your Network adapters – and you can do all this by simply using the Network Reset feature.
A Network Adapter controls the interface between an operating system and the wireless network. But sometimes the OS’s seamless performance with WiFi may be hindered. This may cause a slow connection, a dropped connection, or no connection to the wireless network on the computer system. If your operating system is experiencing issues with WiFi or Bluetooth, resetting the network adapter is the best way to troubleshoot the problem.
This post will guide you through resetting the Network adapter & Networking Components to their default settings. The following reasons may cause the network issues:
- Change in route settings or router damage.
- Cable damage or disconnection.
- Overloaded server.
- Congestion in the network.
- Incompatible internet protocol configuration.
- Use of multiple wireless networks or frequent changes in the wireless networks: The WiFi feature works best when carried out with one or two fixed wireless networks and frequency. Sometimes, frequent changes in the network create conflict with the network adapter.
- Corrupted or broken drivers: An error in the driver configuration, or, if the driver set is outdated, the network adaptor may display an error message. The latest drivers include updated troubleshooting features that run in parallel with the network adaptor to make the wireless connection possible.
Reinstall Network adapters, Reset Networking Components to default using Reset Network in Windows 11
The Network Adaptor is responsible for controlling the user interface and connecting the device with the wireless network of the user’s choice. Before you reset the Wi-Fi network adapter, you can try the built-in troubleshooter to resolve the problem. If it does not work, then you can continue with the network reset method. However, there are some points you should know before resetting the network adapter on Windows 11.
- Resetting will lose all Ethernet information and you will have to re-enter all the passwords.
- The VPN or other connections have to be attached again to the network.
- All changes to networking components will be discarded.
Hw to use Network Reset in Windows 11
If you need to use this Network Reset feature in Windows 11, take the following steps:
- Open Windows 11 Settings
- Click open Network and internet settings
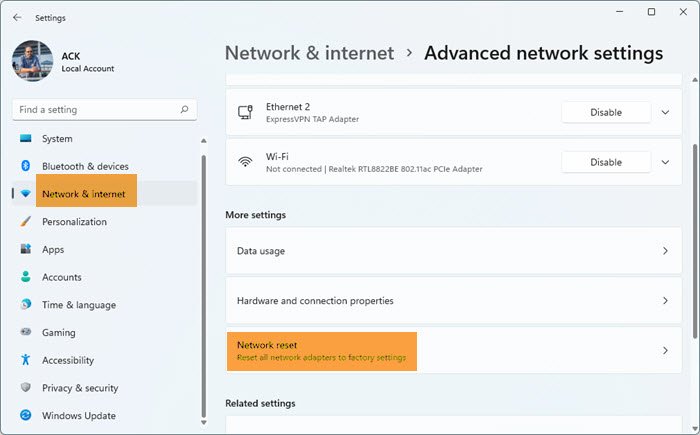
- On the right, scroll down till you see Advanced network settings and then click on it
- Again scroll down on the next screen till you see More settings
- Here click on Network reset
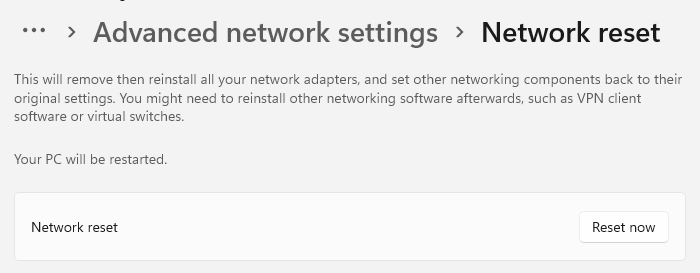
- On the next screen, click on the Reset now button and wait for the process to complete.
- Restart your computer.
Let’s now see in detail:

To reset the Wi-Fi network adapter on your computer, open the Settings app first. For this, click on the Start menu and select Settings.
On the next page, select the Network & internet tab from the left pane. Then scroll down to the Advanced network settings option and open it.

Now go to the More settings section and select the Network reset sub-menu. Next to the Network reset option, click on the Reset now button to reset all networks adapter to factory settings.
Once you do the above changes, restart your computer. This will remove your network adapters, reinstall them, and set other networking components back to their original settings. After that, you will need to reinstall any other networking software, such as VPN clients or virtual switches.
Related: How to Rename Wi-Fi network adapter on Windows 11.
How to use Network Reset in Windows 10
In Windows 10, open the Start Menu and click on the Settings icon. Next, click on Network & Internet. Next, click the Status link on the left. Here you can see the status of your Network. You will also see a link here that lets you open the Network Troubleshooter.
Scroll down till you see the Network reset link.

Clicking it opens the following window.
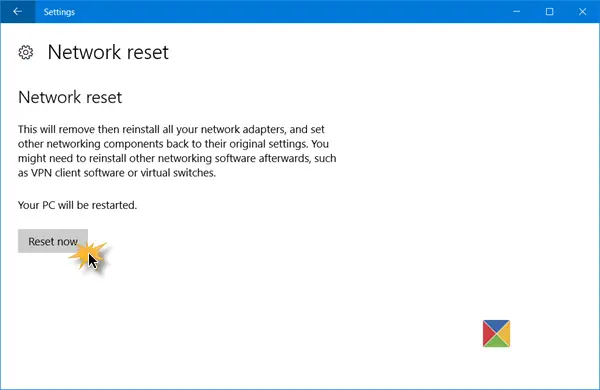
The Network Reset feature will first remove and then reinstall all your network adapters and set other networking components back to their original settings and default values.
Once you are sure and ready, click on the Reset now button, You may be asked to confirm. Click Yes to proceed, then wait for the task to complete; your Windows 10 computer will restart.
After you run this tool, you may have to reinstall your networking software, like VPN or Virtual switches, if you are using them.
This post will show you how to reset Internet Options to default in Windows 11.
Is it OK to reset Network adapter?
Resetting the network adapter is completely safe. Your data (the downloaded files and the files present on your computer) isn’t affected by the network reset. This action restores all your internet connection settings to the default. Network reset can help resolve network connectivity issues.
How long does Network reset take on Windows 11?
Network Reset does not take more time. This process uninstalls and reinstalls the network drivers, and it takes 5 minutes. Hence, when you perform a network reset, you must wait 5 minutes. After 5 minutes, Windows will restart automatically. Windows also displays a message regarding this, so that you can save your work before your computer restarts.
Let us know if this feature helped you.
Related reads:
- No WiFi after upgrading to Windows 11
- Fix Network & Internet connection problems
- Limited Network Connectivity.