
This article lists some effective fixes for the “This program requires a graphics card and video drivers which support OpenGL 2.1 or OpenGL ES 2” error on Windows 11. This error occurs when launching some specific games. You cannot play the game until you fix this error.
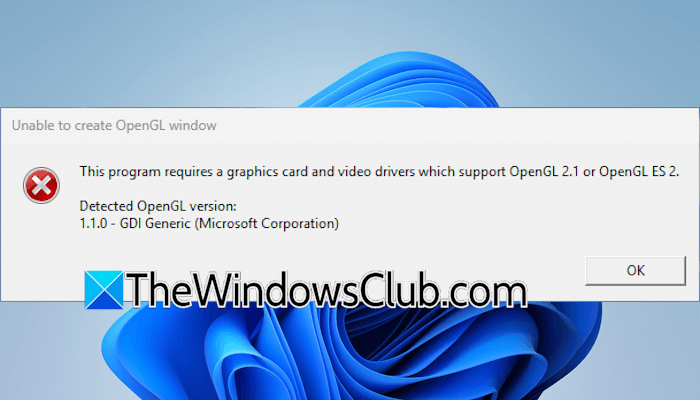
The complete error message is:
This program requires a graphics card and video drivers which support OpenGL 2.1 or OpenGL ES 2.
What is OpenGL 2.1 or OpenGL ES 2?
OpenGL 2.1 is a graphics API released in December 2006 that added support for programmable shaders via GLSL (OpenGL Shading Language) 1.20 It is a key step toward modern GPU programming. It is designed for desktop and workstation GPUs.
OpenGL ES 2.0 is a streamlined graphics API released in 2007, designed specifically for mobile and embedded devices. It introduced programmable shaders via GLSL ES, replacing the old fixed-function pipeline, and became the foundation for modern mobile graphics, including Android, iOS, and WebGL. It is tailored for mobile and embedded systems (smartphones, tablets, consoles, smart TVs).
This program requires a graphics card and video drivers which support OpenGL 2.1 or OpenGL ES 2
Use the following suggestions if you encounter the “This program requires a graphics card and video drivers which support OpenGL 2.1 or OpenGL ES 2” error while launching a game on your Windows 11 computer:
- Force the program to use the dedicated graphics card
- Disconnect the second monitor (if applicable)
- Turn off the HDCP setting on your monitor
- Select OpenGL Rendering manually in NVIDIA Control Panel
- Enable GPU scaling
- Enable OpenGL Triple Buffering in AMD
- Roll back your graphics card driver
- Reinstall your graphics card driver
All these fixes are explained in detail below:
1] Force the program to use the dedicated graphics card
On Windows 11, you can force a program to use the dedicated graphics card. The steps to change this setting are as follows:
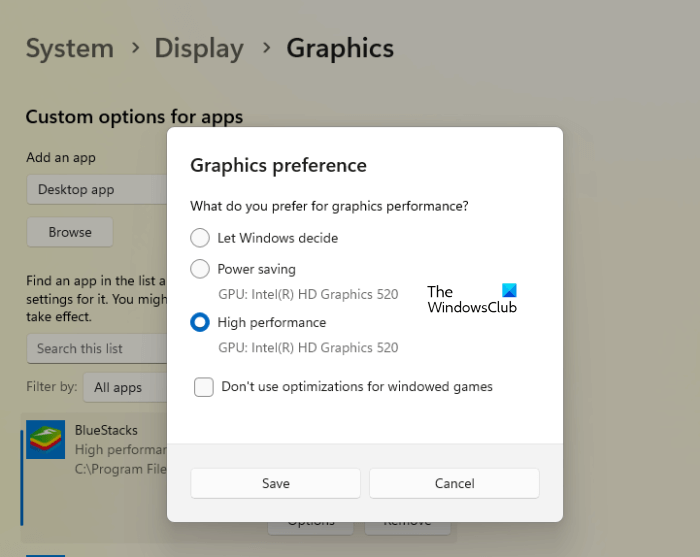
- Open Windows 11 Settings.
- Select System > Display > Graphics.
- You will see the list of apps and games. Click your game, and then select the High Performance option with your dedicated graphics card in the GPU preference drop-down.
If your game is not there, you can add it manually. To do so, right-click on the desktop shortcut of your video game and select Open file location. This will open your game’s .exe file location in File Explorer. Click on the File Explorer address bar and copy the path.
Now, go back to the System > Display > Graphics page in Windows 11 Settings and click Add desktop app. The File Explorer pop-up window will appear. Click on the address bar and paste the copied path. Press Enter after that. Now, select your game’s .exe file and click Add.
2] Disconnect the second monitor (if applicable)
If you have a dual-monitor setup and both monitors are connected to your PC, but you are currently using only one, disconnect the second monitor.
3] Turn off the HDCP setting on your monitor
In some cases, HDCP settings can interfere with OpenGL applications. This might be the case with you. Check if your monitor has such a setting. If yes, disable it. Refer to your monitor’s user manual for instructions on disabling this setting.
4] Select OpenGL Rendering manually in NVIDIA Control Panel
If you have an NVIDIA graphics card, you can enable OpenGL rendering for your game manually in the NVIDIA Control Panel. This can help fix this issue.
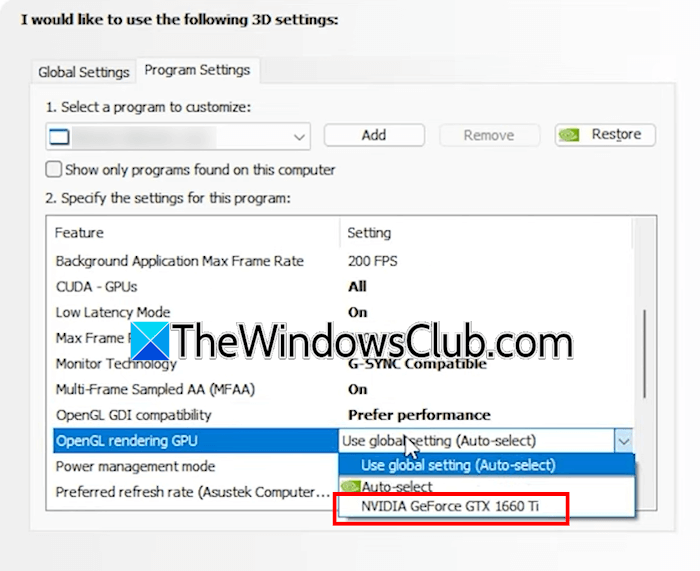
The steps to enable OpenGL Rendering are as follows:
- Launch NVIDIA Control Panel.
- Expand the 3D Settings branch and click the Manage 3D Settings link.
- Go to the Program Settings tab and click Add.
- Select the exe file of your game and click Add.
- Once your game is added to the NVIDIA Control Panel, select your NVIDIA graphics card in the OpenGL rendering GPU dropdown.
- Click Apply to save changes.
Now, restart your computer and launch the game. The error should not occur this time.
5] Enable GPU scaling
Enable the GPU or display scaling for your AMD or NVIDIA graphics and see if it helps. I have explained the steps to enable display scaling for both AMD and NVIDIA graphics.
NVIDIA graphics card users need to follow these steps:
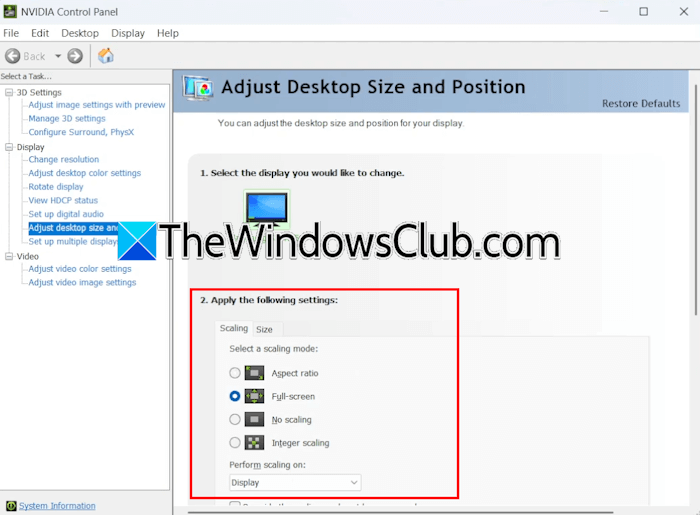
- Launch the NVIDIA Control Panel.
- Expand the Display branch.
- Click the Adjust desktop size and position link.
- Select Full Screen under the Scaling tab.
- Click Apply.
If you have AMD graphics, use the following instructions:
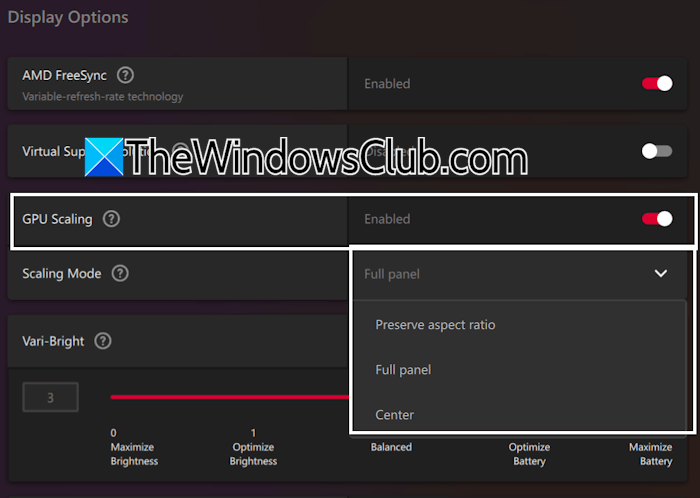
- Open AMD Adrenalin software.
- Select the Gaming tab and then select the Display tab.
- Under the Display Options, enable GPU Scaling.
- Select Full Panel in the Scaling Mode.
6] Enable OpenGL Triple Buffering in AMD
If the error “This program requires a graphics card and video drivers which support OpenGL 2.1 or OpenGL ES 2” continues to occur while launching the game, enable the OpenGL Triple Buffering setting for AMD graphics. The OpenGL Triple Buffering mode on AMD Graphics is an alternative vsync mode exclusively for OpenGL applications.
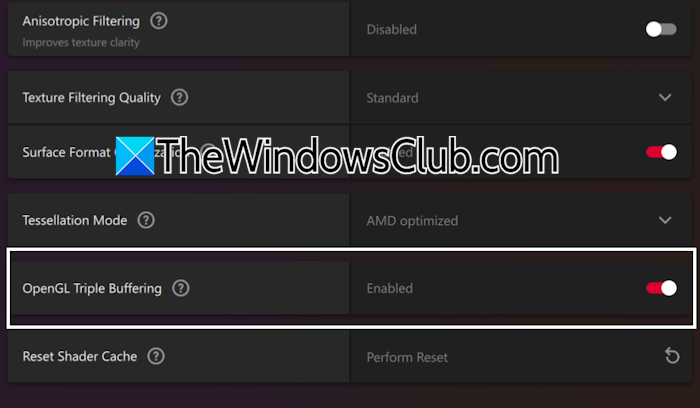
Go through the following instructions:
- Open the AMD Adrenalin software.
- Navigate to the Gaming tab and then select the Graphics tab.
- Scroll down and expand the Advanced tab.
- Now, enable the OpenGL Triple Buffering setting.
Restart your computer and launch the game.
7] Roll back your graphics card driver
If the error still occurs, roll back your graphics card driver. The following instructions will guide you on this:

- Open the Device Manager.
- Expand the Display adapters branch.
- Right-click on your graphics card driver and select Properties.
- Go to the Driver tab and click Roll Back Driver.
- Follow the on-screen instructions to restore the earlier version of your graphics card driver.
If you find the Roll Back Driver button greyed out, you can try other methods to roll it back to the previous version.
8] Reinstall your graphics card driver
If rolling back the graphics card driver to an earlier version does not resolve the issue, or you cannot roll back, performing a clean installation of the GPU driver may resolve it.
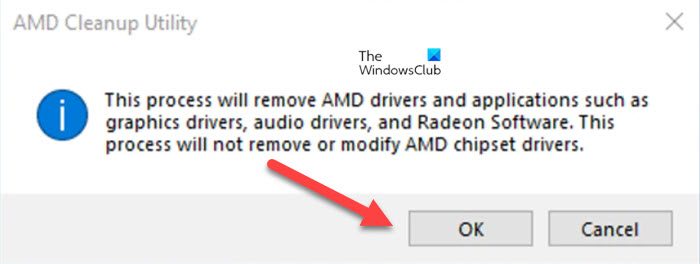
For a clean installation, you must completely uninstall your graphics card driver and all associated components from your system. You can use the dedicated software, NVIDIA GeForce Experience and AMD Cleanup Utility, or a third-party tool, such as DDU (Display Driver Uninstaller).
First, download the latest version of your graphics card driver from the official website. Now, boot your system in Safe Mode and run the DDU tool to completely remove your GPU driver. After that, boot in normal mode and run the GPU driver installer file to install its driver from scratch.
That’s it, I hope this helps.
How to download OpenGL 2.0 for Windows 11?
You do not need to download OpenGL 2.0 or a higher version separately for your graphics card. It is provided as a component for your graphics card driver. To check whether it is installed on your system, you can use a third-party tool such as GPU-Z.
Which driver supports OpenGL?
OpenGL (Open Graphics) is a cross-language and cross-platform API for rendering 2D and 3D vector graphics. All graphics card drivers support OpenGL. To check if your graphics card driver supports OpenGL, use a third-party tool, such as GPU-Z.
Read next: There is a problem with your graphics card.
