
Windows 11 has many background features that improve performance. These features sometimes cause issues and consume a lot of CPU and memory. At times, they use a lot of storage space, making it hard for other programs to run properly. Pagefile.sys is one such feature that helps your system perform properly. When Pagefile.sys on your Windows 11uses a lot of storage space, it becomes a problem. In this guide, we show you ways to fix Pagefile.sys being too big in Windows 11. Also, we explain what it is and how much storage space it uses optimally.
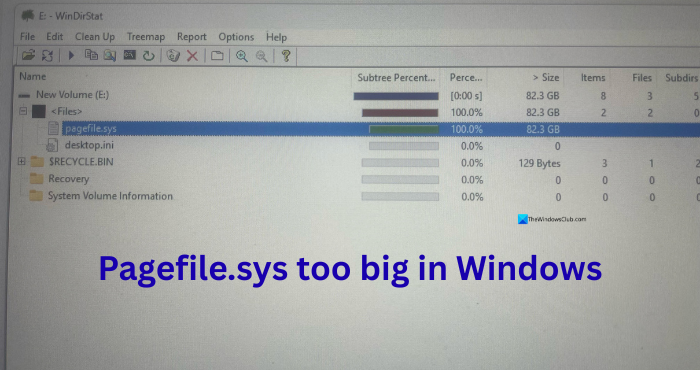
What is Pagefile.sys in Windows 11?
When a Windows PC’s random access memory (RAM) is fully used and has little space to store more system data, Windows stores it in the Pagefile.sys file. The page file is located on the C drive. In general, it is called virtual memory. The page file is a hidden system file that we don’t see like every other program or file. When a computer has multiple drives, you may see multiple page files.
The permitted page file size on a Windows PC varies by RAM. If your PC has 8 GB of RAM, the page file can range from 1 to 12 GB. For a PC with 16 GB of RAM, it may range from 2 to 24 GB. A PC with 32 or 64 GB of RAM may have 4-48 GB and 8 – 64 GB of page file. If the page file on your Windows PC doesn’t match your RAM size, you may have an issue.
Pagefile.sys too big in Windows 11
When you find that Pagefile.sys on your PC is using a lot of storage space, you can fix it in the following ways.
- Enable Windows to manage the page file automatically
- Reset the Page file
- Extend the C drive
- Move the page file to another drive
- Set a custom page file maximum size
Let’s get into the details of each method.
1] Enable Windows to manage the page file automatically
If you tweaked the Advanced system settings on your PC and set custom page file values, you may see the page file using a lot of space. Do this in a way your PC supports. Open the Settings app on your PC, go to System, and click About. Then, click Advanced system settings.

It opens System Properties. Click Settings under Performance. It opens Performance Options. Click Change under Virtual memory. Then, in the Virtual memory window that opens, check the box beside Automatically manage paging file size for all drives.
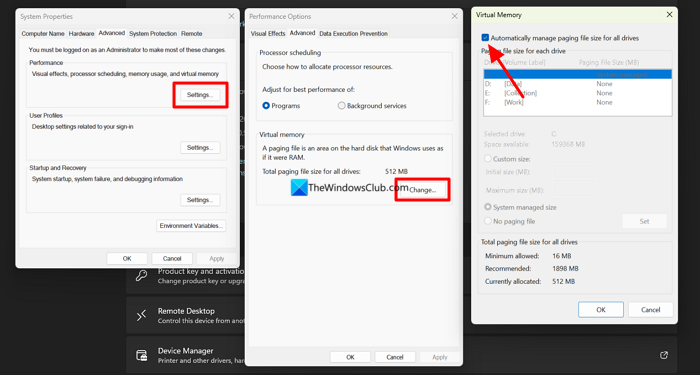
Click OK to save the changes. Then, restart your PC.
2] Reset the Page file
You can manually reset the page file size via System Properties, Group Policy or the Registry Editor. Resetting it means either Windows clears the file when the system shuts down, or the system resets it when you manually change the size.
3] Extend the C drive
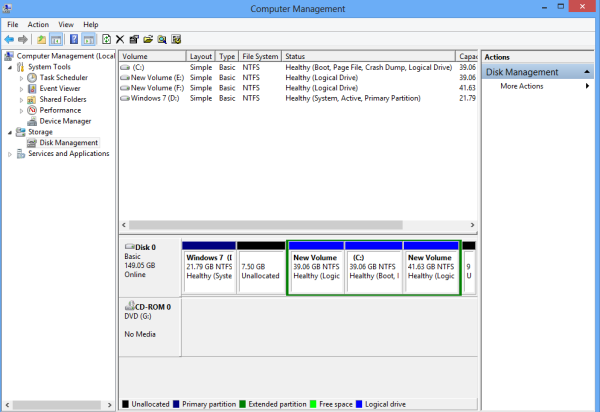
If you have more RAM and don’t have much storage space on the C drive, the page file may use more space than it needs. You may need to extend the C drive and add more storage space to it from other drives. You can extend the volumes or shrink them in the Disk Management utility. After expanding the C drive, you may see improved PC performance.
4] Move the page file to another drive
If, for some reason. you cannot extend the C drive and the page file is taking up a lot of space based on your RAM size, you can move the Page file to another drive. Open Advanced system settings from the Settings app. Go to Virtual Memory options.
Uncheck the box beside Automatically manage paging file size for all drives to see customization options. Click the button beside No paging file and then click Set. Accept the warning by clicking Yes. The paging file on the C drive will be disabled now.
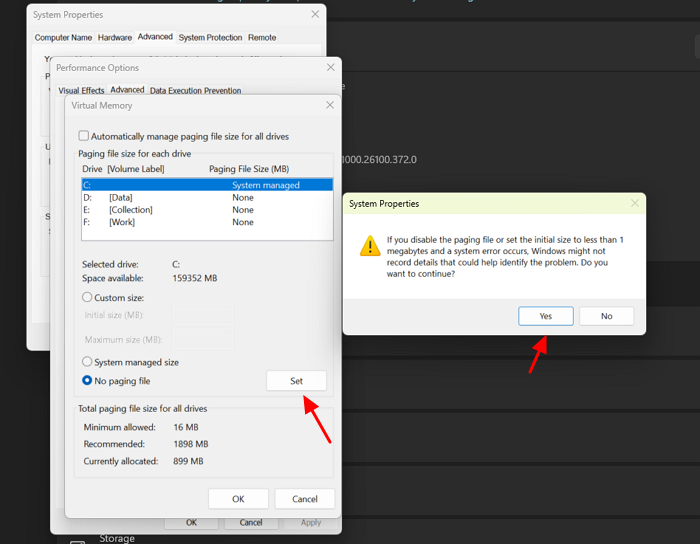
It will ask you to select another drive for the paging file. Select the drive with plenty of storage space, and set the paging file to that drive.
Read: What is the best Page File size for 64-bit versions of Windows?
5] Set a custom page file maximum size
If nothing works, you can just set a custom maximum size for the page file on your PC. This works best if you are unsure about tweaking drives and RAM. Open the Settings app, go to System, and select About. Then, click Advanced system settings. In the System Properties window that opens, click Settings under Performance. Performance Options window will open. Select the Advanced tab and click Change under Virtual memory.
This opens the Virtual Memory window. Uncheck the button beside Automatically manage paging file size for all drives. Then, click the button beside Custom size: to enable it. Then, enter the values you prefer in Initial size (MB) and Maximum size (MB).
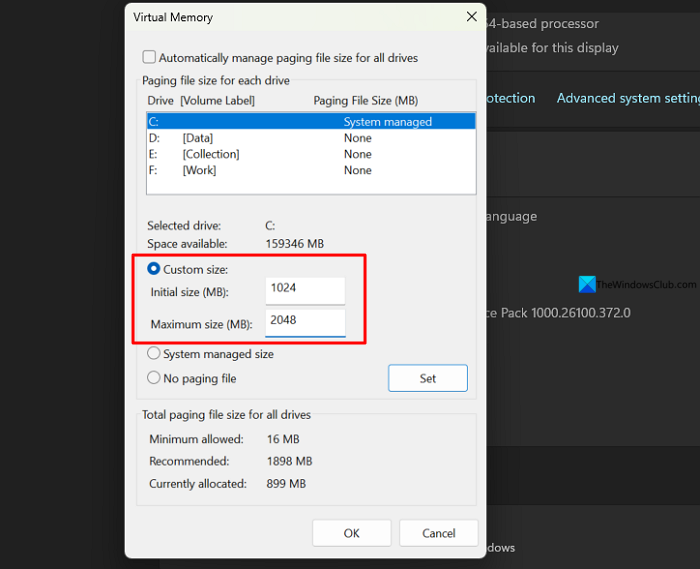
Click OK to save the changes. Then restart your PC to apply the changes.
Read: How to create Virtual Memory on a secondary SSD
How can I reduce the size of the paging file?
You can reduce the size of the paging file, or pagefile.sys, by setting a custom size in the Virtual Memory settings. This works well and keeps it from taking up a lot of space on your drive. You can see the recommended size in the Virtual Memory settings. You can use those values to set custom values to limit the size of the paging file on Windows.
Read: Your system is running low on virtual memory on Windows 11.
