Outlook mobile app for Android and iOS offers the right balance between its utility and feature power. Apart from a brand-new design, the app boasts an intuitive UI that makes it extremely easy to navigate while on the go. If required, you can further optimize this experience. While the same procedure may be followed for an Android phone, we are covering the steps for an iPhone.
Optimize the Outlook mobile app for iOS device
Once you have downloaded and set up email in Outlook for iOS, you can customize the mobile app to stay connected the way you want. Scroll through the handy tips below to optimize the app for your mobile.
- Configure Focused Inbox
- Set Swipe options
- Turn Organize By Thread Off/On
- Change or update Outlook notifications
- Change the Calendar view
- Add the Outlook app to the dock/home screen
- Hide the built-in email and calendar apps
- Add Outlook calendar widget
- See conversations and notifications from your favorite contacts
- Keep your Outlook app up-to-date
Let’s proceed to configure these settings and maximize your mobile productivity.
1] Configure Focused Inbox
Focused Inbox separates your inbox into two tabs—Focused and Other. Your most important emails are on the Focused tab, while the rest remain accessible on the Other tab. Focused Inbox is on by default.
Tap Settings.

Scroll down to Focused Inbox, then tap the button to toggle the setting.
2] Set Swipe options
Customize swipe options to take action on emails in your inbox quickly.
Tap Settings > Swipe Options.
Tap Swipe Right or Swipe Left and select an action.

3] Turn Organize By Thread Off/On
Threading is a process where an email service organizes messages so that all replies and forwards are grouped together. This avoids listing them in the order they arrived in your Inbox. Outlook mobile app for iOS lets you organize mail by a thread and arrange them as conversational threads based on the message Subject. By default, this option is turned on. If you would like to turn it off,
Tap Settings.
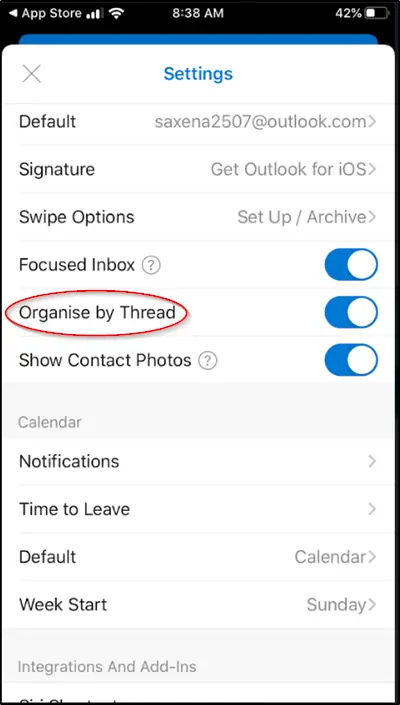
Scroll down to ‘Organize mail by thread’. There, tap the button to toggle the setting.
4] Change or update Outlook notifications
Go to ‘Settings’, and select ‘Notifications’.
Scroll down your list of apps to ‘Outlook’.
Update your notification preferences.
5] Change the Calendar view
Outlook allows you to change your calendar view according to your preferences and working style. So, if you’d like, you can easily switch between day, week, or month views, or change your workweek start day and time. To switch to the Calendar view.
Tap the ‘Calendar’ icon at the bottom right corner.
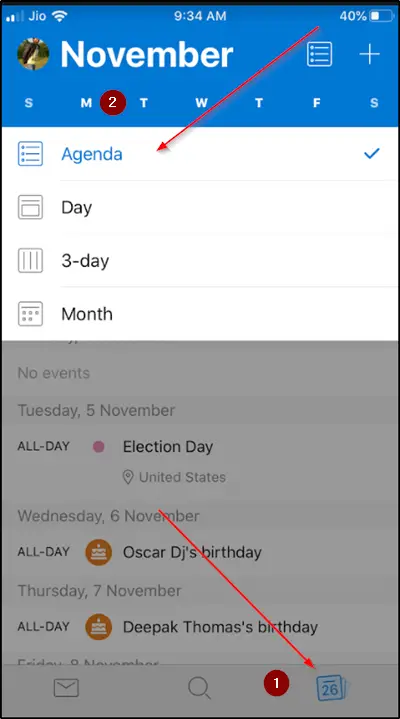
Next, hit the ‘View’ icon and select
- Agenda
- Day
- 3-Day view
Take action on a message
You can choose an action for the messages you receive in your inbox.

To take action, tap the message to open it. Tap the ellipses visible as three horizontal dots and tap an action.
6] Add the Outlook app to the dock/home screen
iOS users can easily add Outlook to the ‘dock’ on their home screen. For configuring this change,
Hold your finger on the Outlook app icon.
Drag it to the dock/app bar at the bottom of your screen.
If you find another app that already occupies the Dock space, you can make room. Simply hold your finger on another app in the dock and drag it onto the home screen.
7] Hide the built-in email and calendar apps
You might have more than one email account, but not use all of them simultaneously. As such, it’s better to hide unused email and calendar apps that are not currently in use. Here’s how to do it!
Keep your finger pressed on native email apps like Mail or Calendar.

When the apps are shaking, drag one on top of the other to make a new folder.
Note – Apple doesn’t allow you to remove these apps. As such, these apps cannot be uninstalled from your device.
8] Add Outlook calendar widget
To add the Outlook calendar widget to your iOS device,
Swipe down from the top of your screen to open the Notification Center.
Now, swipe to the right to view your widgets and scroll to the bottom.
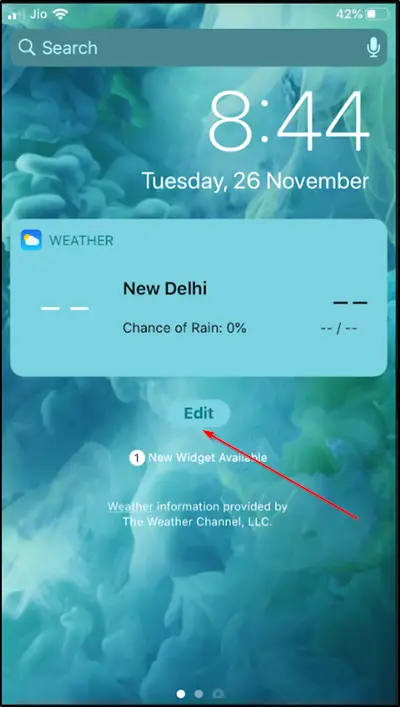
Tap ‘Edit’ option visible there.
![]()
If you find the Outlook app listed there, press + adjacent to it to add the app as a widget. Hit ‘Done’.
Now, if needed, you can easily access your widgets by swiping down or swiping to the left-most screen on the home screen.
9] See conversations and notifications from your favorite contacts
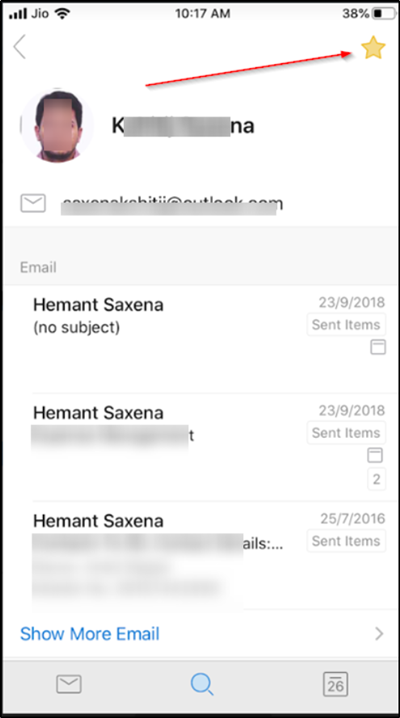
Adding contacts to favorites enables you to quickly find and send emails to them. To mark a contact as a favorite,
Open the contact’s profile card, then select the star in the card’s upper right corner. You can add multiple favorite contacts in the same way. Once done, you can view all recent conversations with them displayed before your other messages.
10] Keep your Outlook app up-to-date
It is always advisable to keep your app up to date. You can update the Outlook mobile app from your device’s app store. If you find the ‘Open’ instead of the ‘Update’ option there, then there’s no need to update as you’re already on the latest version of Outlook for iOS.
Download the Outlook app for your Android or iOS device from the respective stores to get started!
Is it better to use the Outlook app on iPhone?
Outlook is known to offer the best email experience on your iPhone. It offers many features that help to manage emails efficiently. Features such as automatic message categorization and a reading view make it easy to view long emails. You can take advantage of push notifications and server-side search features when using an Exchange account.
Do I need a subscription to use Outlook app?
No, you do not need a subscription to use the Outlook app on iPhone or Android. It’s a free email client that supports almost all the available email services. You can use Gmail, Outlook Live, and any other email account. The only thing that may differ is configuring the email account settings. For example, Gmail doesn’t connect through the IMAP setting, but if you have a custom domain, you will need to configure it through different settings.