If you see an error message saying Office Push Notifications Utility Assembly has stopped working on Windows 11/10 PC, here is how you can troubleshoot the issue. You can follow these instructions if you use Microsoft 365 or any version of Microsoft Office.

The entire error message reads like this:
Office Push Notifications Utility Assembly has stopped working
A problem caused the program to stop working correctly. Please close the program.
What is the Office Push Notifications Utility Assembly?
The Office Push Notifications Utility Assembly is a service that helps you receive push notifications for any Microsoft 365/Office application. That said, it is responsible for displaying Outlook email notifications, calendar events, and other relevant information.
Primary reasons why the Office Push Notifications Utility Assembly has stopped working
- Adware has removed opushutil.exe, which is responsible for showing push notifications of any Office or Microsoft 365 program.
- Your Office/Microsoft 365 installation is corrupt due to a virus, malware, or adware attack.
- You have a conflict between two versions of Office.
- Your computer has a notification blocker software installed, which is blocking your PC from showing notifications.
Office Push Notifications Utility Assembly has stopped working
If the Office Push Notifications Utility Assembly has stopped working, follow these instructions:
- Verify opushutil.exe
- Scan PC with an adware removal tool
- Uninstall recent Windows updates
- Remove Office/Microsoft 365 leftovers
- Remove any notification blocker software
- Restart Windows Push Notifications User Service
To learn more about these solutions, continue reading.
1] Verify opushutil.exe
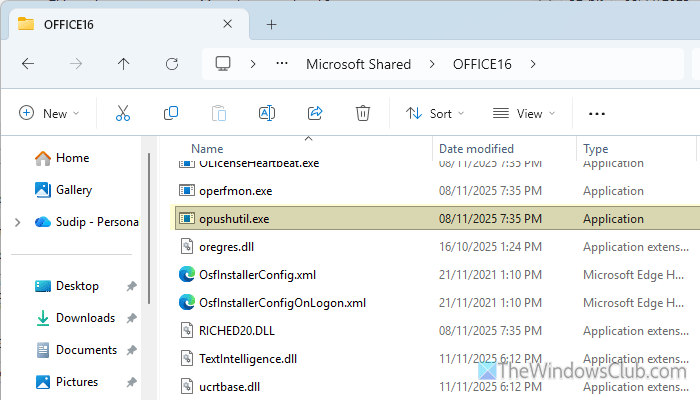
opushutil.exe is also known as Office Push Notifications Utility Assembly. In other words, if this executable file is not present in your computer, you won’t get push notifications, and as a result, the aforementioned error message might occur.
To verify this executable file, open the File Explorer and navigate to the following path:
C:\Program Files\Microsoft Office\root\vfs\ProgramFilesCommonX64\Microsoft Shared\OFFICE16
Search for opushutil.exe. If you can find this file, you will need to look for an alternative solution. However, if you cannot find this file, you must repair the Office installation. You can go through this detailed guide to repair Office on Windows 11.
2] Scan PC with an adware removal tool
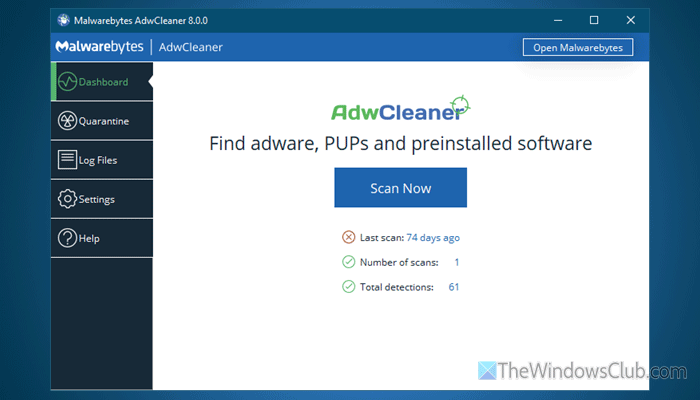
Even after repairing the Office or Microsoft 365 installation, opushutil.exe remains unavailable. It is recommended to scan the PC with an Adware removal tool. You can use AdwCleaner, Ultra Adware Killer, Norton Power Eraser, etc.
3] Uninstall recent Windows updates
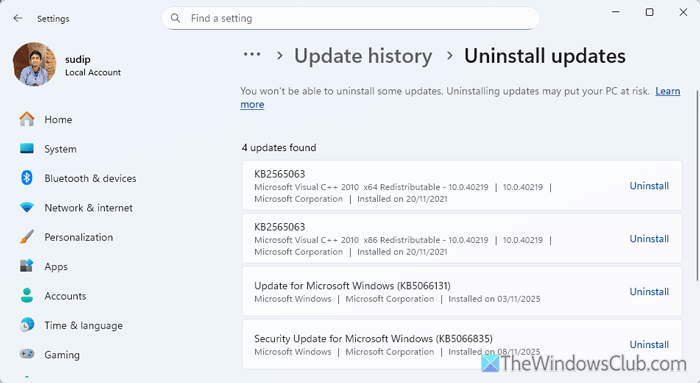
At times, this problem might arise due to the recent installation of Windows Update. That is why it is suggested to uninstall the most recent update that you have installed or the update that you installed immediately before encountering this error.
To uninstall Windows Updates, follow these steps:
- Open Windows Settings.
- Go to Windows Update > Update history > Uninstall updates.
- Find the update you have installed recently.
- Click on the Uninstall button.
4] Remove Office/Microsoft 365 leftovers
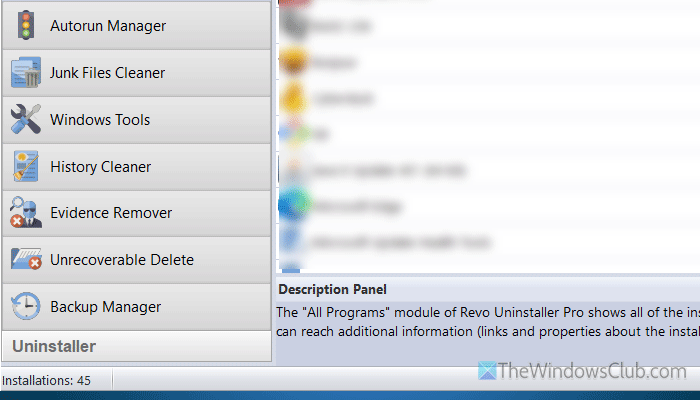
This problem may arise when you have files from multiple versions of Microsoft Office, such as Office 2024 and Microsoft 365. When you install a newer version, it is highly recommended to remove all the leftovers. You can use software uninstaller programs such as Revo Uninstaller, IObit Uninstaller, etc. In the Revo Uninstaller, you can use the Junk Files Cleaner, History Cleaner, etc.
5] Remove any notification blocker software
If you have installed a third-party notification blocker software, it is recommended to disable it temporarily and check if this resolves the issue. If yes, it is suggested to remove that program or make an exception for Microsoft Office. Even if that doesn’t work, you have to uninstall it.
Read: How to Turn Off Notification and System Sounds in Windows 11
6] Restart Windows Push Notifications User Service
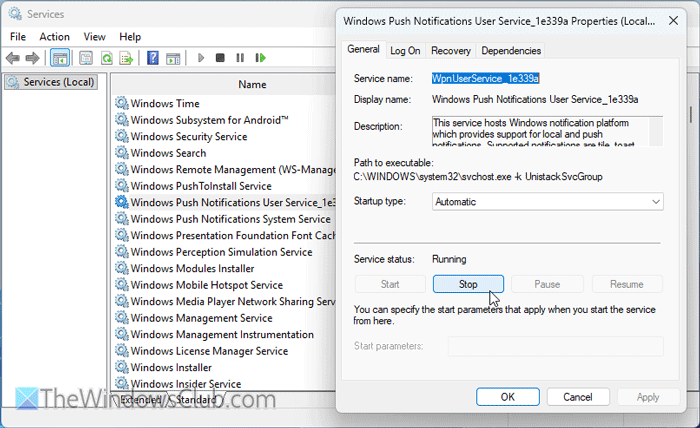
To restart Windows Push Notifications User Service, follow these steps:
- Press Win+R, type services.msc, and hit Enter.
- Double-click on the Windows Push Notifications User Service.
- Click the Stop button.
- Choose Automatic from the Startup type drop-down list.
- Click the Start button.
- Click the OK button.
Although it is not required, it is suggested that you restart your computer once.
Read: Windows Push Notifications User Service High Memory or CPU usage
Why am I not getting push notifications even though they are turned on?
These are the reasons why you are not getting push notifications even though they are turned on:
- You have enabled Focus session, which turns on the Do Not Disturb facility.
- The Windows Push Notifications User Service has stopped working, which is responsible for showing push notifications.
- The Notifications setting is turned OFF, but the same setting is enabled for the app only.
Read: Edge push notifications not working.