In this post, we will show you how you can make your files or folders Hidden or Read only on Windows 11/10 PC. When you set a file or folder as Hidden, it will not be visible to others. When you set a file to be Read only, folks will be able to read the file but they will not be able to make changes and save them.
Hidden Files are any files with the ‘Hidden’ attribute in the Properties turned on. These files are hidden because they are usually important operating system-related files. These files are hidden from the normal view so that they do not get changed or deleted. While the Hidden attribute can be applied to files and folders, the Read only attribute applies to files inside a folder only.
Make a file or folder Hidden in Windows 11/10
To set the attributes of the File or Folder to Hidden, follow these steps:
- Locate the file
- Right-click on it
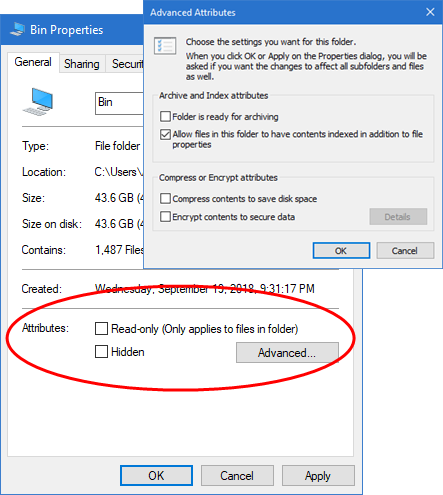
- Under Attributes, select Hidden.
- The file will get hidden.
To see it again, you can use this method to show Hidden files.
You should know one thing. If the checkbox shows a square inside, the Folder’s Properties, it means that some items inside are Hidden or Read only and some not.
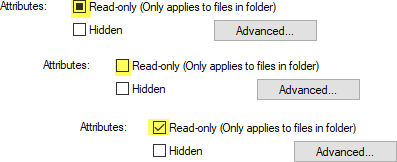
A blank checkbox indicates that none of the items have that attribute, whereas a checkmark indicates that that file or all the files in the folder have that attribute.
Make a file Read only in Windows 11/10
To set the attributes of the File or Folder to Read only, follow these steps:
- Locate the file
- Right-click on it
- Under Attributes, select Read only.
- The file will now be Read only and changes made will not get saved.
You will, however, be able to save this file with a different name.
Clicking on the Advanced button, as shown above in the first image, will open another box that allows you to compress or encrypt files and archive or index items.

Read: Can’t uncheck Read Only in the Folder and files on Windows 11
I hope this basic tutorial helps you.
Can we lock a folder in Windows 11?
Yes, you can lock a file or a folder in Windows 11/10. For this, you can use some free folder encryption software that first encrypts your item and then let you set a custom password to lock it. Or else, you can use a script and create a BAT file to password protect folders without using third-party tools.
How to restrict users from deleting files and folders in Windows 11?
The best way to protect a file or folder from deletion in Windows 11/10 is by changing the security permissions. You can Deny a user from Full Control, Modify, Read, Write, and other permissions for a file or folder, and then that user account won’t be able to delete it. You first need to Disable inheritance for the file/folder and then you can access and edit the deny permissions for a user.
Now read: How to list all the Hidden files & folders on your Windows computer.