
You can develop and run React applications directly in Visual Studio Code. You do not need a separate development environment inside VS Code, but you do need Node.js and a React project to get started. In this post, we will see how you can run a React app in Visual Studio Code.
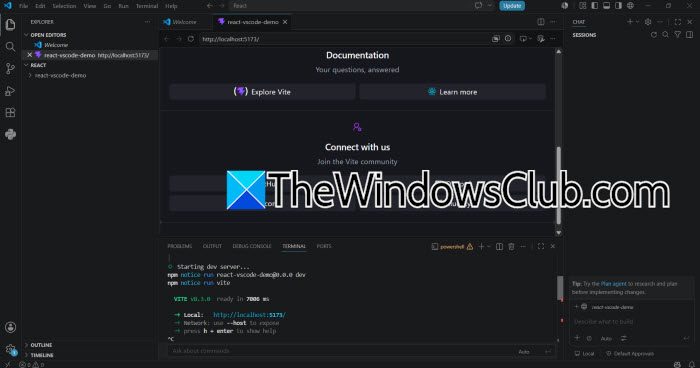
How to run a React app in Visual Studio Code
To run a React app in Visual Studio Code, follow the steps mentioned below.
- Install Node.JS
- Open the React Project in Visual Studio Code
- Install Project Dependencies
- Start the React Development Server
- Open the React App in your browser
- Stop the React Development Server
Let us talk about them in detail.
1] Install Node.JS
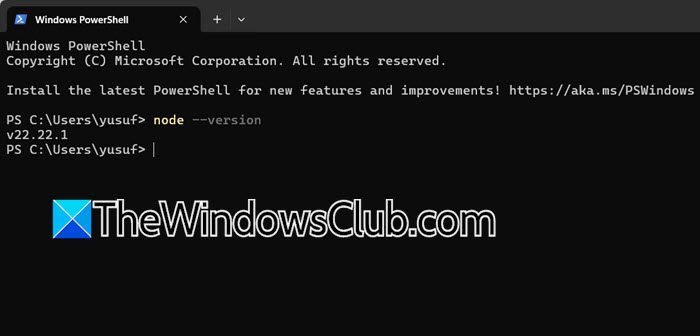
React projects use Node.js to run JavaScript outside the browser and manage project dependencies. If Node.js is not already installed on your computer, download and install the latest LTS version. After installing it, open Command Prompt, PowerShell, or the VS Code Terminal, and run the following command.
node -v
You can also check npm with npm-v.
2] Open the React Project in Visual Studio Code
Launch Visual Studio Code and open the folder containing your React application. Go to File > Open Folder and select your React project’s folder. You can also open the project from a terminal by navigating to its folder and running the following command.
code .
Once the folder opens, you should see files and folders such as src, public, package.json, and possibly node_modules in the Explorer panel.
3] Install Project Dependencies
We can use the integrated terminal to install dependencies and start the React application. To do so, in Visual Studio Code, go to Terminal > New Terminal. The terminal normally opens at the bottom of the VS Code window. Make sure its current directory is the root folder of your React project, where the package.json file is located. You can check the contents of the folder by running dir on Windows, or ls on macOS or Linux.
If you have downloaded or cloned an existing React project, its dependencies may not be installed yet. To install them, in the project directory, run npm install, as npm reads the dependencies listed in package.json and downloads the required packages into the node_modules folder. You generally need to run this command only after getting a project for the first time, or when the project’s dependencies have changed.
4] Start the React Development Server
After the dependencies have been installed, start the application using the command specified by the project’s scripts. For most modern React projects, run npm run dev. Some React projects, particularly projects created with Create React App, use npm start.
You can check which command your project uses by opening the scripts section in package.json.
For example:
"scripts": {
"dev": "vite",
"build": "vite",
"preview": "vite preview"
}
In this example, npm run dev is the correct command.
5] Open the React App in Your Browser
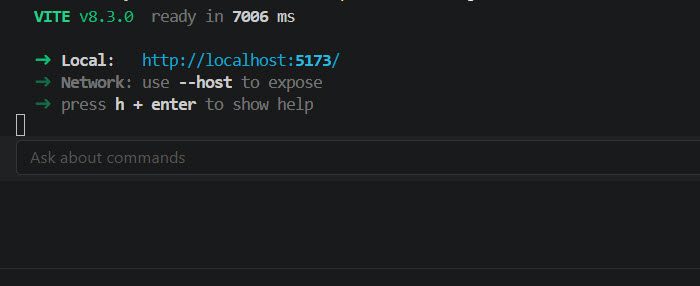
Once the development server starts, the terminal will display a local address. With a Vite project, it will commonly look similar to http://localhost:5173/. Open the displayed address in your web browser. If the project uses Create React App, the address is commonly http://localhost:3000/. Your React application should now appear in the browser.
You can now make changes to the application’s source files from VS Code. React development servers normally provide hot reloading, so changes are reflected in the browser automatically. For example, you might open src/App.jsx and change some text in the component. Save the file and return to the browser. The development server should rebuild the application and display the updated content.
6] Stop the React Development Server
When you are finished working on the application, return to the VS Code terminal where the development server is running and press Ctrl + C. This stops the local React development server. You can start it again later by running npm run dev or npm start.
Hopefully, with the help of this guide, you will be able to run, stop, and edit React apps in Visual Studio Code.
Read: Best AI tools for Developers
How do I run a React Native app in Visual Studio Code?
To run a React Native app in Visual Studio Code, first install Node.js, VS Code, and the required React Native development tools. Open your React Native project in VS Code and launch the integrated terminal. Run npm install to install the project dependencies, then start the development server with npm start. Depending on your setup, you can run the app on an Android emulator with npm run android or on an iOS simulator with npm run ios. For Android, you will also need Android Studio and a configured emulator or connected device.
Read: How to use Codex to build a Website
How to run ReactJS in VS Code?
To run a ReactJS application in VS Code, install Node.js and open your React project folder in Visual Studio Code. Open Terminal > New Terminal, make sure you are in the folder containing package.json, and run npm install to install the dependencies. For a Vite-based React project, start the development server with npm run dev; for projects using Create React App, use npm start. The terminal will display a local URL, such as http://localhost:5173/, which you can open in your browser to view the application.
Also Read: Build AI CoAgents or apps powered by Copilot.
