
Visual Studio is one of the best code editors in the market. It packs an excellent User Interface, Intellisense, and a lot of different features to make coding easier for you. In this post, we will see how you can install and set up Visual Studio 2026/2022 on Windows 11/10 computers.
How do I install Visual Studio 64 bit?
Downloading and installing Visual Studio is a three-step process. To learn what these steps are and how to install Visual Studio and the components and languages you want, see the guide below.
How to Install and Set Up Visual Studio on Windows 11
Visual Studio 2026/2022 is an upgrade over its predecessors. This Microsoft IDE supports many database technologies, including Azure, SQL, and SQLite, and integrates them well. The developers of VS also optimized the IDE and improved the automatic code completion feature more than ever. Other reasons to install this IDE include C++20 support and build tools, a better debugger, a free community edition, and more. Now, let us see how you can install and set up Visual Studio on your computer.
The Visual Studio installation process includes the following steps.
- Download the installation package
- Launch and run the installer
- Add Components to Visual Studio
Let’s cover each step in detail.
1] Download the installation package
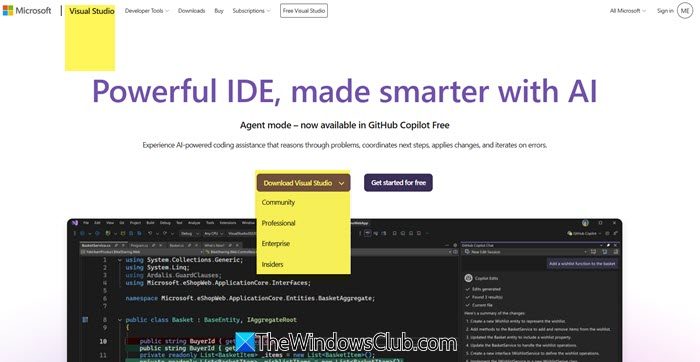
Before installing the IDE, we need its package. For that, navigate to visualstudio.microsoft.com, Microsoft’s official website, to download Visual Studio. Go to Download Visual Studio and select any of the versions. This will download the executable file or installation package for Visual Studio.
Read: Microsoft Visual Studio – Editions, Comparison, Features, FAQ
2] Launch and run the Installer
Once the installation package is downloaded, we need to launch it in order to download and install VS. To do the same, go to your Download folder, and double-click on the installer. It will start downloading the required software, and depending on your internet connection, the download time will vary.
Once the download is complete, you may see a screen asking you to select the Visual Studio version. So, select the 2026 or 2022 version and install it. After installing the required IDE on your system, move to the next step to add its components.
If Needed: Visual Studio Installer is stuck on Downloading
3] Add Components to Visual Studio
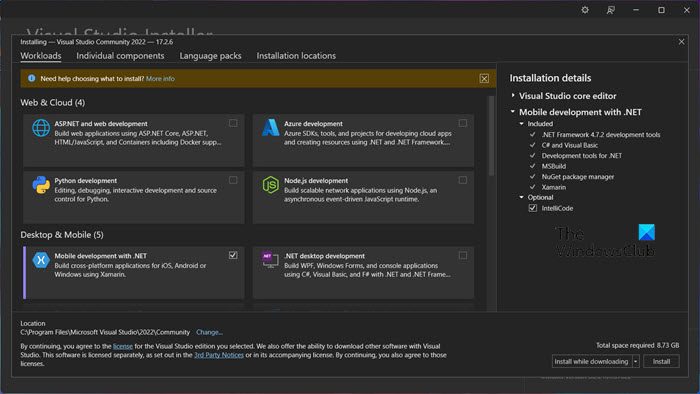
Visual Studio has so many languages and packages that it might take forever to download them all. Also, the IDE can be so large that it might fill up your entire Hard Disk. That is why the IDE is a blank canvas, as it allows you to add and install the language pack you want.
Visual Studio is divided into various components such as Web & Cloud, Mobile & Desktop, Gaming, and Other toolkits. You can go to any of these sections, select the package(s) you want to install, and click on Install or Install while downloading. Keep in mind these are usually bigger files, so if you feel like there is something inside that package that you want, just untick the box associated with the Installation details section.
Once the app is installed, open it and start coding. It’s quite easy, isn’t it?
Can Visual Studio run on Windows 11?
Yes, Visual Studio works on all Microsoft Windows, including the latest and greatest, Windows 11. All you have to do is download any version of Visual Studio, install the launcher, install the components that you want to use, and start coding. It is quite simple, but if you still want to know how to do the same check the steps mentioned in this post.
How do I download and install Visual Studio Community?
In the first step, when you go to the Download Visual Studio option. you will see an option saying Community. Just click on it and the required edition will be installed. If you didn’t see the option when downloading the IDE, you will see it when installing it. You can install the Community edition from there and you will be good to go.
Also read: Best Code Editors for Windows that every developer must be using.
