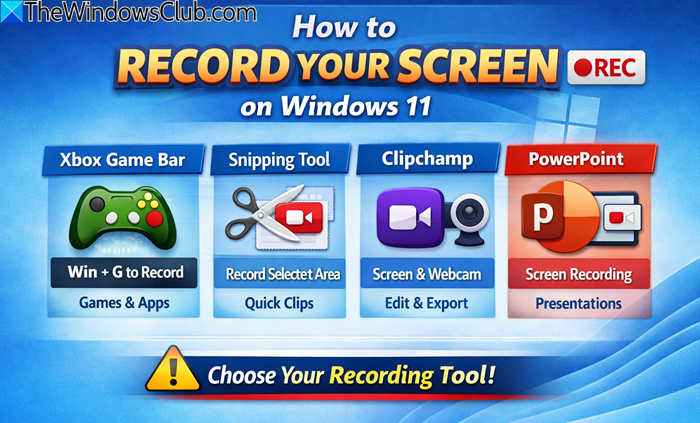
Recording the screen on your Microsoft Windows computer can sometimes seem very important. You may use it for a myriad of purposes and thus, it helps to have the tools necessary for it handy. Fortunately, some built-in utilities include a screen recording feature in Windows 11/10. In this article, we will look at 3 ways to record your screen in Windows 11/10.
How to record Screen on Windows 11/10?
- Use Snipping Tool
- Use Microsoft Clipchamp
- Record screen using the Xbox Game Bar
- Record screen using PowerPoint
- Record screen using ShareX
1] Record screen using Snipping Tool
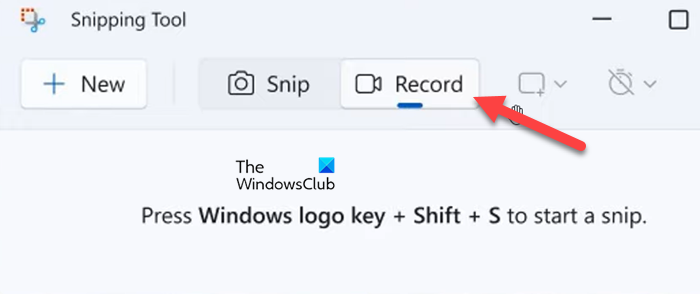
You can now record Videos using the Snipping Tool in Windows 11
- Open the Snipping Tool and click on the Record button.
- Select the New button and select the area to record.
- Now, click the Start button and record the screen session as required.
- Select the Stop button to stop recording.
- Finally, click the Save button and select the required location to store the recording file.
2] Record screen using Microsoft Clipchamp
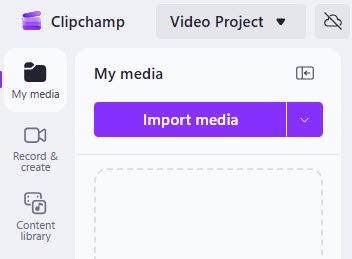
If you want to record your screen and webcam together, take these steps:
- Open Clipchamp
- Choose Screen and camera recording.
- Record, trim, and export your video easily.
3] Record screen using the Xbox Game Bar
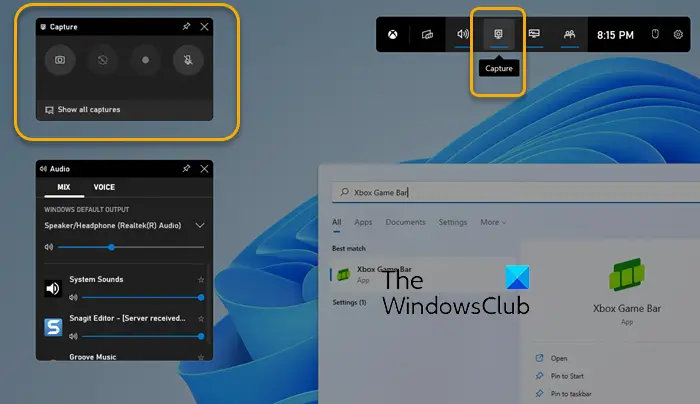
The Xbox Game Bar is built into Windows 11 and Windows 10 by default. Among the many features, it offers is the screen recording feature. This feature is primarily intended for gamers to record gameplay clips, but it can also be used by anyone to record the computer screen.
A limitation to keep in mind is that you can only record the screen of a single application using this feature. So, a screencast that involves you navigating several browser windows won’t work. Here’s how you can use it.
- Open the program you want to record and have it open so the screen recorder picks it up
- Search for the Xbox Game Bar on the search menu of the Taskbar and open it
- Here, click on the Record button from the upper-left corner
- You’ll then find that your recording has started, with its timeline prompt on the top-right corner of the screen, so you can monitor how long the screen recording has been
- Once you’re done recording, click on the square icon to stop it
To access this recording, reopen the Xbox Game Bar and select Show all captures. This will display the list of all recordings. Here, you can view the video(s), delete them or open them in their saved folder.
4] Record screen using PowerPoint
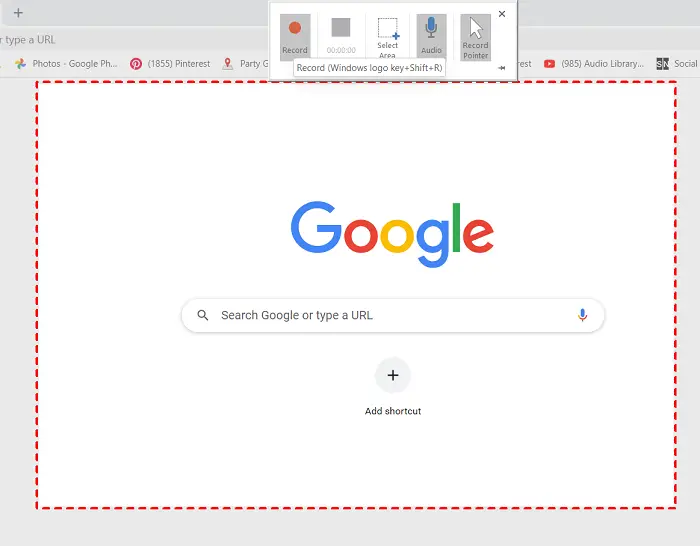
The Xbox Game Bar is a lesser-known utility and thus, most people resort to PowerPoint. PowerPoint also has a built-in recording feature, which helps you record your computer screen in the form of a slideshow. Here’s how you can do so:
- Open PowerPoint and further click to open a blank presentation
- Click on the Insert tab and select Screen Recording from the Media section
- Doing so will take you to the last opened application, so make sure the work you want to record is the last thing you open before PowerPoint
- Click on the Select Area box from the small strip of options available and move your cursor over the area you want to record
- Once selected, click on the red-colored recording button
- Once done, select the blue-colored square button to stop the recording
After exiting the record screen, you’ll find that the screen recording you’ve just made has been copied on a slide in the open PowerPoint file. You can now save it as a media file on your computer by right-clicking on it and selecting Save Media As.
On most days, these two tools do a good enough job of screen recording on Windows, but if you’re not satisfied, there is free software that offers the same functionality. One of them is ShareX.
5] Record screen using ShareX

ShareX is a free screen capturing application. You can use it to make screen captures in an MP4 or GIF format. Here’s how you can use it:
- Open ShareX on your PC and click on Capture from the options to your left. This will present you with a dropdown where you can select to record screen in either MP4 or as a GIF
- Select the area you want to record, as you did with PowerPoint. If you’re not happy with the selected portion and want to record some other area of the screen, you can move around the box as well
- To capture a particular window, hover the mouse over it and then click on it
- Click on Stop to stop the recording. You can then choose to save the recording or discard it (abort)
Windows may ask for permission before installing the application because it is not an official source, but you can confirm this with assurance.
We hope this helps!
Here are some more free Desktop Recorder & Screen Recording Software for Windows that may interest you. You can also record the desktop screen using VLC Player or Samsung Screen Recorder.
Enable or disable Let apps take Screenshots and Record screen in Windows 11
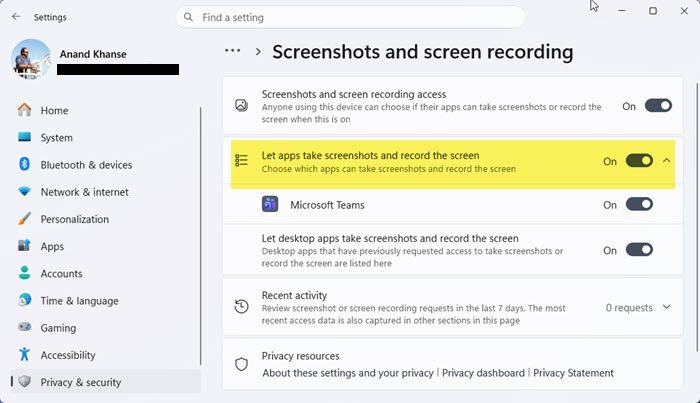
To manage App Screenshot & Recording Permissions, open Settings and select Privacy & security on the left menu. Now, click on Screenshots and screen recording under the “App permissions” section and toggle “Let apps take screenshots and record the screen” to On or Off as required.
Read: How to stop Apps from taking screenshots in Windows 11.
How do you capture a screenshot on a PC?
Taking a screenshot in Windows, on the other hand, is a much easier task. On the keyboard of your computer is a button named ‘prt sc’ which is short for print screen. Clicking it once captures the screen and copies it to your clipboard. You can then save it locally or modify it via Paint or a third-party image editor. There are several highly rated screen-capture freeware programs, such as Snipping Tool. Even ShareX, described above, can help you take screenshots with ease.
How do I save a Print Screen as a PDF?
If you have a specific requirement to save the screenshot you capture in a particular format, there are tools for that as well. Online tools like FastStone Capture and browser extensions like Webpage Screenshot make it very convenient to copy a screenshot to your clipboard or save it as a PowerPoint, PDF, Word file, etc. with just a click or two. You can also save screenshots as PDFs using Photos App.