
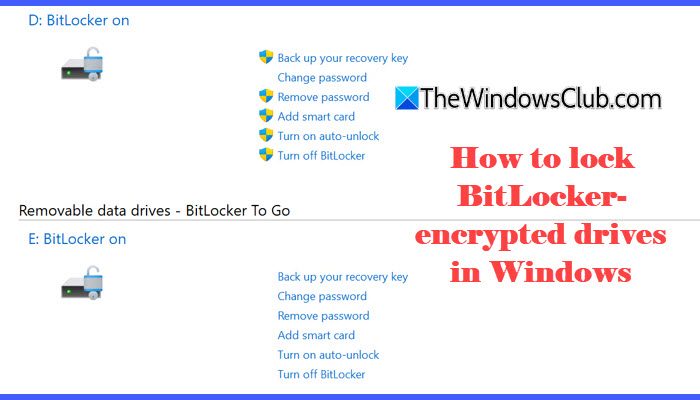
BitLocker is a built-in Windows security feature that encrypts your drives and protects sensitive data from unauthorized access. However, once a BitLocker-protected drive is unlocked, it remains accessible until you remove the drive or restart the computer. This can become a security concern, especially on shared computers or when using external drives. Fortunately, Windows allows you to manually lock BitLocker-encrypted drives whenever needed. In this post, we will show you multiple ways to lock BitLocker-encrypted drives in Windows 11.
Things to know before locking a BitLocker drive
- You can manually lock only fixed data drives and removable data drives protected by BitLocker.
- The operating system drive (usually C:) cannot be manually locked while Windows is running. It locks automatically when you shut down or restart the computer.
- Fixed data drives automatically lock after a restart unless auto-unlock is enabled for the drive.
- Removable BitLocker drives automatically lock when disconnected or after restarting the PC unless auto-unlock is enabled.
- You cannot manually lock a drive while auto-unlock is turned on or BitLocker protection is temporarily suspended for that drive.
- You must have access to the BitLocker password, PIN, or recovery key to unlock the drive again.
How to lock BitLocker-encrypted drives in Windows 11
You can lock a BitLocker-protected drive in Windows 11/10 using the following methods:
- Using Command Prompt
- Using Windows PowerShell
- Create a one-click shortcut or batch file to lock the drive instantly
Let us see these methods in detail.
Note: Administrative privileges are required to manually lock BitLocker-encrypted fixed and removable drives in Windows 11.
1] Using Command Prompt
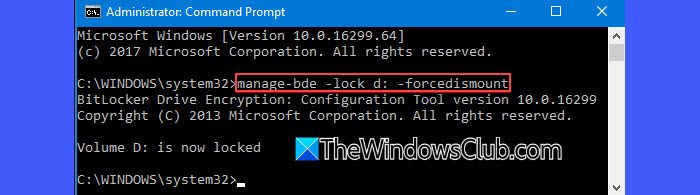
Windows includes the manage-bde command-line tool that allows you to manually lock BitLocker-protected drives.
Open Command Prompt as Administrator. Type the following command and press Enter:
manage-bde -lock D:
Replace D: with the actual drive letter of the BitLocker drive you want to lock.
If the drive is currently in use and refuses to lock, run this command instead:
manage-bde -lock D: -ForceDismount
The -ForceDismount parameter forces Windows to close open files and immediately lock the drive.
Note: Before using the -ForceDismount parameter, save all open files and close any apps using the drive, as forcibly dismounting the drive may cause data loss.
2] Using Windows PowerShell
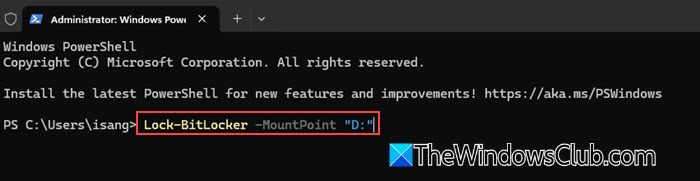
You can also use Windows PowerShell to manually lock BitLocker-encrypted drives.
Press Win + X to open the Power User menu. Select Terminal (Admin) or PowerShell (Admin) from the list. Click Yes in the User Account Control prompt.
Run the following command:
Lock-BitLocker -MountPoint "D:"
Replace D: with the correct drive letter.
Once the command executes successfully, the drive will become inaccessible until it is unlocked again.
Note: If the drive is in use and refuses to lock, you can use the -ForceDismount parameter in PowerShell as well, as explained above.
3] Create a one-click shortcut or batch file to lock the drive instantly
If you frequently lock a BitLocker-protected drive, you can create a desktop shortcut or batch file for quicker access.
Create a desktop shortcut
Right-click on the desktop and select New > Shortcut. In the location field, enter:
C:\Windows\System32\manage-bde.exe -lock D:
Replace D: with your drive letter. Click Next and enter a name for the shortcut. Click Finish.
You can now double-click the shortcut whenever you want to lock the drive quickly.
Note: You may need to run the shortcut as Administrator for it to work properly.
Create a batch file
Open Notepad and paste the following command:
manage-bde -lock D:
Replace D: with your drive letter. Save the file with a .bat extension, for example: LockDrive.bat. Right-click the batch file and select Run as administrator whenever you want to lock the drive.
Unlock a BitLocker drive using Command Prompt
You can also unlock a BitLocker drive from an elevated Command Prompt.
Open Command Prompt as Administrator. Type the following command and press Enter:
manage-bde -unlock D: -password
When prompted, enter the BitLocker password for the drive and press Enter.
The drive will unlock immediately if the password is correct.
I hope you find this useful.
Why won’t my BitLocker drive lock?
If a BitLocker drive refuses to lock, one of the following may be preventing it:
- Files or folders on the drive are currently open
- An application is actively using the drive
- Auto-unlock is enabled for the drive
- BitLocker protection is temporarily suspended
- The drive is being indexed, scanned, or backed up in the background
In such cases, close all apps using the drive and try again. You may also use the -ForceDismount parameter to forcibly lock the drive, though this can cause data loss.
Read: How to manually prepare a drive for BitLocker in Windows.
Does BitLocker lock the drive?
Yes, BitLocker locks encrypted drives until proper authentication is provided. Depending on the drive type and configuration, you may need to enter a password, PIN, or recovery key to unlock it. Once unlocked, the drive remains accessible during the current session unless it is manually locked, disconnected, or the computer is restarted.
How to disable BitLocker-encrypted drive in Windows 11?
To disable BitLocker in Windows 11, open Control Panel > BitLocker Drive Encryption and click Turn off BitLocker next to the encrypted drive. Windows will begin decrypting the drive and remove BitLocker protection. The decryption process may take some time to complete, depending on the drive size and data stored.
Read Next: Customize context menu of BitLocker-encrypted drives in Windows.
