
Windows Management Instrumentation Command-line (WMIC) is a tool introduced by Microsoft for tracking events on a Windows PC, including hardware, processes, settings, and user accounts. The administrator can run WMIC scripts to retrieve data from the system and analyze the behavior. It’s convenient to just run commands to find system data instead of installing multiple third-party applications. Microsoft has deprecated WMIC in the latest versions of Windows 11. If you still have to use it, we show you how to install WMIC in Windows 11 using Settings, PowerShell, or CMD.
How to install WMIC in Windows 11 using Settings, PowerShell or CMD
If you still want to install and use WMIC after it was deprecated on Windows 11, you can follow these methods.
- Install WMIC in Windows 11 using the Settings app
- Install WMIC in Windows 11 using command-line
Let’s see how we can install WMIC on Windows 11 using these two methods. You need to be an administrator on the PC or sign in as an administrator to install WMIC or any features.
1] Install WMIC in Windows 11 using the Settings app
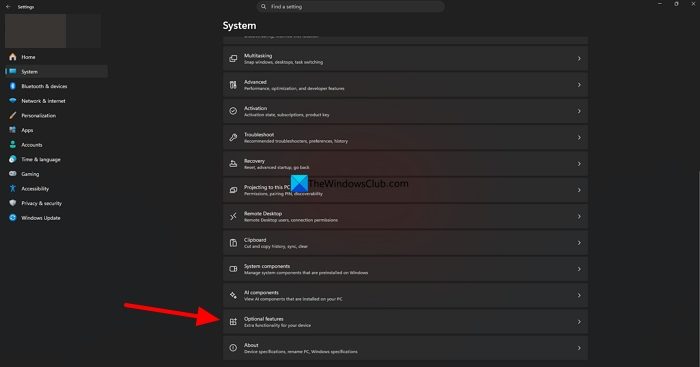
WMIC can be installed easily using the Settings app on Windows 11. To get started, open the Settings app using the Win+I keyboard shortcut. Click System and then select Optional features.
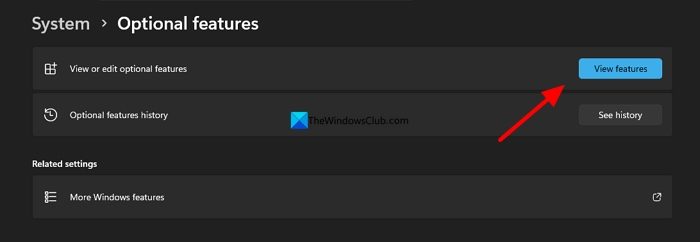
On the Optional features settings page, click View features next to View or edit optional features.
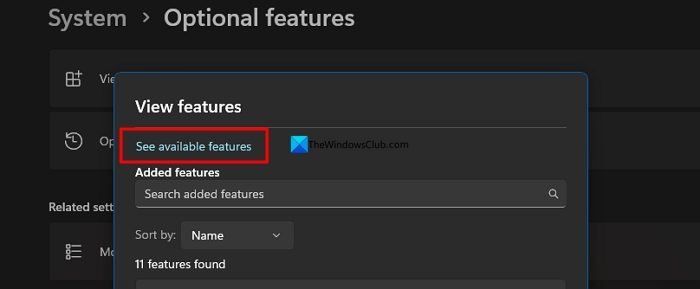
Then, click See available features in the View features options.
Search for WMIC under Available features. You will see WMIC in the search results. Check the button beside WMIC and click Add (1).
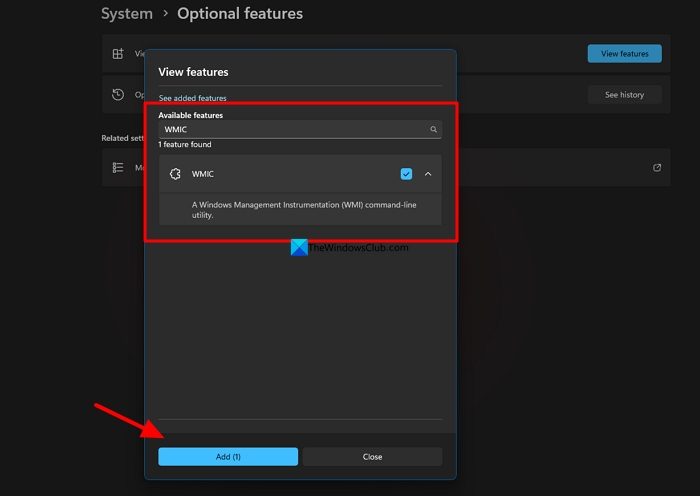
Wait for the WMIC feature to be added, which will take a minute or so, and close the view features page. You can now be able to use WMIC commands without any issue.
To verify if the WMIC is installed successfully via the Settings app, click the View features button in the Optional features page. Then, type WMIC under Added features.
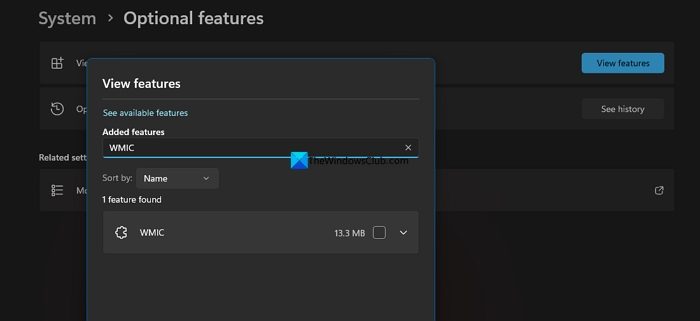
It will show WMIC in the added features list.
2] Install WMIC in Windows 11 using command line
To install WMIC in Windows 11 using PowerShell or Command Prompt, run a single command and wait for the installation to complete.
Open Windows PowerShell or Command Prompt as an administrator on your Windows PC. Then, enter the following command and press Enter.
DISM /Online /Add-Capability /CapabilityName:WMIC
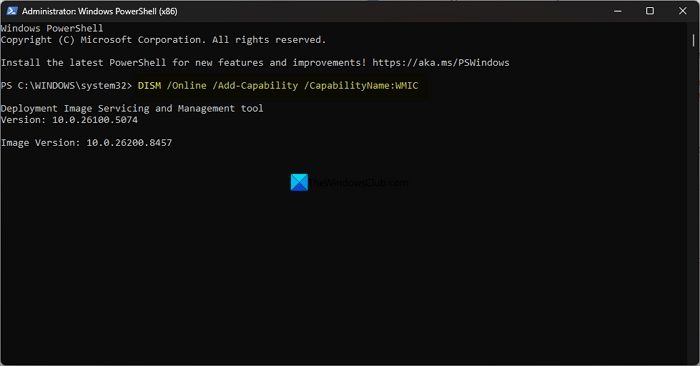
It will show the progress of the installation and wait for it to reach 100% to complete the installation.
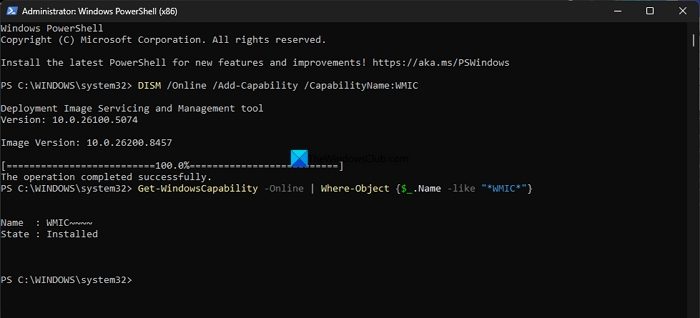
You will see the “The operation completed successfully” message after WMIC is successfully installed. To verify the installation, you can use the following command in PowerShell or Command Prompt.
Get-WindowsCapability -Online | Where-Object {$_.Name -like "*WMIC*"}
You will see the Name of the tool as WMIC, and its state as Installed.
Read: WMIC is not recognized as an internal or external command
How do I enable WMIC on Windows 11?
To enable or install WMIC on Windows 11, use the Optional features setting in the Settings app. In the Optional features, you can find WMIC and add it to your PC. You can use PowerShell or Command Prompt as an administrator using a simple command. Remember that you will need an internet connection to install or enable the WMIC feature.
Could not add WMIC Windows 11?
If you cannot add WMIC on your Windows 11 PC, check if your internet is working properly. The installation will not start or show any progress immediately after entering the installation command via PowerShell or Command Prompt. It takes a few minutes to see the status bar. Wait a moment, then check the progress for a successful installation.
Related read: How to check up Hard Disk Health in Windows 11 using WMIC
