Oracle Solaris is a Unix-based operating system known for its scalability, security, and advanced features like ZFS and DTrace. If you are looking to use Solaris, you don’t have to create a separate partition on your hard drive; instead, create and deploy it on a virtual machine. In this post, we are going to see how you can install Oracle Solaris on VirtualBox.

Can I install Solaris on VirtualBox?
Yes, you can absolutely install Oracle Solaris on VirtualBox; in fact, it is one of the officially supported and recommended virtualization platforms by Oracle for running Solaris 11. The process is straightforward, especially if you use Oracle’s pre-configured VirtualBox appliance (an OVA template), which is designed to import directly into the software, eliminating much of the manual configuration hassle. This makes VirtualBox an ideal and risk-free environment for anyone who wants to explore, learn, or develop on the Solaris operating system without needing dedicated hardware.
Install Oracle Solaris on VirtualBox
If you want to install Oracle Solaris on VirtualBox, you need to follow the steps mentioned below.
- Meet the prerequisites
- Import your machine
- Configure the Virtual Machine
- Get started with Solaris OS
- Install Guest Additions
Let us talk about them in detail.
1] Meet the prerequisites
First of all, it is essential to gather the software components required for this job. We need to first download and install VirtualBox from virtualbox.org. Make sure to download the latest version of the same. Since in this tutorial we have taken a Windows machine as a host, we will download the software for Windows, but you need to select the version depending on your host machine.
Now, go to Oracle.com to download the Solaris VM template for VirtualBox. You then have to enable hardware virtualization (Intel VT-x or AMD-V) in your BIOS/UEFI, as it is required for Solaris.
Read: Can’t boot into Windows after installing Linux
2] Import your machine

Unlike a usual OS installation, Solaris requires you to import the template that we just downloaded. To do so, you can follow the steps mentioned below.
- Install and open VirtualBox.
- Now, go to File > Import Appliance.
- Click on the folder icon placed next to File, navigate to the OVA file we asked you to download earlier, and select it.
- Now, click on Settings to expand it, enter the Name, make sure that the RAM is at least 4 GB, check other parameters, and click on Finish.
Importing appliances is going to take some time, you can see the progress bar at the right side of the window. Monitor it and wait for it to complete.
You have created a virtual machine, but we need to make some configuration changes before starting it up.
3] Configure the virtual machine

Now that we have our virtual machine ready, let us configure it to get it ready for installation. To configure your virtual machine, right-click on its entry and select Settings.
Make sure you are on the Expert tab, then go to the Network tab. In the Adapter1 section, and set Attached to as NAT. Now, go to the Adapter2 tab, and set Attached to as Host-Only Adapter.
We recommend reviewing all network settings and making any necessary changes. If you are setting up the VM for an organization, make sure to go through their requirements as well.
Finally, we are good to get started with the installation of the Solaris OS.
3] Get started with Solaris OS
To get started with Solaris OS, you need to follow the steps mentioned below to install the operating system.
- In VirtualBox, select our new virtual machine, and click on Start.
- Now, enter the system’s name and click on F2 continue.
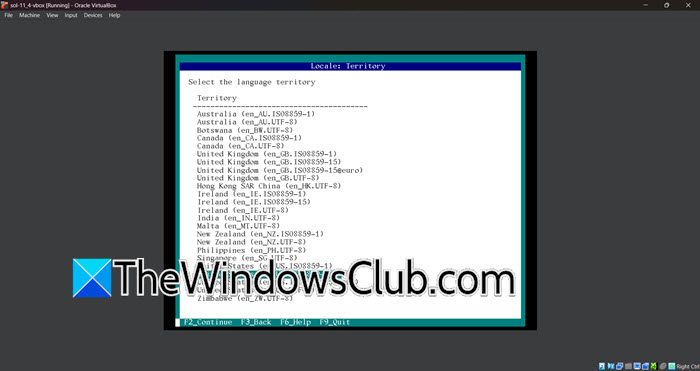
- You will be prompted to set up system configurations such as Region/Time Zone, Hostname, Network (set DHCP if you are not sure which one to select), root password, and user account (create a new user account and set a password, this account will have sudo privileges)
Once done, you will be able to log in to your guest Solaris machine using the credentials you configured earlier. However, you will still not be able to use some of the features will not work, therefore, we need to install Guest Additions.
Read: How to install Rocky Linux on VirtualBox in Windows 11
4] Install Guest Additions
Guest Additions improve the overall usability and performance of the virtual machine by enabling seamless integration between the host and guest operating systems. This includes essential features like shared clipboard and drag-and-drop functionality for easy data transfer, automatic screen resolution adjustment for proper full-screen mode, and significantly better graphics performance through optimized video drivers. Without Guest Additions, the virtual machine experience can feel isolated and clunky, with limited display options and no easy way to share content between systems.
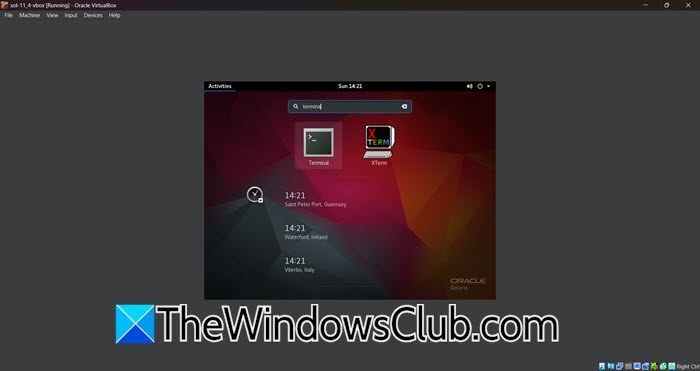
To install Guest Additions, click on Activities, search for Terminal, and once it’s open, run the following command.
pkginfo -l SUNWvboxguest
That’s it! Now, you can go ahead and start using Solaris OS on your VirtualBox VM.
Read: How to install Windows 11 on VirtualBox
How to install OS in Oracle VM VirtualBox?
To install any OS in an Oracle VirtualBox VM, you need to create a new virtual machine, and then set the ISO file of the OS as a storage medium of that VM. Then, boot the machine and follow the on-screen instructions to complete the installation process.
Also Read: Install macOS in VirtualBox on Windows 11.