OpenAI Gym is a toolkit designed for developing and comparing Reinforcement Learning (RL) algorithms. If you are interested in it, you can install the toolkit locally on your computer. In this post, we are going to see how you can install OpenAI Gym in a Windows environment.
Install OpenAI Gym in a Windows environment
OpenAI Gym is a Python toolkit that simplifies reinforcement learning development by providing ready-made environments, removing the need to create physics simulations from scratch. It supports various domains, including robotics, control tasks, humanoid motions, and games, offering a diverse set of challenges for AI training. A key advantage is its compatibility with popular computation libraries like TensorFlow and Theano, making it valuable for both beginners and experienced researchers to build, test, and refine RL algorithms efficiently.
If you want to install OpenAI Gym in a Windows environment, follow the steps mentioned below.
- Meet the prerequisites
- Create and set up a Conda Environment
- Install Gymnasium Environments
- Validate your Environment
Let us talk about them in detail.
1] Meet the prerequisites
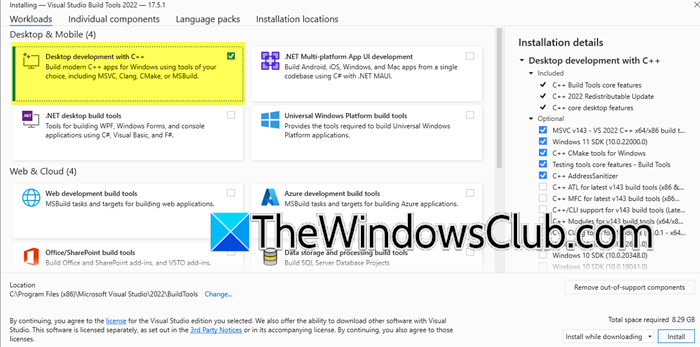
First of all, you need to make sure that you have all the software required to install OpenAI Gym. At first, you need to install the Microsoft Visual C++ Redistributable Package. However, before that, you need to check if you already have it, which is usually the case. Just open Settings > Apps > Installed apps, search for “C++”, and if you see Microsoft Visual C++ Redistributable. Additionally, you need to install Visual Studio. And, select the Desktop development with C++ workload component.
Next up, you need to install Conda Package Manager, which can be either Miniconda or Anaconda. We went with Miniconda, which can be downloaded from anaconda.com. Once downloaded, go ahead and install it.
2] Create and set up a Conda Environment

Next up, we need to create the environment that will host our packages. To do this, you need to search for “Anaconda Prompt” in the Start menu search. You will be able to launch the utility regardless of the Anaconda version you are using.
To create the environment, you need to run the following command.
conda create -n <ENVName>
It may ask to download a few packages, hit Y when prompted.
Once done, you need to activate the environment using the following command.
conda activate <ENVName>
You will see the commands to activate and deactivate when creating the environment, so just copy and paste them.
Once the environment is activated, we need to install Python (if it is already installed, you can skip this step, but we would still recommend running the command).
conda install python=3.11
Let it install all the packages. Hit “Y” when prompted.
3] Install Gymnasium Environments
After configuring our environment, it is time to install Gymnasium environments. There are various environments, and if you want to learn about them in detail, you should visit gymnasium.farama.org, as we are not going to discuss each of them in detail.
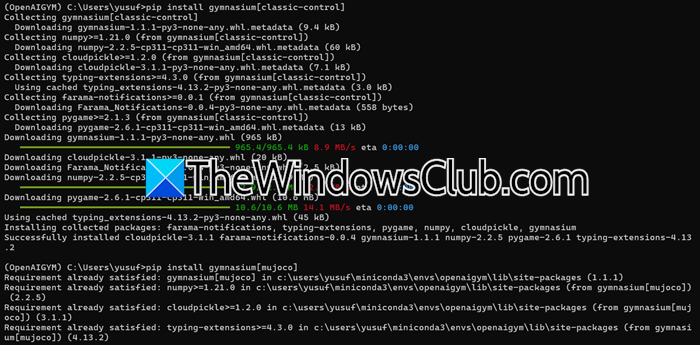
First, let’s install the Classic Control package, which will install Acrobot, CartPole, Mountain Car, Continuous Mountain Car, and Pendulum classic controls. To do so, in the environment that we created, run the following query.
pip install gymnasium[classic-control]
Now, we need to install MuJoCo. It is short for Multi-Joint dynamics with Contact, a physics engine used in robotics, biomechanics, graphics, and animation for fast, accurate simulations. It models physical interactions between robots and their environment, focusing on realism and computational efficiency. Use the following command to install it.
pip install gymnasium[mujoco]
To install Atari, you need to run two commands. It is a set of classic Atari 2600 games used in reinforcement learning research within OpenAI Gym
pip install gymnasium[atari]

pip install gymnasium[accept-rom-license]
Finally, we need to install Box2D. It has a set of environments that rely on Box2D for physics simulation and use PyGame for rendering. If you just run the command, pip install gymnasium[box2d], you will not encounter an error.
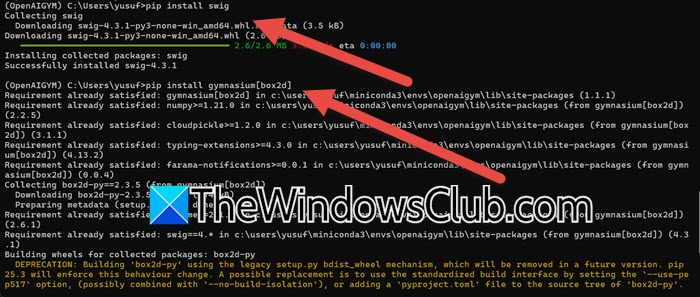
That is why, in the new documentation, OpenAI requests users to run the commands in the following order.
pip install swig
pip install gymnasium[box2d]
With this, you have installed all the environments.
4] Validate your environment
Finally, let us go ahead and validate the environment that we created. For this, we will be using Visual Studio Code. Open the folder where you have created the environment in Visual Studio Code, then create a new file called validate.py. Now, you can activate the environment and copy the line of code from gymnasium.farama.org and run it to verify.
Hopefully, with the help of this guide, you will be able to use OpenAI Gym.
Read: What is Debug-Gym Tool from Microsoft Agentic AI
Does OpenAI Gym work on Windows?
Yes, OpenAI Gym works on Windows, but some environments may require extra setup. Certain dependencies, like Box2D and Atari, can be tricky to install and may need workarounds. Using Windows Subsystem for Linux (WSL) can help run OpenAI Gym more smoothly. However, if you want to run OpenAI Gym locally, you can follow the steps mentioned earlier.
Read: How to use Open AI Sora to create videos
Is OpenAI Gym free?
Yes, OpenAI Gym is free and open-source, allowing anyone to use and contribute to its development. It provides a variety of environments for reinforcement learning research without any cost, making it accessible to both beginners and experts. Developers can experiment with different AI models and test algorithms without restrictions.
Also Read: Use OpenAI Whisper on Windows PC.