
You can use WMIC command line to find & check running processes by name on your Windows 11/10 computer. We show you how. A simple WMIC command can help you list all processes running on your computer. Instead of using Task Manager, you can give this WMIC command a try to get the job done.
What does the WMIC display about the process?
Although Task Manager is a great source of information, you can use the WMIC command to get the same thing done. The advantage of using WMIC is that it provides more detailed information than Task Manager. For your information, it displays the following things:
- ExecutablePath
- KernelModeTime
- PageFileUsage
- Priority
- PageFaults
- ReadTransferCount
- SessionID
- TerminationDate
- WorkingSetSize
- WriteOperationCount
- VirtualSize
- WindowsVersion
- WriteTransferCount
- PeakPageFileusage
Before you proceed, you should know that the WMIC tool is being deprecated now and has been superseded by Windows PowerShell for WMI – but you can install and use it if you want to.
How to find all running processes using WMIC in Windows 11/10
To find all processes using WMIC in Windows 11/10, follow these steps:
- Press Win+X to open the WinX menu.
- Select the Windows Terminal option.
- Enter this command: wmic process list
- Find the details on the Windows Terminal window.
It is possible to use Command Prompt and the Command Prompt instance in Windows Terminal. Either way, you will get the same result. However, here we have used the Windows Terminal to show you the example.
First, you need to open the WinX menu by pressing the Win+X buttons. Then, select the Windows Terminal option in the WinX menu.
As mentioned earlier, if you want to use the Command Prompt, you need to search for cmd in the Taskbar search box and click on the individual search result.
Once the Windows Terminal is opened, you need to enter this command:
wmic process list
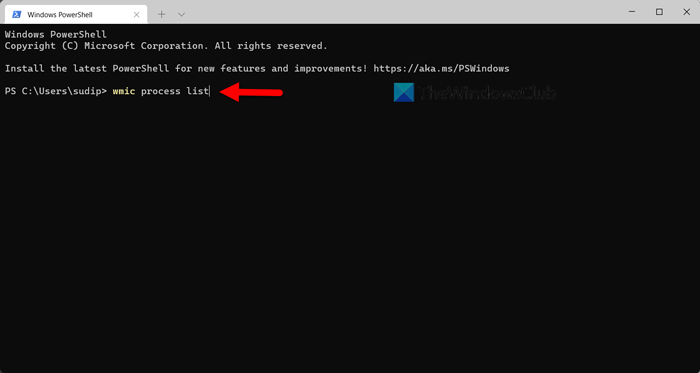
Then, you can see all the information required to diagnose your PC or something else.
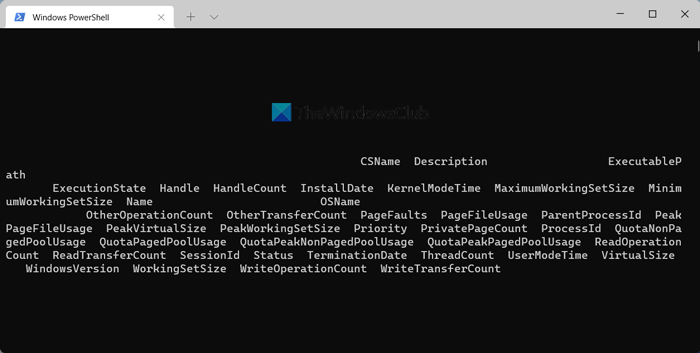
As we said before, you can find the ExecutablePath, Description, InstallDate, etc.
Disadvantages of using WMIC over Task Manager
The main disadvantage of using WMIC over Task Manager is its user interface. Although it displays more details than Task Manager, the user interface makes the data difficult to read. No matter which monitors you try it on, you can find the same issue across all the displays.
When the Task Manager shows columns, task names, etc., separately, the WMIC prompt displays them together. The only way to read the data is to export it to a text editor, such as Notepad or Notepad++.
Whether you execute the aforementioned command in the Windows Terminal or the standalone Command Prompt window, the data displays in a similar way. However, if you can overcome this problem, you will find this method for seeing all running processes pretty handy.
Read: How to check Battery level using WMIC in Windows
How can I see all the running processes?
There are multiple ways to see all running processes on Windows. However, the easiest way to find them is to use the Tasklist command in Task Manager. The Task Manager has a dedicated Processes tab, where you can find all the running processes. Apart from that, you can switch to the Services tab, where it displays all the running services your computer has. Last but not least is the Details section, where you can find all the processes according to the user. This post will show you how to generate and print the list of running Processes in Windows Task Manager.
How do I list all processes in Windows?
As described earlier, you can list all processes in Windows 11/10 with the help of the Task Manager. However, if you do not want to export anything, you can try the WMIC method instead. A simple command in Command Prompt or Windows Terminal can help you find all running processes in moments.
