You are at the right place if you want to downgrade Windows Server from Datacenter to Standard edition for whatever reason. It can be as simple as no longer needing the advanced features of Datacenter or reducing the cost of the license. However, Microsoft does not support direct in-place downgrades, so this procedure requires careful planning. In this guide, we will walk through the available method step-by-step to ensure a smooth transition.
How to downgrade Windows Server DataCenter to Standard edition?
Follow the steps mentioned below to downgrade Windows Server Datacenter to the standard edition.
- Backup critical data
- Download Windows Server Standard ISO and create a bootable USB
- Clean install Windows Server Standard
- Reinstall roles and restore data
Let’s get started with the guide.
1] Backup critical data
Before starting the procedure, it’s a must, non-negotiable step to create a backup of your server to prevent data loss. This includes system files, installed roles, configuration files, and user data. Once done, let’s get started with the procedures.
2] Download Windows Server Standard ISO and create a bootable USB
Before installing Windows Server Standard, we will need a bootable USB containing the correct ISO file. Make sure to
Here’s how to do the same.
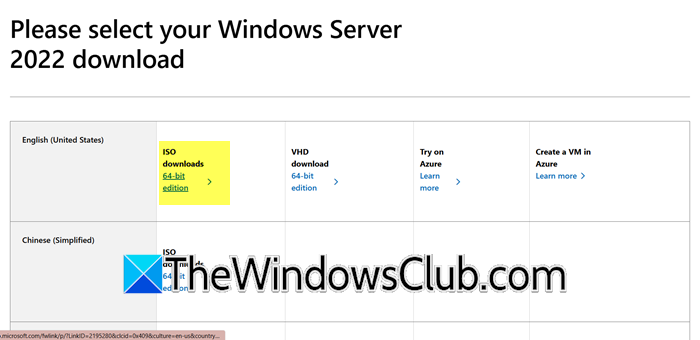
- Go to Microsoft’s official download page (microsoft.com), select Windows Server Standard, and download the ISO file. However, it’s necessary to ensure that the version matches the system and licensing requirements.
- To create a bootable USB, either use Rufus or the Media Creation Tool. For example, to use Rufus to create a bootable USB and launch the app.
- Now, insert a USB device, select the ISO, and set Partition Scheme as GPT.
- Set NTFS in the File System, and hit the Start button to create the bootable USB.
After the bootable USB is created, proceed to the next step to use it to perform a clean installation.
3] Clean install Windows Server Standard
To proceed, after downloading Windows Server Standard ISO and creating a bootable USB, users can either perform a clean installation, attempt an in-place edition change using the Registry editor. One involves booting from installation media, while the other uses a repair install to apply the Standard edition over DataCenter. To do the same, follow the steps mentioned below.
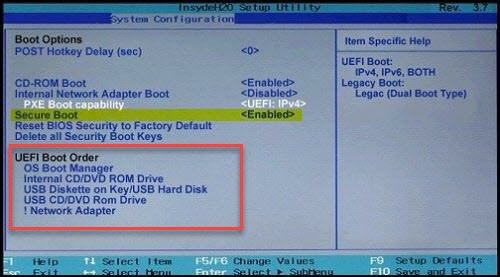
- Insert the bootable USB device into the server, and reboot the server.
- Press the appropriate key to enter the boot menu, and change the boot order to boot using USB.
- The Windows server setup will load up. Here, select the language, time, and keyboard input method, and then click Next.
- Select the Install Now option and enter the valid Windows Server Standard edition key when prompted.
- In the next window, select Windows Server Standard as the Operating System you want to install, hit Next, and then choose Custom: Install Windows only.
- On the partition screen, select the system drive, click Delete to remove the old partition, then select the unallocated space and click the Next button.
Windows will begin installing the Standard edition. Please wait for the installation to complete, and be aware that the system may restart several times during the process.

Alternatively, users can also use the Registry Editor to achieve the same result.

- For that, click Win + R to open the Run dialog box, type regedit, and hit Enter to open Registry Editor.
- Navigate to the location mentioned below, and change EditionID to ServerStand:
HKEY_LOCAL_MACHINE\SOFTWARE\Microsoft\Windows NT\CurrentVersion
- Similarly, change ProductName to Windows Server 2019 Standard, and CompistonEditionID to ServerStandard.
- Next, without rebooting the server, mount the Windows Server 2022 installation ISO, and run setup.exe.
- Select Upgrade and the Windows Server 2020 Standard edition in the Windows Server setup window.
- Follow the upgrade prompts and complete the in-place repair installation.
Once the installation completes or the in-place upgrade finishes, the next step is to activate Windows.
4] Reinstall roles and restore data
After the final restart, users will see the Customize settings or Administrator password set up screen, select the latter option, enter the credentials, and hit the Finish button. Now, log in to Windows Server, and activate the Standard Edition licence key.
Once done, use Device Manager to check for missing drivers, install them if needed, and then re-enable the necessary roles from the backup saved earlier. Copy back all data, settings, and files from them.
Read: Different types of Windows Updates released for Windows OS
What are the downgrade rights for Windows Datacenter?
Downgrade rights for Windows Datacenter enable licensed users to install and use earlier versions, provided they are covered under Volume Licensing agreements. However, users must provide their installation media and keys for the downgraded version.
Read: How to set and configure Disk Quota in Windows Server
Which is better, Windows Server Standard or DataCenter?
This decision depends mainly on the organization’s scale, infrastructure requirements, and licensing budget. However, when compared, Windows Server DataCenter is more suitable for enterprises requiring extensive virtualization and advanced features, whereas the Standard edition is ideal for smaller environments with limited virtualization needs.
Also Read: How to deploy Feature Update on Windows Server.