We have already seen how Data Execution Prevention, a security feature can help prevent damage to your Windows 11/10/8/7 computer from viruses and other security threats. Harmful programs that attempt to attack Windows by executing code from system memory locations reserved for Windows and other authorized programs are stopped. These types of attacks can harm your programs and files. DEP can help protect your computer by monitoring your programs to ensure they use system memory safely. If DEP notices a program on your computer using memory incorrectly, it closes the program and notifies you. It is a security feature.
While it is not recommended, you may have reasons to disable Data Execution Prevention on your Windows computer. Lets us see how to disable DEP in Windows 11/10 using the bcdedit.exe tool.
Before you begin, you need to make sure that Secure Boot has been disabled on your system; else you may see The value is protected by Secure Boot policy and cannot be modified or deleted error message,
Disable Data Execution Prevention in Windows 11/10
Type cmd in Start Search. Right-click on search results ‘cmd’ and click on Run as Administrator. You can also open an elevated command prompt window via the WinX menu.
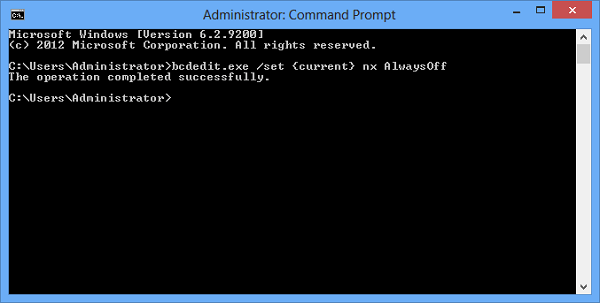
Then, copy-paste the following and hit Enter:
bcdedit.exe /set {current} nx AlwaysOff
You will see the message – The operation completed successfully.
Reboot.
You will find that Data Execution Prevention has been disabled on your Windows computer.
You may then, if you wish, verify the status of the Data Execution Prevention feature on your system.
Enable Data Execution Prevention in Windows 11/10
To enable back DEP, type the following in an elevated command prompt and hit Enter:
bcdedit.exe /set {current} nx AlwaysOn

This will enable back Data Execution Prevention.
Turn on or off DEP in Windows via System Properties
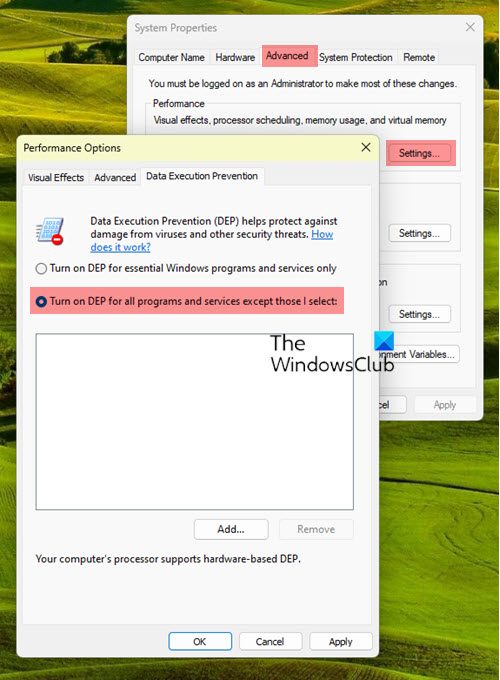
You can also Turn on or off DEP via System Properties as follows:
- First, press the Win+R hotkey to open the Run dialog box and enter sysdm.cpl in it to launch System Properties.
- Now, move to the Advanced tab inside the System Properties window and tap on Settings under Performance.
- After that, navigate to the Data Execution Prevention tab and select the Turn on DEP option that suits your requirement.
- Next, press the Apply > OK button to save changes.
See this if you receive The boot configuration data store could not be opened message.
How do I find DEP in Windows 11?
DEP stands for Data Execution Prevention. It is a set of hardware and software technologies that protect your system’s memory against malicious code exploits. To check whether hardware-enforced DEP is available on your computer or not, you can use the wmic command. Open the command prompt and execute the following command. If the output is true, your system has hardware-enforced DEP.
wmic OS Get DataExecutionPrevention_Available
Is disabling DEP safe?
As explained earlier in this article, DEP is a security feature that helps prevent damage to your Windows 11/10 computer from viruses and other security threats. If you disable it, your system’s memory will become prone to attacks because malicious code can be executed there. Hence, disabling DEP is not safe.
Read: Turn Off or On Data Execution Prevention (DEP) for Individual Programs.