Microsoft has integrated its AI chatbot, Copilot, into all its Microsoft 365 suite, including Teams. This issue could be a result of various factors, including policy and configuration settings, particularly when the agent operates elsewhere (such as Copilot Studio) but fails within Teams. In this post, we will explore what you can do if the Copilot is not working in Teams.

Fix Copilot not working in Teams
The issue usually stems not from the Copilot agent itself, but from its deployment and interaction within the Teams environment. Common reasons for this include restrictive Teams admin policies that block custom applications, the agent not being correctly configured for personal chat scope, or incomplete authentication requirements for the Teams channel.
If Copilot is not working in Teams, follow the solutions mentioned below.
- Enable Custom App Policies
- Enable Custom Apps at the Team Level
- Verify Authentication Setup
- Check the log file
Let us talk about them in detail.
1] Enable Custom App Policies
Copilot agents from Copilot Studio are considered custom apps in Microsoft Teams. If your IT administrator has set policies to block custom apps for security reasons, the Copilot agent won’t work properly, even if configured. To allow end-users to access it, these policies must be enabled.
- In the Teams admin center, go to Teams apps > Org-wide app settings.
- Under the Custom apps section, ensure the setting Let users interact with custom apps in preview is set to Allow.
- Click on Save.
- Now, go to Teams apps > Setup policies.
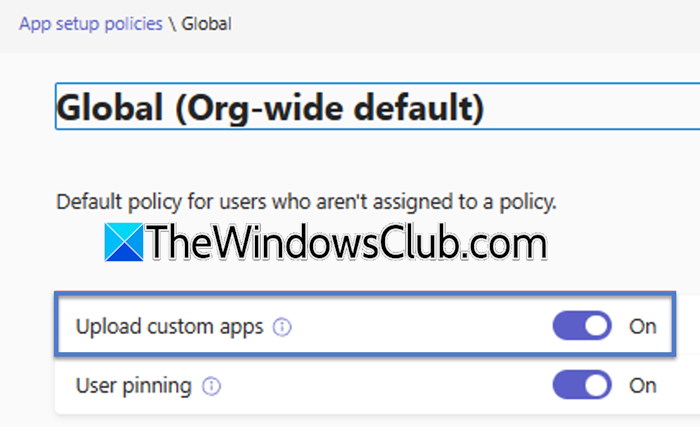
- Select the policy applied to your users (e.g., Global (Org-wide default)) and click Edit.
- Find the setting Upload custom apps, and turn it on.
- Click on Save.
Now, move on to the next step.
2] Enable Custom Apps at the Team Level
Even if global admin policies allow custom apps, individual teams can have their own settings that override these permissions. If a user attempts to use Copilot within a specific team channel (rather than a personal chat), the team’s settings may be blocking custom app functionality. This setting acts as a final permission gate at the team level. You can follow the steps outlined below to achieve the same result.
- Open the Microsoft Teams application.
- On the left-hand sidebar, you will see a list labelled Teams.
- In this list, find and click directly on the Name of the Team where Copilot is not working. This will select the team and show its channels.
- To the right of the Team Name, click the More options button (which appears as three dots …).
- From the menu that appears, select Manage team.
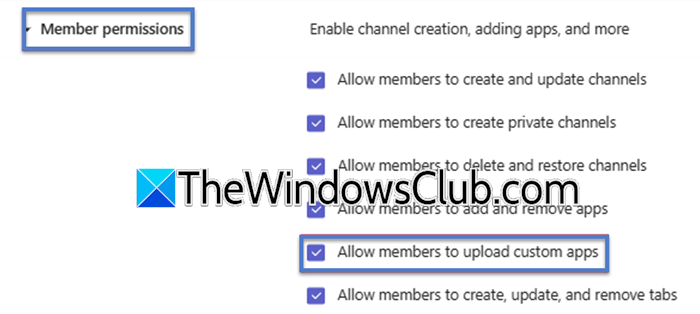
- Go to Settings > Member Permissions.
- Locate and check the box for Allow members to upload custom apps.
- Finally, save your changes.
Once done, you need to verify that your issue is resolved.
3] Verify Authentication Setup
The Copilot agent needs to access external data or perform actions that require user authentication. If the agent lacks proper authentication configuration, it will fail when attempting to access secured resources, such as SharePoint files or databases. Enabling authentication provides the necessary security context for the agent to operate with user permissions.
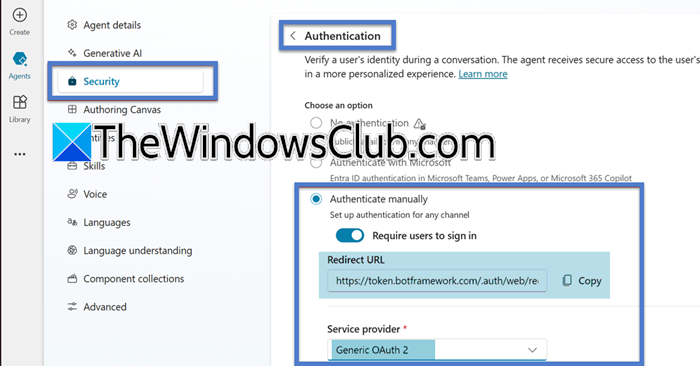
- In Copilot Studio, select your Copilot agent and navigate to Settings > Security.
- Now, go to the Authentication section, click on Add authentication.
- Now, select your identity provider (typically Azure Active Directory or Microsoft Entra).
- Configure the connection and, crucially, add the required API permissions (scopes) such as Files.Read.All, Sites.Read.All, or any other necessary permissions for your specific use case.
- Now, save the authentication settings.
- Return to Settings > Channels and select the Microsoft Teams channel.
- Ensure the Use when a user is signed in option is enabled for the Teams channel.
- Finally, republish the agents.
This should do the job for you.
4] Check the log file
Now, let’s return to the client-side and check if there is an issue with their Teams. To do so, you need to open File Explorer, go to %appdata%\Microsoft\Teams\, and check the logs.txt file.
Look for any errors or warnings that could provide more insight into why Copilot is not functioning. You can use the information provided in the logs to find appropriate solutions.
Hopefully, with the help of these solutions, your issue will be resolved.
Read: Copilot Vision not connecting or working
How do I enable Copilot in MS Teams?
To enable Copilot in Microsoft Teams, open the Teams admin centre and ensure that the Copilot service is available in your organisation’s Microsoft 365 subscription. From there, assign the appropriate Copilot licenses to users and verify that Teams policies permit access to the app. Once enabled, Copilot will appear within Teams, ready to assist with chats, meetings, and document collaboration. You may need to update Teams or restart the app for the changes to take effect.
Read: GitHub Copilot not working in Visual Studio
Is Copilot linked to Teams?
Yes, Copilot is closely linked to Microsoft Teams as it is designed to work within the platform to enhance collaboration and productivity. It integrates directly into chats, meetings, and calls, helping users generate content, summarise discussions, and access information more efficiently.
Also Read: Copilot not working in Windows 11.