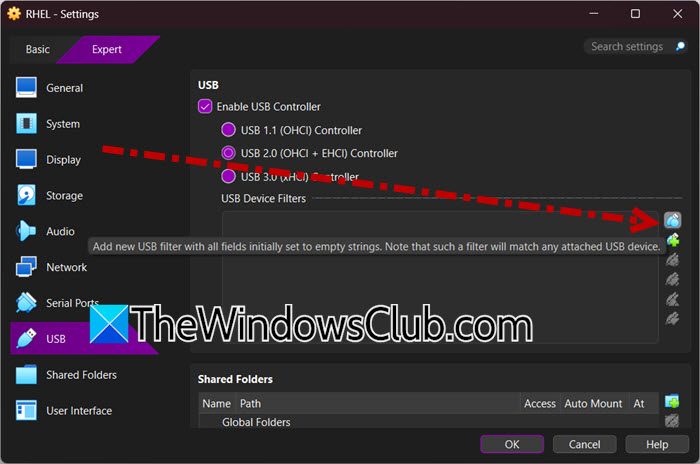
When attempting to use a built-in laptop webcam or a USB camera within a virtual machine, you may see a black screen or an error stating the device is not found. This is a common hurdle when setting up video conferencing or testing camera-based applications in a virtualized environment. In this post, we will see what you can do if your Camera is not working in a virtual machine running Hyper-V or VirtualBox (if you use VMware, we already have a guide for you).
Camera not working in Virtual Machine in Hyper-V
Hyper-V has an architectural issue. It is a Type-1 hypervisor that runs directly on the hardware, meaning it fully controls the system’s resources. Because of this, the host operating system cannot directly access devices like cameras. To make local resources available to the virtual machine, you need to use a specific policy called Enhanced Session Mode.
If your camera is not working in a Hyper-V Virtual Machine, follow the solutions mentioned below.
- Enable Enhanced Session Mode Policy
- Utilize Remote Desktop Connection (RDP)
- Check Basic Session Audio/Video Drivers
Let us talk about them in detail.
1] Enable Enhanced Session Mode Policy
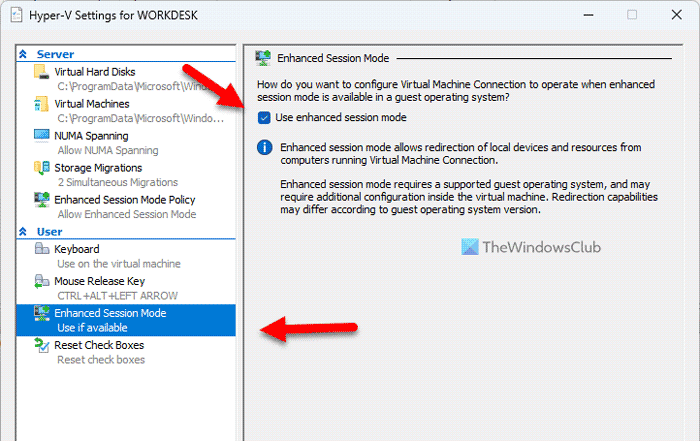
Enhanced Session Mode leverages the same underlying technology as Remote Desktop Services to create a more interactive connection to the virtual machine. Unlike the standard basic session, which only transmits keyboard, mouse, and basic display data, this mode actively negotiates which local resources (like cameras, clipboards, and drives) should be redirected from the physical host to the guest operating system.
- Open Hyper-V Manager and select your computer name from the left panel.
- Click Hyper-V Settings at the bottom right.
- Under Users, click Enhanced Session Mode Policy.
- Start your VM and wait for the login screen to appear.
- Click the Show Options button (or monitor icon) on the connection bar.
- Go to the Local Resources tab and click More… at the bottom.
- Scroll down, check the box next to your webcam, and click OK.
- Click Connect and log in. Your camera should now work.
Finally, check if your issue is resolved.
2] Utilize Remote Desktop Connection (RDP)
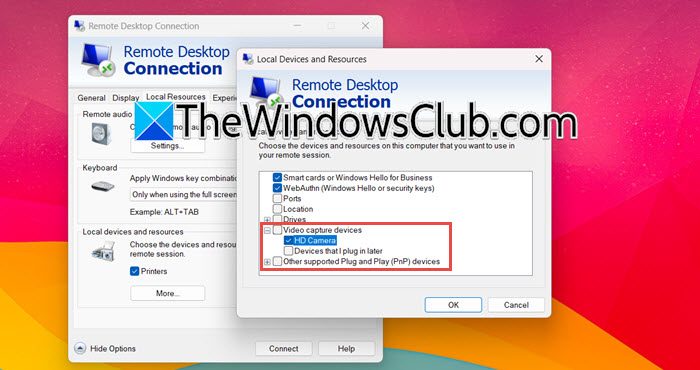
Remote Desktop Connection has built-in functionality to redirect local devices over the network. By connecting this way instead of using Hyper-V’s standard viewer, you bypass the hardware-sharing limitations and tell Windows to pass the camera feed directly to the remote session.
First, find your VM’s IP address. For that, log into your VM, open Command Prompt, type ipconfig, and note down the IPv4 address.
Now, follow the steps mentioned below to connect.
- On your host machine, press Windows Key + R, type mstsc, and hit Enter to open Remote Desktop Connection.
- Enter the VM’s IP address in the “Computer” field and click “Show Options” at the bottom left.
- Go to the Local Resources tab.
- Under Local devices and drives, click the More button.
- In the list that appears, scroll down and check the box next to your webcam (if may show as Camera or Integrated Webcam).
- Click OK, then go to the General tab and click on Connect.
Enter your VM credentials when prompted. The camera should now be accessible inside the virtual machine.
3] Check Basic Session Audio/Video Drivers
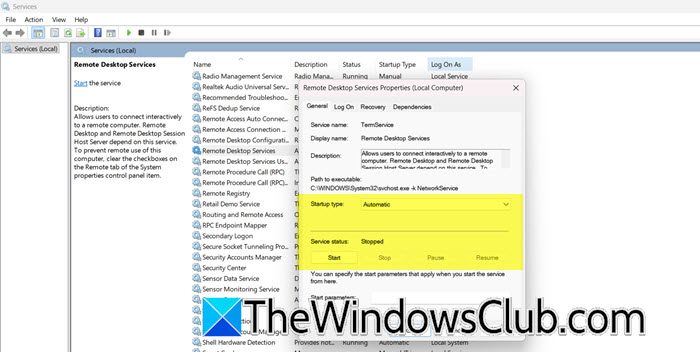
The camera feed relies on specific Windows services and drivers for the guest operating system to receive it. If these components are missing or outdated, the VM simply won’t recognize that a camera is being shared, even if Enhanced Session is enabled.
Inside your VM, press Windows Key + R, type services.msc, and hit Enter. Scroll down and look for Remote Desktop Services in the list. Check if the Status column says Running; if not, right-click it and select Properties. Change the Startup type to Automatic, and click OK.