When you set up a VMware home lab with ESXi hosts, it is common to find that the hosts can ping each other but fail to ping the default gateway. This prevents them from reaching external networks. In this post, we will see what to do if the VMware client cannot ping the default Gateway.
VMware Client cannot ping the default Gateway
The inability to ping the default gateway usually stems from virtual network misconfiguration, firewall rules, or service failures. The virtual network editor may have an incorrect NAT gateway address, a subnet conflict, or DHCP disabled. The Windows host firewall, or the guest OS firewall, might block ICMP echo requests. VMware’s core services (NAT and DHCP) could be stopped or crashed. For ESXi specifically, VLAN mismatches or improper physical switch port settings can also break gateway reachability. Lastly, the VM network adapter mode (bridged, NAT, or host‑only) might be set incorrectly for your intended topology.
If the VMware client cannot ping the default Gateway, follow the solutions mentioned below.
- Reset Virtual Network Configuration
- Verify and start VMware Core Services
- Allow ICMP Traffic Through the Firewall
- Check VM Adapter Mode and IP Configuration
Let us talk about them in detail.
1] Reset Virtual Network Configuration
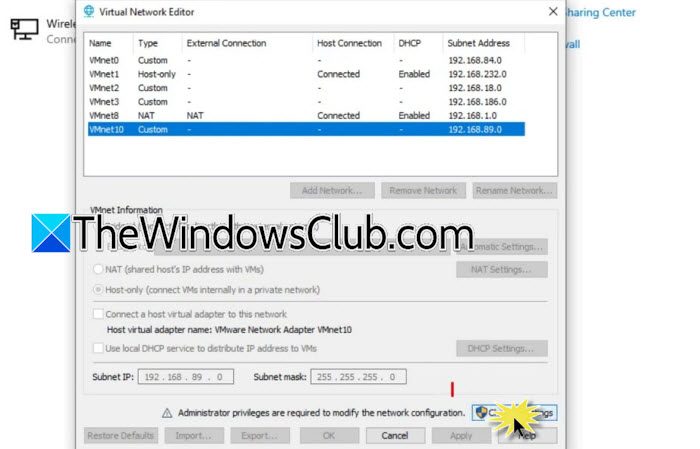
The virtual network configuration files can become corrupted after upgrades, abrupt shutdowns, or manual edits. Resetting removes all custom settings and regenerates default ones, eliminating hidden misconfigurations. To reset the virtual network configuration, follow the steps mentioned below.
- Shut down all running virtual machines.
- Now, open VMware Workstation as Administrator.
- Then, go to Edit > Virtual Network Editor.
- Navigate to Change settings > Restore Defaults and wait for the reset to complete.
- Reconfigure your custom network (e.g., VMnet4) with the correct subnet IP and gateway address.
Restart the VM and test pinging the gateway.
2] Verify and Start VMware Core Services

VMware NAT Service performs network address translation so that VMs can reach external networks; VMware DHCP Service automatically assigns IP addresses. If either service is not running, NAT‑mode VMs cannot communicate with the gateway.
First, open Services from the Start menu. Now, look for VMware NAT Service and VMware DHCP Service. Check that their status is Running and the Startup type should be Automatic. If it is not running, right-click each and select Start. If the startup fails, right-click, select Properties, and set the Startup type to Automatic. Finally, apply the changes,
Now, restart the VM and test connectivity.

3] Allow ICMP Traffic Through the Firewall
![VMware client cannot ping Default Gateway [Fix]](https://www.thewindowsclub.com/wp-content/uploads/2026/06/icmpv4.jpg "VMware client cannot ping Default Gateway [Fix]")
Windows Defender Firewall blocks inbound ICMP echo requests by default. Even with correct network settings, the firewall will drop ping packets, causing false timeouts. Enabling an ICMPv4 inbound rule resolves this. To allow ICMP Traffic through the Firewall, follow the steps mentioned below.
- Open Control Panel > Windows Defender Firewall.
- Go to Advanced settings.
- Click on Inbound Rules > New Rule.
- Choose Custom rule type, then click on Next.
- On the Protocol and Ports page, select ICMPv4 as the protocol.
- On the Scope page, under Remote IP addresses, add your VM subnet (e.g., 192.168.x.0/24).
- Now, go to the Action page, select Allow the connection.
- On the Profile page, check Domain, Private, and Public.
- Give the rule a name (e.g., “Allow ICMPv4 for VMware”) and finish.
If you use third‑party security software (e.g., Kaspersky, 360 Total Security), add VMware executables to its white list. Finally, check if you can ping the default gateway.
4] Check VM Adapter Mode and IP Configuration
If the VM’s network adapter is set to Bridged or Host‑only instead of NAT, it cannot use the NAT gateway. Also, if the VM gets an APIPA address (169.254.x.x), DHCP has failed, so releasing and renewing the IP forces a correct lease.
In the VM Settings, confirm the Network Adapter is set to NAT mode.
Inside the VM, open Command Prompt and run ipconfig /all to verify that all IP belongs to the NAT subnet (default 192.168.x.0/24). If the IP is 169.254.x.x, run these commands in sequence.
ipconfig /release
ipconfig /renew
Run ipconfig again and confirm that the default gateway matches the NAT gateway shown in the Virtual Network Editor (usually 192.168.x.2).
If you use a static IP, double‑check that the IP, subnet mask, and gateway are entered correctly.
Read: VMware NAT Service service terminated unexpectedly, Event ID 7031
Is 192.168.1.1 always the default gateway?
No, 192.168.1.1 is not always the default gateway. While many consumer routers from brands like Netgear, D‑Link, and TP‑Link use this address by default, it is not a universal standard. Manufacturers often choose different IPs; for example, some ASUS routers use 192.168.50.1 and many TP‑Link models use 192.168.0.1. Network administrators can also change the gateway to any valid IP within the subnet, such as .254. To find your actual gateway, check the sticker on your router or run ipconfig on a connected device.
Read: VMware network adapter not showing up in Windows 11
Why can’t I ping my VM?
A VM may not respond to ping due to firewall rules, network misconfiguration, or service failures. Windows Defender Firewall and guest OS firewalls often block ICMP echo requests by default. The VM might have an incorrect IP, subnet mask, or gateway address, or it could be using the wrong virtual network adapter mode (e.g., NAT vs. bridged). VMware services like NAT and DHCP may also be stopped. Start by checking the VM’s IP configuration with ipconfig, ensuring ICMP is allowed in the firewall, and verifying that VMware services are running.
Also Read: VMWare VM unable to connect to the Internet.