You may encounter an error when performing a Disk Management task without the necessary system-level privilege. Your user account is either not a member of the Administrators group, or the critical background services required for disk management are not running correctly. In this post, we are going to see what you can do if you do not have access rights to Logical Disk Manager in Windows 11/10.
You do not have access rights to Logical Disk Manager on DESKTOP

You do not have access rights to Logical Disk Manager
This access error primarily occurs for one of two reasons: Your user account does not have Administrator privileges, preventing it from making system-level changes, or the core Windows services responsible for disk management are stopped or misconfigured.
If you do not have access rights to Logical Disk Manager, follow the solutions mentioned below.
- Run Disk Management as administrator
- Enable the Logical Disk Manager Services
- Add your account to the Administrators Group
- Repair System Files
- Use DiskPart
Let us talk about them in detail.
1] Run Disk Management as administrator
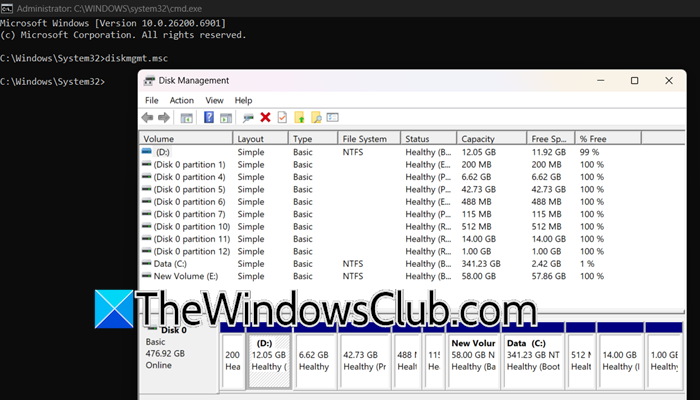
Logical Disk Manager requires elevated system privileges to modify disk configurations, which standard user accounts lack. By explicitly launching the tool with administrator rights, you bypass the standard user permission level and grant the application the necessary authority to interact with low-level disk management functions and services.
Open Run by Win + R, type cmd, and hit Ctrl + Shift + Enter. You will see a UAC prompt, click Yes to continue. In the window that opens, type diskmgmt.msc and press Enter.
Finally, check if the issue is resolved.
2] Enable the Logical Disk Manager Services
Disk Management tool is merely a graphical interface; these background services handle the actual work of configuring drives. If the Logical Disk Manager services are stopped or disabled, the graphical tool has no underlying engine to perform the tasks, resulting in the access rights error. Starting the services and setting them to automatic restores this essential functionality.
Follow the steps mentioned below to enable the Logical Disk Manager Services.
- Open Run by Win + R.
- Type services.msc and press Enter.
- Find Logical Disk Manager and Logical Disk Manager Administrative Service.
- Double-click each one, and set its Startup type to Automatic.
- Click on Start > Ok.
Finally, check if the issue is resolved.
3] Allow Remote Access in Permissions
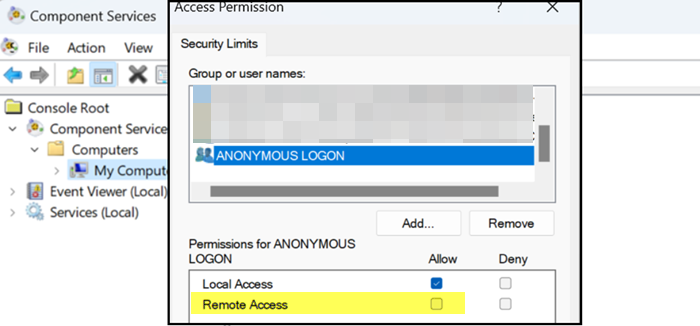
This solution addresses a permissions issue affecting the Disk Management tool, which relies on the Distributed Component Object Model (DCOM) for communication with core disk management services. If the ANONYMOUS LOGON security principal is denied access in the DCOM configuration, it can cause an “access rights” error, even for administrators. Granting Remote Access permission to ANONYMOUS LOGON re-establishes this essential communication. To make the changes, follow the solutions mentioned below.
- Open Run by Win + R, type dcomcnfg, and hit Enter.
- Go to Console Root> Component Services > Computers > My Computer.
- Now, right-click on My Computer and select Properties.
- Navigate to the COM Security tab, from the Access Permissions section, click on Edit Limits.
- Now, in the Access Permission window, locate ANONYMOUS LOGON, and then check the box Allow Remote Access.
Finally, check if the issue is resolved.
3] Add your account to the Administrators Group
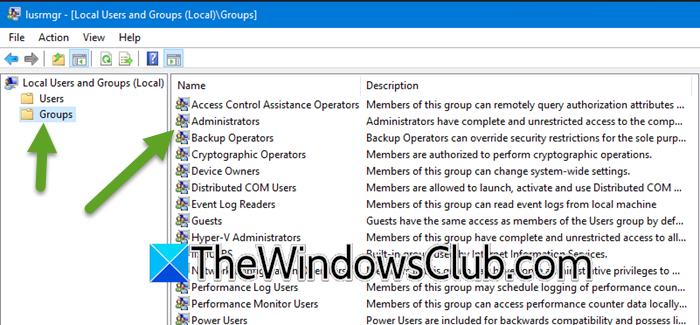
Logical Disk Manager is a protected system component that requires full administrative privileges to modify disks or partitions. Adding your account to the Administrators group grants your user the necessary security token to perform these elevated system tasks, which are otherwise blocked for standard user accounts. You can follow the steps outlined below to achieve the same result.
Follow the steps below to complete the same task.
- Open Run by Win + R, type lusrmgr.msc, and hit Enter to open Local users and groups.
- Then, go to Groups.
- Now, double-click on the Administrators.
- Click on Add, enter your username, and click OK.
- You must restart your computer for this change to take effect.
Finally, verify that you can make changes to the Local Disk Manager.
4] Repair System Files
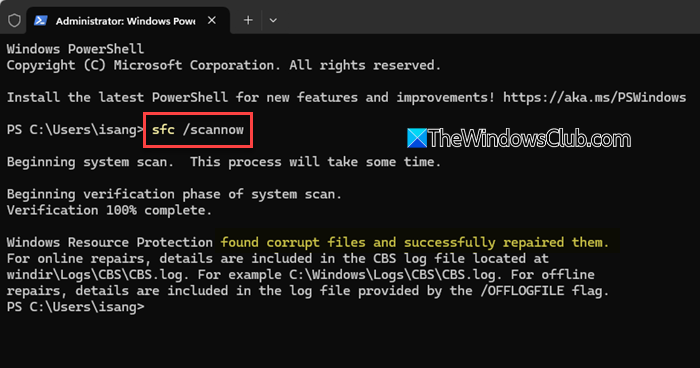
If the issue is not due to privilege and permissions, we need to repair the system files. System File Checker (SFC) utility scans for and restores corrupted or missing protected system files. If the “access rights” error is being caused by damaged system files related to disk management or security permissions, running sfc /scannow will replace the bad files with a correct version from a cached location, effectively repairing the underlying cause of the failure.
If running SFC didn’t help, we need to run DISM. So, open CMD as an admin and run the following command.
DISM.exe /Online /Cleanup-image /Restorehealth
Finally, check if the issue persists.
5] Use DiskPart
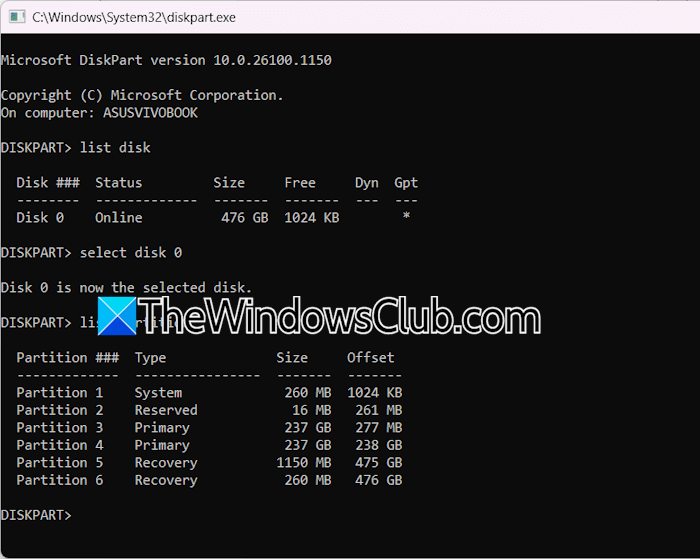
If the graphical interface is corrupted, using the command-line tool DiskPart can bypass the issue entirely. DiskPart is a powerful text-mode command interpreter that provides direct control over disks, partitions, and volumes with the same administrative privileges, allowing you to manage your storage without relying on the Disk Management GUI.
Open Command Prompt as an admin and then type diskpart.
You can now use commands to manage your disks. For example, type list disk to see all connected disks. Use commands like select disk X (where X is the disk number) and clean or create partition primary to perform management tasks.
Be cautious when running these commands, as they make changes immediately.
Hopefully, with the help of these solutions, your issue will be resolved.
Read: Fix Disk Management errors on Windows 11
How to fix You must initialize a disk before logical disk manager can access it?
To fix the “You must initialize a disk” error, you need to prepare the new disk for use with Windows. Open Disk Management, right-click the disk labeled Unknown and Not Initialized, and select Initialize Disk. Choose a partition style (GPT for modern systems or MBR for compatibility) and click OK, which will allow the Logical Disk Manager to access it and let you create new volumes.
Read: Drive is not accessible, The Parameter is incorrect on Windows 11
How to resolve d:\ is not accessible?
This error often occurs due to drive letter conflicts, file system corruption, or connection issues. To resolve it, use Disk Management to ensure the drive has a valid letter assigned, then open Command Prompt as admin and run chkdsk D: /f to repair errors. We recommend you check our guide to know what to do when an external Hard Drive is not showing up or detected.
Also Read: Hard Disk Partition not showing up in Windows 11.