
VirtualBox on Windows 11 throws Failed to get device handle and/or partition ID alongside VERR_NEM_VM_CREATE_FAILED. This error stops VM creation and points to a direct clash between VirtualBox and the Windows hypervisor. In this post, we are going to talk about it and see what you can do to resolve it.
Failed to open a session for the virtual machine.
Failed to get device handle and/or partition ID
VERR_NEM_VM_CREATE_FAILED
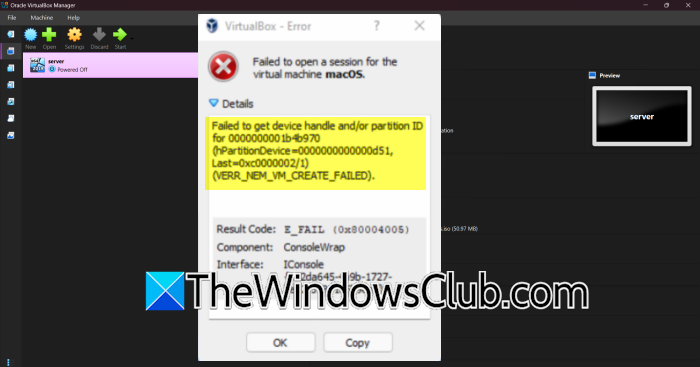
Windows 11 activates Hyper‑V‑backed security features that permanently claim the CPU’s virtualization extensions. VirtualBox needs those same extensions to run its native hypervisor and to grab direct device handles. Because the Windows hypervisor already owns the hardware, the VirtualBox Native Execution Manager cannot start, the raw device handle request fails, and the entire VM creation aborts with VERR_NEM_VM_CREATE_FAILED.
VirtualBox failed to get device handle and/or partition ID
If you see VirtualBox failed to get device handle and or partition ID with error message VERR_NEM_VM_CREATE_FAILED, follow the solutions mentioned below.
- Disable Hyper-V via BCDEDIT
- Turn off Windows virtualization features
- Disable Memory Integrity and Credential Guard
- Start or reinstall the VirtualBox Kernel Driver (vboxdrv)
- Run VirtualBox as Administrator and match the target disk ID
Let us discuss them in detail.
1] Disable Hyper‑V via BCDEDIT
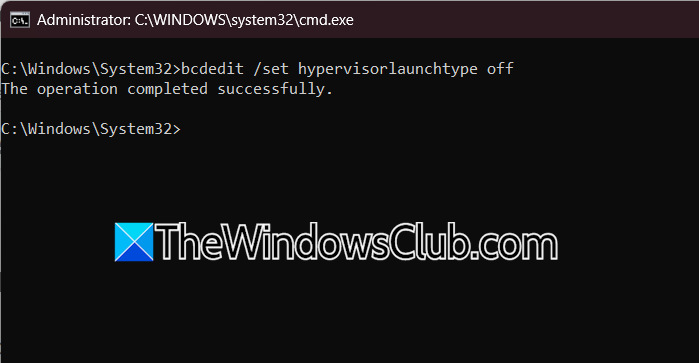
We need to run a command to prevent the Windows Hypervisor from loading at boot and return full control of VT-x/AMD-V to VirtualBox. By disabling a competing hypervisor, VirtualBox can obtain the device handle directly.
To do so, open Command Prompt as an administrator and run the following command to turn off Hyper-V.
bcdedit /set hypervisorlaunchtype off
Now, reboot your computer.
To re‑enable Hyper‑V later, run bcdedit /set hypervisorlaunchtype auto and reboot.
Read: How to run Hyper-V, VirtualBox and VMware on same computer
2] Turn off Windows virtualization features

Windows features like Virtual Machine Platform and Windows Hypervisor Platform keep the hypervisor running even when no VM is active. Hence, removing them stops the hypervisor service and releases the CPU extensions.
To do so, follow the steps mentioned below.
- Open Control Panel.
- Go to Programs > Turn Windows features on or off.
- Now, uncheck these items:
- Hyper-V, Virtual Machine Platform,
- Windows Hypervisor Platform,
- Windows Sandbox,
- Windows Subsystem for Linux (if it uses WSL2)
- Click OK and reboot your computer.
If WSL2 is required, re‑enable only it after the reboot and accept the prompt to install the updated WSL2 kernel; do not re‑enable other Hyper‑V components.
3] Disable Memory Integrity and Credential Guard
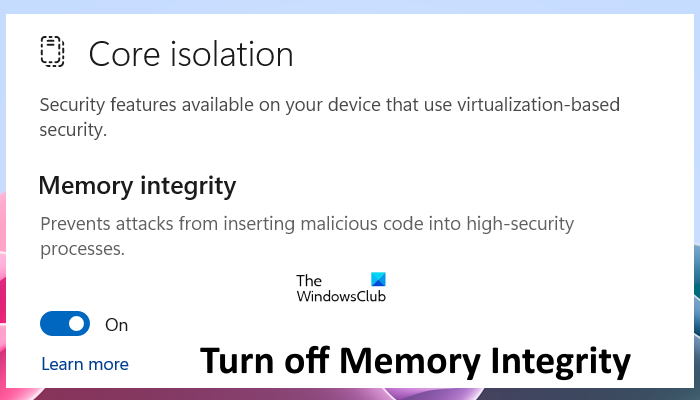
Memory Integrity (part of Core Isolation) and Credential Guard rely on virtualization‑based security, which in turn occupies the hypervisor. By turning them off, we can free the hardware, so VirtualBox can operate directly.
To do so, open Windows Security, go to Device security > Core isolation details. Now, turn off the Memory integrity toggle and restart.
If Credential Guard is active, disable it via Group Policy; open gpedit.msc (Local Group Policy Editor), navigate to:
Computer Configuration > Administrative Templates > System > Device Guard
Here set Turn on Virtualization Based Security to Disabled, click OK, and reboot.
For Windows Home editions, open the Registry Editor and set the following key to 0 and restart:
HKEY_LOCAL_MACHINE\SYSTEM\CurrentControlSet\Control\DeviceGuard\EnableVirtualizationBasedSecurity
Finally, check if the issue is resolved.
4] Start or reinstall the VirtualBox Kernel Driver (vboxdrv)
If the Windows Hypervisor is disabled but VirtualBox still cannot grab the device handle, the low-level vboxdrv driver may be stopped or blocked by Windows Security.
To force-start the driver, open Command Prompt as Administrator and type the following command and press Enter.
sc start vboxdrv
If it returns an error or fails to start, navigate to C:\Program Files\Oracle\VirtualBox\drivers\vboxdrv\ in File Explorer. Right-click VBoxDrv.inf and select Install. Once complete, restart your PC and try launching the VM again.
5] Run VirtualBox as Administrator and match the target disk ID
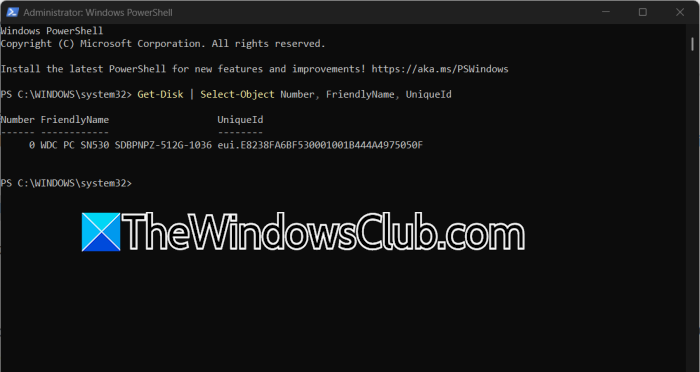
When attaching a physical disk as a raw VMDK, Windows keeps the disk online and locked by default. Additionally, Disk Management does not display unique Partition GUIDs or Disk IDs. To identify the right disk and release the lock, we first need to identify the unique ID. So, press Win + X and select Terminal (Admin) or PowerShell (Admin). Then, run the following command to view all connected disks and their unique IDs.
Get-Disk | Select-Object Number, FriendlyName, UniqueId
Run this command to map the exact Partition ID / GUID from your error message to a disk number.
Get-Partition | Select-Object DiskNumber, PartitionNumber, DriveLetter, Guid
Note the DiskNumber associated with the failing Partition ID. Now, open Disk Management (diskmgmt.msc) and locate that specific Disk number in the lower pane, right-click the disk header on the left, and select Offline. Close Disk Management, right-click the VirtualBox shortcut, and select Run as administrator. Start your VM. If Windows requires access to that physical disk again later, open Disk Management, right-click the disk, and select Online.
How to fix error 0x80004005 in VirtualBox?
Error 0x80004005 usually points to a conflict with Windows Hyper-V, active Core Isolation, or missing VirtualBox kernel driver permissions. To resolve it, disable Hyper-V by running bcdedit /set hypervisorlaunchtype off in an elevated Command Prompt and turn off Memory Integrity in Windows Security. Additionally, ensure hardware virtualization (VT-x/AMD-V) is enabled in your system’s BIOS settings and launch VirtualBox as an administrator.
How do I fix VirtualBox not in a Hypervisor partition?
This error indicates that VirtualBox is trying to launch while the Windows hypervisor engine is actively holding onto the CPU’s virtualization extensions. You can fix this by unchecking Hyper-V and Virtual Machine Platform under Turn Windows features on or off in the Control Panel, then rebooting your system. If the issue persists, run Command Prompt as Administrator, execute bcdedit /set hypervisorlaunchtype off, and perform a full system restart to release the processor hardware back to VirtualBox.
