
Microsoft iSCSI Initiator is commonly used in enterprise environments to access storage hosted on a Storage Area Network (SAN), an iSCSI-enabled Network Attached Storage (NAS) device, or a Windows Server configured as an iSCSI target. The tool is built into Windows 11, but it requires the Microsoft iSCSI Initiator Service to be running before you can connect to an iSCSI target. In this post, we will show you how to enable and use Microsoft iSCSI Initiator in Windows 11.
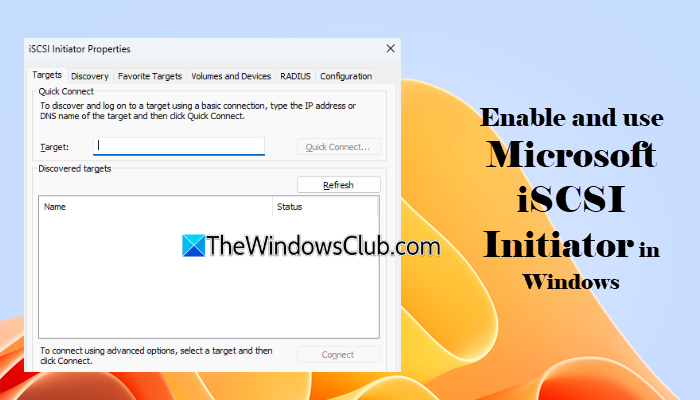
What is the iSCSI initiator in Windows?
Microsoft iSCSI Initiator is a built-in Windows client that connects to iSCSI (Internet Small Computer Systems Interface) storage targets over a TCP/IP network. Instead of connecting storage through SATA, USB, or Fibre Channel, it sends SCSI commands over Ethernet, allowing remote disks to appear and function like locally attached drives. Once connected, Windows detects the remote storage as a standard disk, allowing you to initialize, partition, format, and use it like any other physical drive.
How to enable and use Microsoft iSCSI Initiator in Windows 11
To enable and use Microsoft iSCSI Initiator in Windows 11, follow these steps:
- Launch Microsoft iSCSI Initiator
- Start the Microsoft iSCSI Initiator Service
- Discover the iSCSI target
- Connect to the iSCSI target
- Initialize and format the iSCSI disk
- Disconnect an iSCSI target
Let us see these steps in detail.
1] Launch Microsoft iSCSI Initiator
To open Microsoft iSCSI Initiator, type iSCSI Initiator in the Windows Search box and select the app from the search results.
Alternatively, press Win + R, type iscsicpl.exe in the Run dialog, and press Enter.
2] Start the Microsoft iSCSI Initiator Service
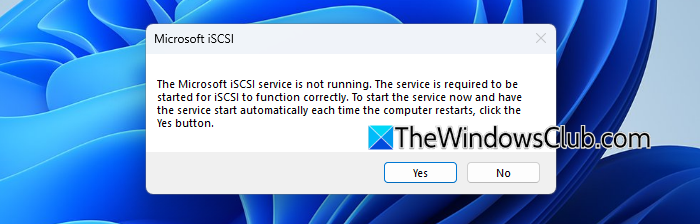
The Microsoft iSCSI Initiator service is usually set to Manual by default. The first time you launch the tool, Windows asks whether you want to start the service through the following prompt:
The Microsoft iSCSI service is not running. The service is required to be started for iSCSI to function correctly. To start the service now and have the service start automatically each time the computer restarts, click the Yes button.
Click Yes. Windows starts the service and changes its startup type so that it starts automatically whenever Windows boots.
You can also verify the service manually:
- Press Win + R, type services.msc, and press Enter.
- Locate Microsoft iSCSI Initiator Service.
- Make sure its Status is Running.
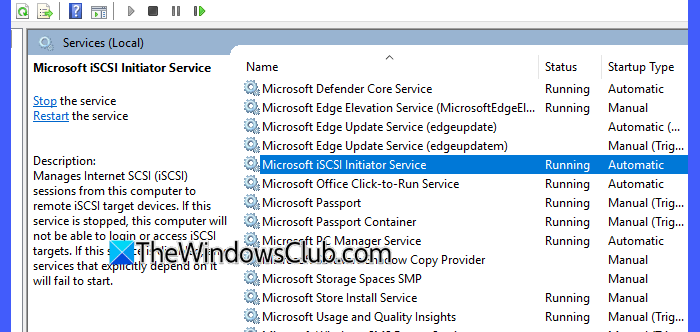
If the Microsoft iSCSI service isn’t running, double-click it. In the Microsoft iSCSI Initiator Service Properties window, set Startup type to Automatic and click Start. Then click Apply > OK.
3] Discover the iSCSI target
Once the service starts, the iSCSI Initiator Properties window opens.
Select the Discovery tab and click Discover Portal. Enter the IP address or DNS name of your iSCSI target in the Discover Target Portal window. If your storage server uses the default iSCSI port (3260), leave the port unchanged.
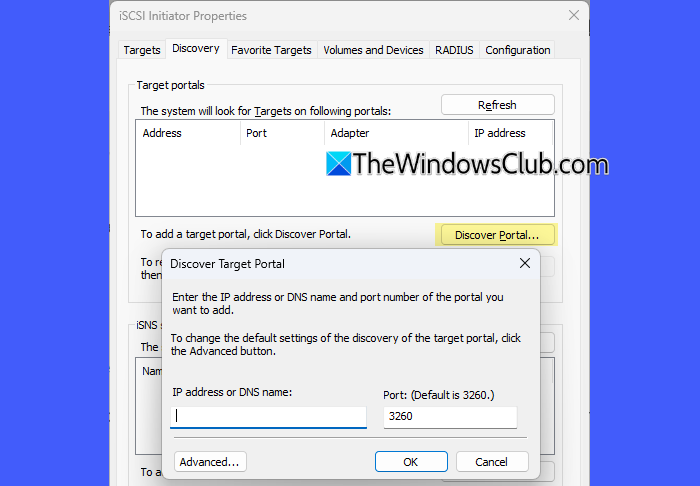
Click OK. Windows will search for available iSCSI targets on the specified server.
Note: If you already know the IP address or DNS name of the target, you can also use the Quick Connect option on the Targets tab to establish a basic connection.
4] Connect to the iSCSI target
Open the Targets tab. If Windows successfully discovers the storage server, the iSCSI target appears with an Inactive status. Select the target and click Connect.
If you want Windows to reconnect automatically whenever the computer starts, select Add this connection to the list of Favorite Targets in the Connect To Target window. Click OK.
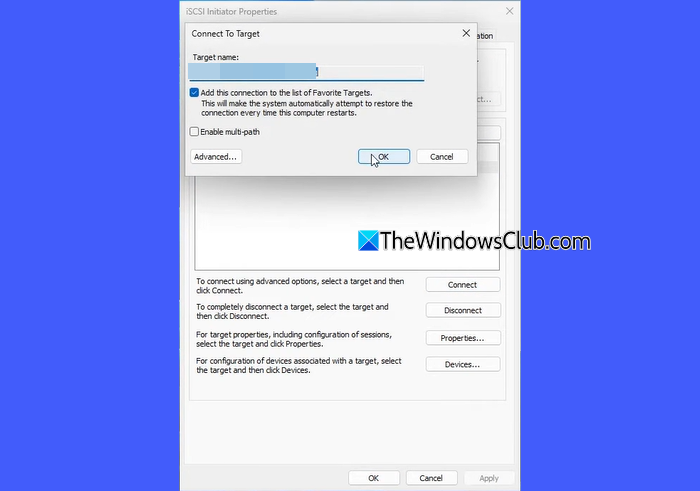
The target status should now change to Connected. Click Done.
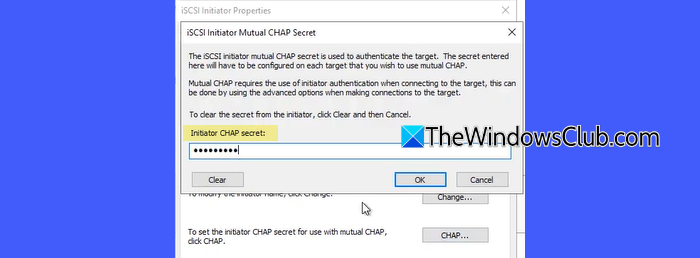
Note: Some iSCSI targets require CHAP (Challenge-Handshake Authentication Protocol) authentication to prevent unauthorized access. If your storage administrator has enabled CHAP, enter the secret provided before connecting.
5] Initialize and format the iSCSI disk
After the connection is established, Windows detects the iSCSI storage as a new disk. Press Win + X and select Disk Management.
If prompted, initialize the newly connected iSCSI disk. GPT (GUID Partition Table) is the recommended partition style for Windows 11 and most modern Windows Server deployments. Choose MBR (Master Boot Record) only if you need compatibility with older systems that do not support GPT.
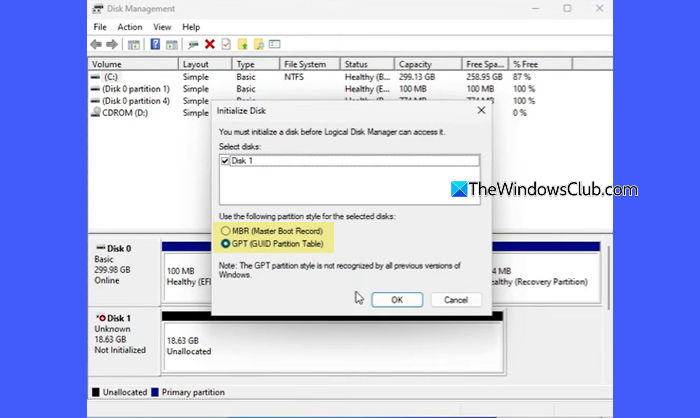
Click OK. Then right-click the unallocated space and select New Simple Volume.
Follow the New Simple Volume wizard to specify the volume size, assign a drive letter, and format the partition using NTFS or ReFS (if supported).
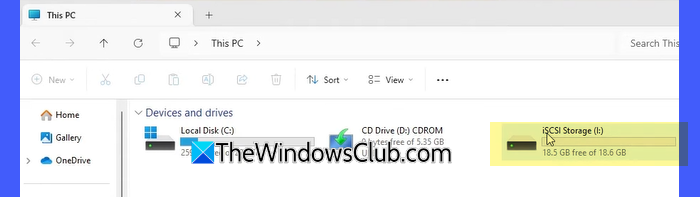
Click Finish. After formatting is complete, the iSCSI storage appears in File Explorer and can be used like any other local drive.
Note:
- If you’re using Microsoft iSCSI Initiator on Windows Server, you can also initialize and manage the connected disk through Server Manager > File and Storage Services > Disks.
- To make the drive easier to identify, you may enter a descriptive volume label (right-click> Properties).
Read: How to install and use iSCSI Target to configure Storage Server
6] Disconnect an iSCSI target
If you no longer need the connection, open iSCSI Initiator and select the Targets tab. Choose the connected target and click Disconnect.
Confirm the action.
The storage will remain unavailable until you reconnect to the target.
I hope you find this useful.
Read: Windows Remote Access Service (RAS) has encountered an error.
Does Windows 11 support iSCSI?
Microsoft iSCSI Initiator is built into the x64 editions of Windows 11, including Home, Pro, Enterprise, and Education editions. You don’t need to download or install it separately. However, Windows 11 on ARM does not currently include the Microsoft iSCSI Initiator.
Read Next: iSCSI Initiator Service fails to start – Access is denied.
