
When managing storage in Hyper-V, admins often overlook the Hyper-V Differencing Disk. It helps one create a parent-child relationship between their virtual disk, allowing changes that are made to the data or the OS to be written to the child, leaving the parent disk untouched. In this post, we will talk more about it and see how we can use Hyper-V differencing disks for VM deployment.
Use Hyper-V Differencing Disks for VM Deployment
A Hyper-V differencing disk is a child disk that stores changes made to a parent virtual hard disk. The parent disk stays unchanged, while all new data and OS changes go to the child disk. To use one, create a differencing disk and choose its parent disk. One parent can have many child disks, and a child can also be a parent for another child, forming a chain. Keep all older disks in the chain locked and leave only the newest child disk unlocked, so changes do not cause chain failure or data loss. The child disk grows dynamically as you add data, up to the parent disk’s maximum size.
To check a differencing disk’s parent, open Hyper-V Manager, choose Inspect Disk, select the differencing disk, and click Inspect Parent. To merge a differencing disk, choose whether to merge it into the parent disk or into a new virtual disk. If you merge into the parent, the child disk is destroyed after the merge. If you merge into a new disk, both the parent and child stay as they are, and the new disk combines their data.
To use Hyper-V Differencing Disks for VM Deployment, follow the steps mentioned below.
- Create the parent VM and install the OS
- Generalize the OS and make the parent disk read-only
- Create the Differencing Disk
- Create a VM that uses the differencing disk
Let us talk about them in detail.
1] Create the parent VM and install the OS
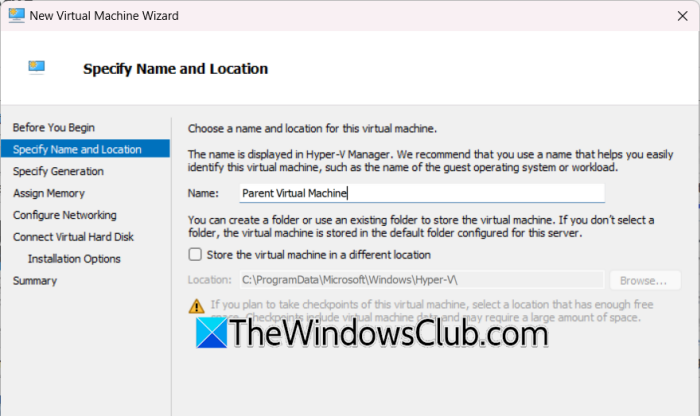
Let us start by building the virtual machine that holds our parent disk. To do so, follow the steps mentioned below.
- Open the Hyper-V Manager.
- In the Actions tab, go to New > Virtual Machine.
- We need to complete the New Virtual Machine Wizard.
- Give the VM a name and location.
- Choose the VM generation.
- Set the startup memory.
- Choose a virtual switch for networking.
- In the Connect Virtual Hard Disk section, select Create a virtual hard disk.
- Finish the wizard.
- Start the new VM, open Virtual Machine Connection, and install the operating system.
This VM and its disk will become the base image for your differencing disks.
2] Generalize the OS and make the parent disk read-only
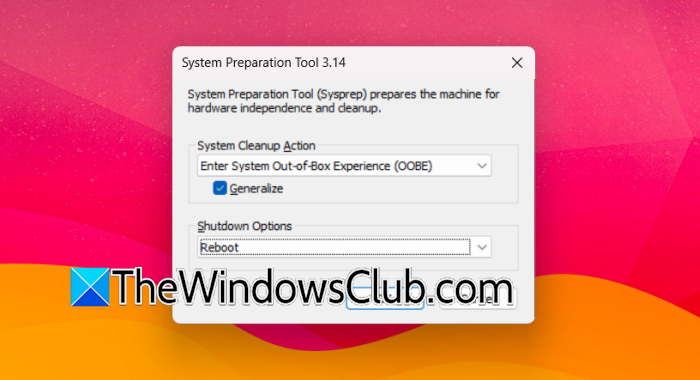
Next, clean the operating system so it can be reused, then protect the parent disk from changes.
- Start the virtual machine and open Run
- Paste %WINDIR%\system32\sysprep\sysprep.exe and click OK.
- Check the Generalize box,
- Set Shutdown Options to Restart.
- Click OK and let the VM restart.
- Find the parent VHD or VHDX file on your computer.
- Right-click the file, choose Properties, check Read-only, and click OK.
Making the parent disk read-only stops new changes from being written to it. The child disk will hold those changes instead.
Read: How to Shrink and Compact Virtual Hard Disks in Hyper-V
3] Create the Differencing Disk
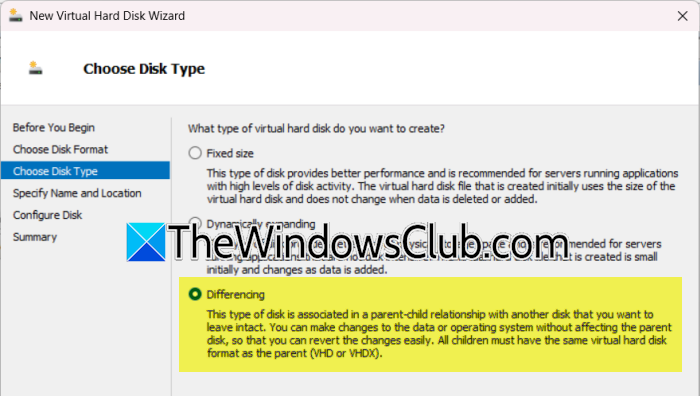
Now that we have configured the parent disk, let us create the differencing disk, or the child disk, to store changes separately from the parent. Follow the steps mentioned below to do the same.
- Open Hyper-V Manager.
- In the Actions pane, click New > Hard Disk.
- In the New Virtual Hard Disk Wizard, go through the Before you Begin page.
- In the Choose Disk Format, select the same format as the parent disk, such as VHDX.
- In the Choose Disk Type, click on Differencing.
- Enter a name and location for the new disk.
- In the Configure Disk section, choose the parent disk you prepared.
- Review the Summary page and click Finish.
Finally, check the folder where you saved the disk to confirm it was created. Each differencing disk should have only one parent. If you need several VMs, create a separate child disk for each VM from the same read-only parent.
Read: How to create a Virtual Hard Disk on Windows 11
4] Create a VM that uses the differencing disk
Finally, build a virtual machine that boots from the differencing disk instead of the parent disk. Go through the steps mentioned below to do the same.
- Open Hyper-V Manager and go to New > Virtual Machine.
- Configure the VM name, generation, memory, and networking as needed.
- In the Connect Virtual Hard Disk section, choose Use an existing virtual hard disk.
- Select the differencing disk you created in Step 3.
- Review the Summary page and click Finish.
- Start the VM and complete any remaining setup.
Repeat Step 3 for each VM that needs its own writable child disk, then attach that disk in Step 4. This approach saves storage space and makes it easy to isolate changes, test updates, or roll back work without altering the original parent disk.
Read: How to install Hyper-V in Windows Server
How do you add a disk to a Hyper-V VM?
Shut down the virtual machine, right-click it in Hyper-V Manager, and open Settings. Under SCSI Controller, select Hard Drive and click Add. Choose to create a new virtual hard disk or attach an existing one, then set its size and location. Start the VM and open Disk Management inside the guest OS to initialize the new disk. Format it and assign a drive letter before use.
Read: Enable or Disable Nested Virtualization for VMs in Hyper-V
What are the best practices for backing up Hyper-V VMs?
Always use a backup solution that leverages the Hyper-V VSS Writer, such as Windows Server Backup or a Hyper-V–aware third-party tool, rather than simply copying VM folders. For critical workloads, combine host-level backups for fast full-VM recovery with guest-level backups for application-consistent data and granular restores. Test restores regularly to confirm recovery objectives are met, and keep multiple backup copies, including one offsite.
Also Read: Improve and optimize Hyper-V VM Performance.
