
When trying to copy or export a VHDX or Hyper-V file, you may encounter an error saying An error occurred when attempting to export the virtual machine. This error can happen for many reasons, which we explain in detail in this guide.
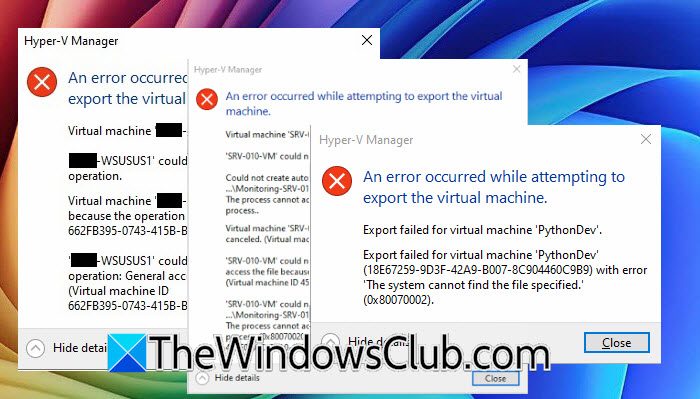
An error occurred while attempting to export the virtual machine. Export failed for virtual machine ‘VMNAME’.
(18E67259-9D3F-42A9-B007-8C904460C9B9) with error ‘The system cannot find the file specified.’ (0x80070002).
What causes Hyper-V export error?
Depending on the error message you get, several reasons could prevent Hyper-V from exporting the virtual machine. Common causes include insufficient permissions to access the required file, a broken checkpoint, an incomplete link to its parent virtual hard disk, a firewall blocking the export, or bad sectors on the drive that contains the virtual machine files. If you get a General access denied error (0x80070005), the issue may be related to permissions on the virtual machine’s files. Hyper-V uses a special NT VIRTUAL MACHINE<VM-ID> security principal for each virtual machine, and giving your administrator account permission or adding it to the Hyper-V Administrators group may not fix this file-level permission issue.
Hyper-V error occurred while attempting to export the virtual machine
If you get this error while exporting a virtual machine in Hyper-V, follow the solutions below.
- Give the VM access to its files
- Check Hyper-V checkpoints
- Remove the checkpoints
- Temporarily disable security software
- Run CHKDSK
Let us talk about them in detail
1] Give the VM access to its files
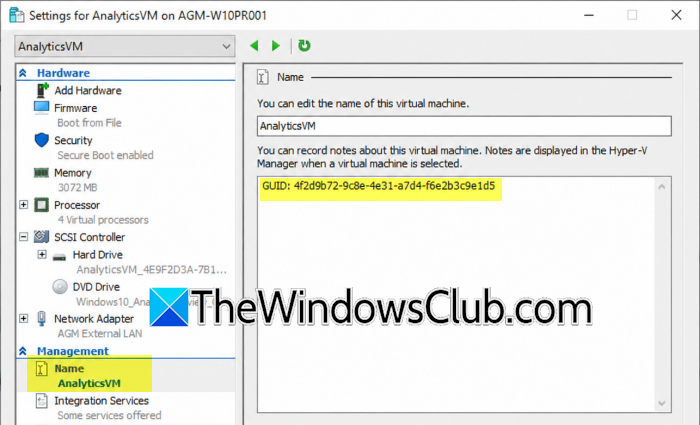
If the error message includes a General access denied error (0x80070005), you should first check the permissions assigned to the virtual machine’s files.
Hyper-V needs permission to access the VM’s files during the export operation. In some cases, the administrator account can access the Hyper-V folders normally, but the VM’s security principal lacks the required permissions.
To fix this, you need the VM’s ID. Open Hyper-V Manager, right-click on the virtual machine, select Names, and then look for the GUID.
662FB395-0743-415B-BB00-84E6DACF1758
This GUID is the VM’s ID.
Now, open Command Prompt as administrator and run the following command.
icacls "D:\Hyper-V\Virtual Machines\VM-ID" /grant "NT VIRTUAL MACHINE\VM-ID":(F) /T
Replace the folder path and VM-ID with the values from your computer.
For example: icacls “D:\Hyper-V\Virtual Machines\662FB395-0743-415B-BB00-84E6DACF1758” /grant “NT VIRTUAL MACHINE\662FB395-0743-415B-BB00-84E6DACF1758”:(F) /T
If the VHDX files are stored in a different folder, apply the required permission to that folder as well. Once done, try exporting the virtual machine again.
2] Check Hyper-V checkpoints
If the permission fix does not work, check whether the virtual machine has any checkpoints. To do so, open Hyper-V Manager, select the affected virtual machine, and look under the Checkpoints section.
When a checkpoint exists, Hyper-V uses an .avhdx differencing disk along with the original .vhdx file. The AVHDX file depends on its parent disk, so the checkpoint chain needs to remain intact.
If one of the AVHDX files is missing or its relationship with the parent disk is damaged, Hyper-V may be unable to copy the virtual disk during the export operation.
You should therefore check that the checkpoint files and their parent VHDX files are still present on the drive.
3] Remove the checkpoints
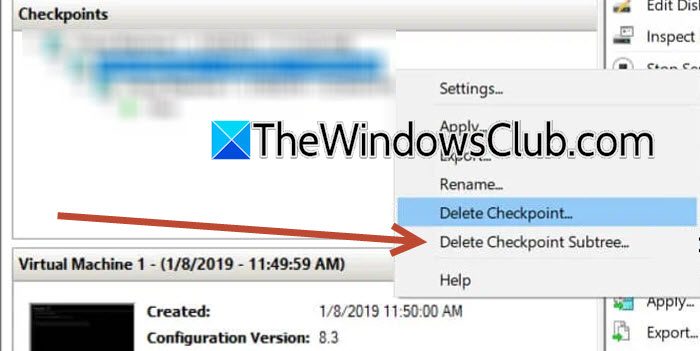
If you do not need the existing checkpoints, try removing them before exporting the virtual machine. Open Hyper-V Manager, select the virtual machine, right-click the checkpoint, and select Delete Checkpoint. If you have multiple checkpoints, remove the ones you no longer need. Hyper-V will merge the checkpoint data back into the virtual disk. Depending on the disk size and how much data needs to be merged, this can take some time. Do not manually delete .avhdx files from File Explorer. They are part of the virtual disk chain, and deleting one directly can make the virtual machine unusable. Once the checkpoint merge has completed, try exporting the VM again.
4] Temporarily disable security software
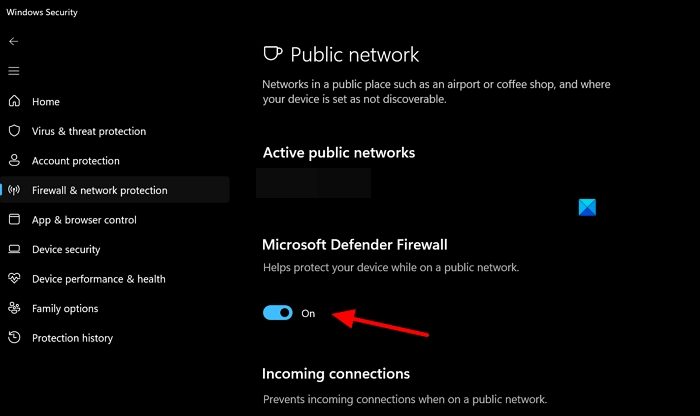
If the virtual machine files and checkpoints are fine, check whether antivirus software or Windows Firewall is interfering with the export operation. You can temporarily disable your third-party antivirus program and Windows Firewall and then try exporting the virtual machine again. If the export succeeds, your security software may be preventing Hyper-V from accessing or copying a VM file. In that case, turn the security software back on and check its settings for an appropriate Hyper-V exclusion rather than leaving it disabled.
Read: How to improve and optimize Hyper-V VM Performance
5] Run CHKDSK
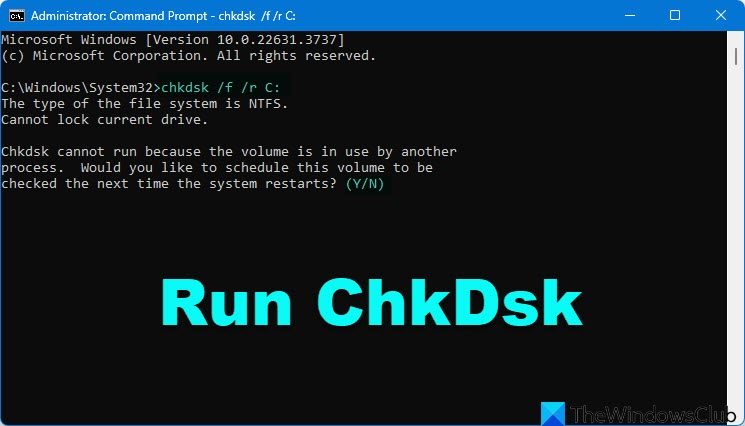
If you still can’t copy the VHDX file after shutting down the VM and checking its checkpoints, the issue may be with the drive where the virtual hard disk is stored.
Open Command Prompt as administrator and run the following command.
chkdsk /f /r C:
Replace C: with the drive letter containing your Hyper-V virtual machine files.
The /f parameter tells CHKDSK to fix file system errors, while /r looks for bad sectors and attempts to recover readable information.
After the scan is complete, try exporting the virtual machine again.
If the VHDX still cannot be copied, you can also start Windows in Safe Mode and try copying the file. This can help determine whether another application or service is interfering with access to the virtual disk. Both Safe Mode and a full chkdsk /f /r scan were suggested in the Microsoft Q&A discussion for VHDX transfer problems.
That’s it!
Read: How to import, export, or clone Virtual Machines in Hyper-V
Can checkpoints prevent Hyper-V from exporting virtual machines?
Yes, a checkpoint can prevent Hyper-V from exporting a virtual machine if its associated AVHDX differencing disk or parent VHDX is missing, damaged, or inaccessible. Hyper-V relies on the checkpoint chain when working with the VM’s virtual disks. If you no longer need the checkpoints, remove them from Hyper-V Manager and allow the merge operation to finish completely. Do not manually delete AVHDX files, as doing so can break the virtual disk chain.
Also Read:Hyper-V encountered error while loading virtual machine configuration.
