
If you are unable to specify pages to print in Excel, here is what you can do to fix the issue. From an incorrect sheet selection to page breaks, anything could be responsible for this problem. That is why we have consolidated some of the most common causes along with solutions to troubleshoot this problem in Windows 11.
Why are you unable to specify pages to print in Excel?
If you are unable to specify pages to print in Excel, one of these could be the reason:
- There are some issues with your printer, and it is not allowing you to select a printer.
- You have set incorrect settings for printing a spreadsheet.
- Your spreadsheet doesn’t have multiple pages; everything is visible on a single page.
- You have already selected a print area.
- The wrong scaling setting is selected in the Page Setup menu.
There could be other reasons. However, these are some of the most common causes so far.
Unable to specify pages to print in Excel
If you are unable to specify pages to print in Excel, follow these instructions:
- Ensure no selection is enabled
- Change scaling settings
- Check Page breaks
- Select an actual printer
- Choose the Print Entire Workbook option
- Remove protection
- Disable Draft quality
- Check Page Setup setting
- Repair Microsoft 365
To learn more about these solutions, continue reading.
1] Ensure no selection is enabled
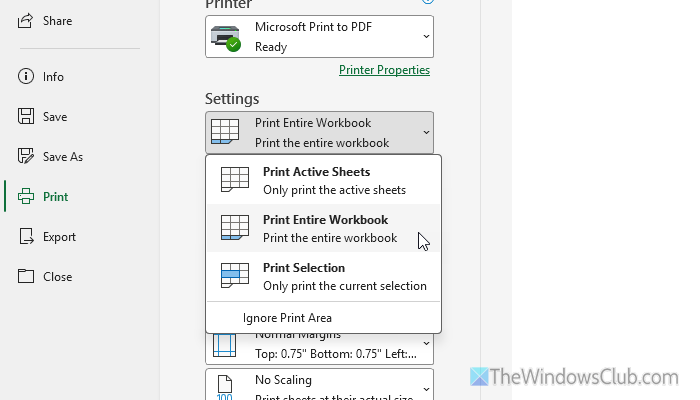
It is the very first thing you must check when you are unable to select pages to print in Excel. If you have already selected a certain part in your spreadsheet and choose the Print Selection option, it will print only the selected part. To get rid of this problem, you will have to opt for the Print Active Sheets option.
For that, press Ctrl+P after opening the spreadsheet, and head to the first drop-down menu under Settings. From here, select the Print Active Sheets option.
2] Change scaling settings
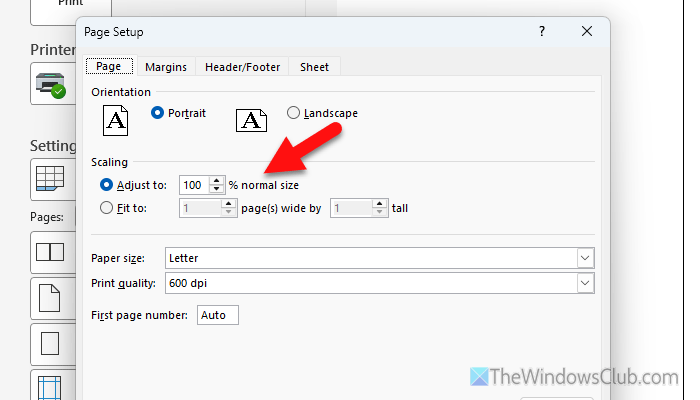
You can select how many cells to display on a page. If you are unable to select a specific page, the scaling may be set to an incorrect option. For that, open the spreadsheet and go to the Page Layout tab. Click on the small arrow icon of the Page Setup menu.
Head to the Scaling option and choose the Adjust to 100% option. If it is set to anything else, select 100% and click the OK button to save the change.
Read: How to change Scaling for Specific Apps in Windows 11
3] Check Page breaks
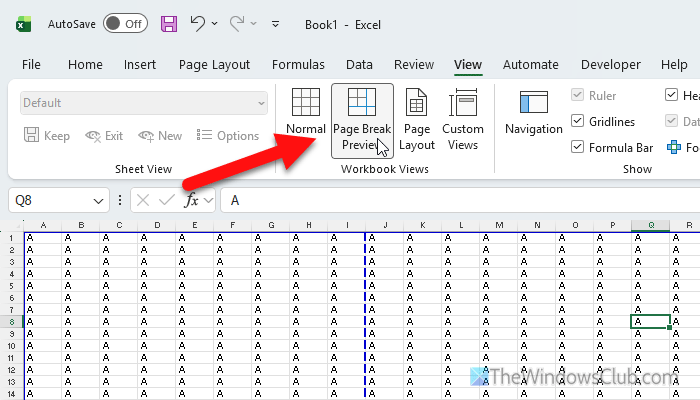
Whenever you create a large spreadsheet, Excel splits it into multiple pages so you can organize it for printing. It is called Page Break. If there are some issues with the Page Break, you won’t be able to specify pages. That is why it is recommended to check the preview before printing the spreadsheet.
For that, open the spreadsheet, go to the View tab, and click on the Page Break Preview option.
Read: How to Insert, Move or Delete Page Breaks in an Excel Worksheet
4] Select an actual printer
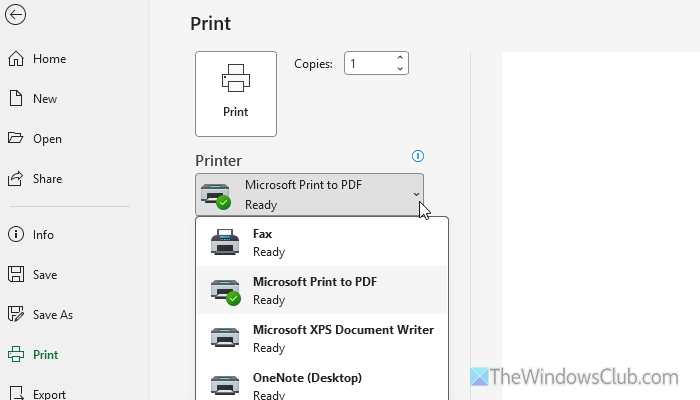
If you have multiple printers, there is a chance of having a mess while printing an Excel spreadsheet. That is why it is recommended to check the settings after selecting an actual print. Do not select the Microsoft Print to PDF printer, as it is not an actual printer; it only helps you create a PDF.
To select an actual printer, go to the Print menu and expand the Printer drop-down list. Then, choose the printer that you use to print documents.
Read: How to set the Default Printer in Windows 11
5] Choose the Print Entire Workbook option
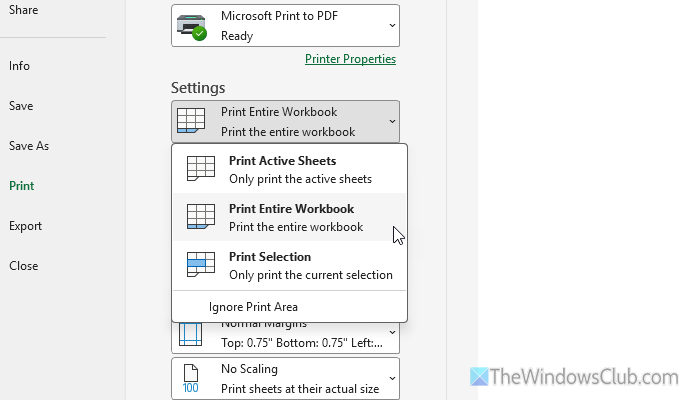
If you choose the Print Selection option, page selection won’t work. To make it work, you must opt for the Print Entire Workbook option. To verify that setting, open the Print menu, head to the first drop-down menu under Settings, and choose the Print Entire Workbook option. Then, you will be able to select which pages you want to print.
Read: How to set Print Area in Google Sheets
6] Remove protection
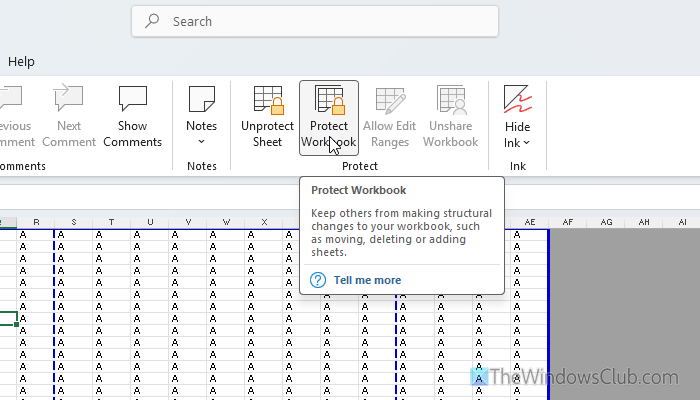
Although it should not be an issue, it is suggested to remove the encryption before trying to print a spreadsheet. To remove the protection, go to the Review tab, click on the Protect Workbook option, enter your password, and click the OK button.
Next, click on the Unprotect Sheet option, enter the password, and click the OK button.
Read: How to remove Password from Excel
7] Disable Draft quality
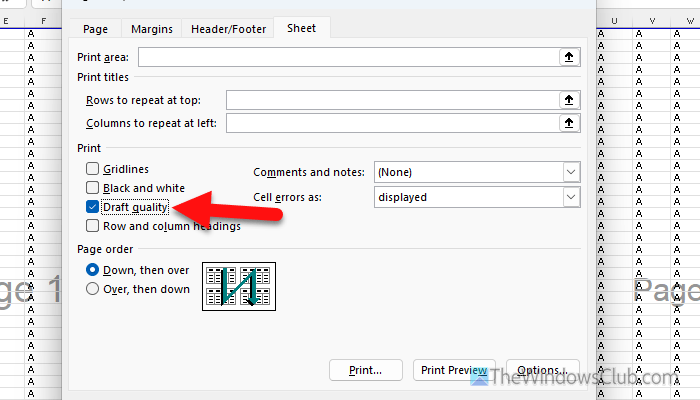
If the Draft quality option is selected, this problem could arise. That is why it is suggested to disable the Draft quality option in Excel. For that, open the spreadsheet, go to the Page Layout tab, and click on the small arrow icon of the Page Setup section.
Then, switch to the Sheet tab and remove the tick from the draft quality checkbox. Finally, click the OK button.
Read: Printer only printing Half Page
8] Check Page Setup setting
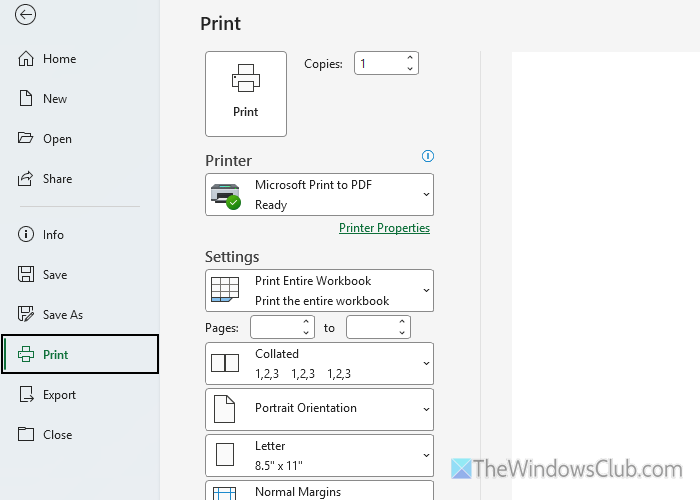
Here is an ideal setting that you can follow to print a spreadsheet:
- Print Entire Workbook
- Choose the pages accordingly.
- Portrait Orientation
- Letter/A4 size
- Normal Margins
- No Scaling
You can find these settings if you press Ctrl+P or go to File > Print after opening a spreadsheet.
Read: How to change Print Page setup in Microsoft Edge
9] Repair Microsoft 365
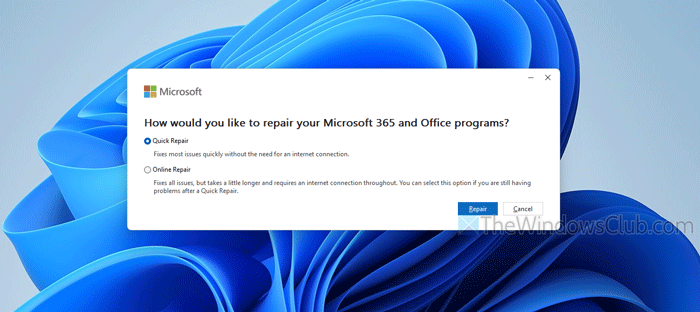
To repair Microsoft 365, open Windows Settings and go to Apps > Installed apps. Then, find Microsoft 365 > click on the three-dotted icon and select Modify.
Choose the Quick Repair option. However, if it doesn’t work, choose the Online Repair option and click the Repair button. For your information, the second option requires a valid internet connection and takes longer than the first.
Read: Not enough memory to run Microsoft Excel
Why is Excel not letting me print?
If Excel is not letting you print, this could be the reason:
- You do not have a valid printer. For your information, Microsoft Print to PDF is not a valid printer. It helps you create a PDF only.
- You have selected an incorrect printing setting.
- There are some issues with Excel.
- Your printer driver is not working.
How do I select specific pages to print in Excel?
To select specific pages to print in Excel, press Ctrl+P first. Select the Print Selected option. Then, enter the page numbers in the Pages section. Finally, click the Print button.
Read: How to select a Row or Column as the Print Title of a Excel Report.
