Ultimate Performance Mode is a power plan in Windows, which is designed for Workstations and aims to optimize the performance of the operating system. While it is meant to improve performance, IMO, this is going to help a lot for gamers as well or anyone with any high-intensity task. In this guide, we will learn how to enable Ultimate Performance Power Plan in Windows 11/10.
Ultimate Performance Power Plan is available only with PCs with high-end configuration running directly on power, and there is no direct way to enable this for all PCs. That said, I will not still recommend this mode for Laptops as it will consume a lot of battery, but if you are sure you want it, you can use it for your best gaming experience.
Ultimate Performance Power Plan in Windows 11/10
Let’s try to understand why this mode was built. On Servers and Workstations where performance is a priority, Microsoft removed all the factors that ensured balanced power consumption or anything to keep the battery last long. Many times, companies need to get the job done and can sustain the cost of power consumption as the results are needed on time.
Microsoft built this mode so that it can help users get maximum performance from their hardware. By default, this mode is available on workstations only. This mode is not available on systems that use a battery. But using this hack you can enable it for all. But if you enable it on a device using Battery, the battery will be drained fast. You can enable it on your Desktop as well.
Enable Ultimate Performance Power Plan
Follow these steps to enable Ultimate Performance Power Plan in Windows 11/10. This mode will make applications perform faster. However, it will consume a lot of battery, and if you are on a laptop, make sure to keep it connected to the Mains.
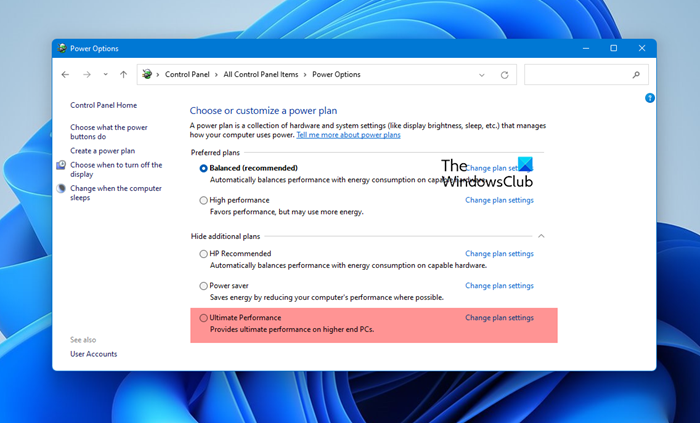
Open Settings >System > Power & sleep > Addtional Power Settings.
Under Choose to customize a power plan, expand the option which says “Unhide Additional plans.”
If you do not see Ultimate Performance Mode, then follow the next steps.
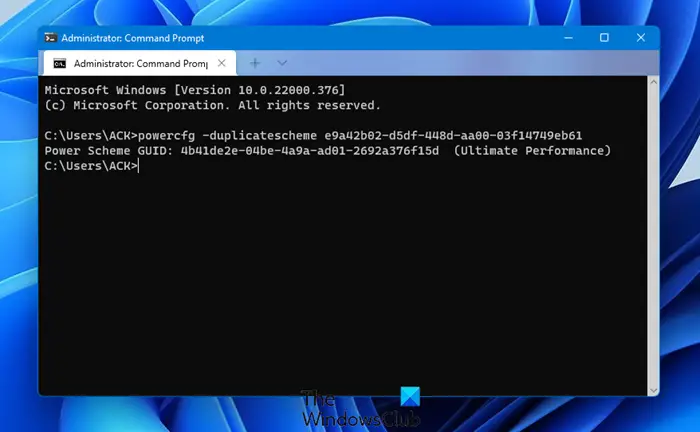
Open a Command Prompt as administrator.

In the command prompt, copy the following command, and hit Enter.
powercfg -duplicatescheme e9a42b02-d5df-448d-aa00-03f14749eb61
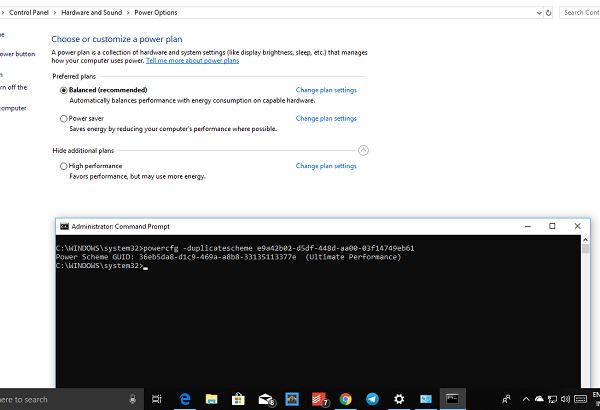
Minimize the command prompt, and Settings >System > Power & sleep > Addtional Power Settings.
Select Ultimate Performance Power Plan.
You can further customize the power plan.
The default modes in Windows 11/10 are Balanced, Power Saver, and High Performance. Ultimate Performance takes it one step ahead.
Highlights of Ultimate Performance Mode:
- Hard disk never goes to sleep
- Javascript timer frequency is at maximum.
- Hibernation and Sleep are turned off.
- Processor State, Colling Policy, maximum processor rate are maxed out.
Disable Ultimate Performance Mode
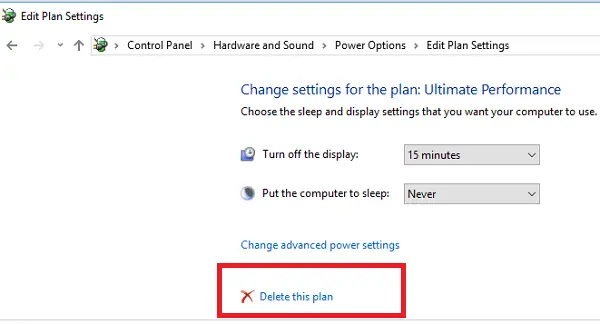
- Go back to Advanced Power Settings.
- Click on Change Plan Settings next to Ultimate Performance Mode.
- In the next window, you can choose to delete it.
So if you don’t see it enabled on your laptop after using this command, maybe your system does not support it.
If you have a PC that doesn’t use the battery, I will strongly suggest you use it when you are gaming, or when you are using a video editing software that needs a lot of CPU/GPU power to get the best result in a much shorter time.
How to enable Ultimate Performance in PowerShell?
To enable the ultimate performance power plan using PowerShell, open PowerShell as an administrator and execute the command: powercfg -duplicatescheme e9a42b02-d5df-448d-aa00-03f14749eb61. This activates the Ultimate Performance plan, enhancing PC performance by optimizing resource management. Afterward, navigate to Control Panel > Power Options to select it.