
If you are a VMware user on Windows 11, you might encounter an error stating that the VMSP service failed to start. The VMSP (VMware VMUSB Arbitrator Service) is crucial for managing USB devices connected to your virtual machines. When this service fails, your virtual machines may struggle to recognize or properly interact with USB drives, printers, or other peripherals, bringing your workflow to a halt. In this post, we will see how to resolve this issue.
The VMSP service failed to start due to the following error:
Insufficient system resources exist to complete the requested service.Source: Service Control Manager
Event ID: 7000
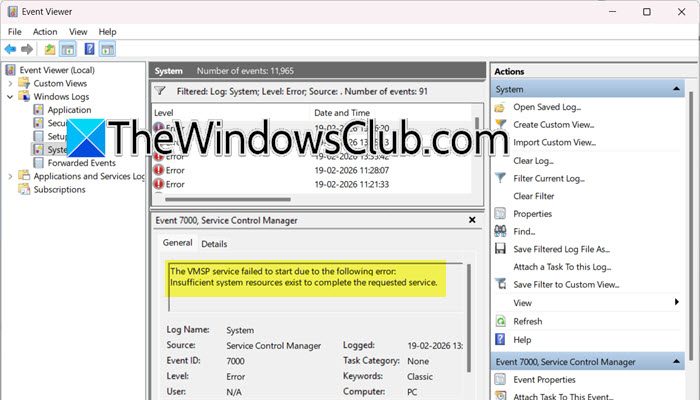
Fix The VMSP service failed to start on Windows 11
Event ID 7000 with the message Insufficient system resources exist to complete the requested service happens when the Windows Service Control Manager tries to start the VMSP service, but the operating system can’t provide the needed memory or resources. This situation usually occurs when the system’s non-paged pool memory is full, too many system handles are open, or another process is using all available resources, leaving none for the VMware service to start.
If the VMSP service fails to start, follow the steps below.
- Increase the Paged Pool Memory Limit
- Check the System Resources (RAM and Page File)
- Disable Memory Integrity/Core Isolation
- Repair VMware Installation
Let us talk about them in detail.
1] Increase the Paged Pool Memory Limit
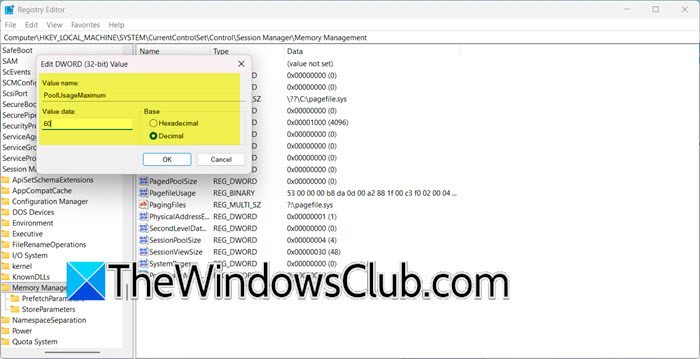
When Windows throws an insufficient system resources error, it often means the kernel’s memory pool is completely full and cannot handle any new requests. By setting the PoolUsageMaximum value to 60, you are telling the system to stop allocating memory from this pool once it hits 60% usage, effectively preventing it from ever becoming completely exhausted. This reserves a small buffer of resources so that critical services like VMSP have enough memory to start up properly.
Since we are going to make changes to the registry, create a backup of the registry.
Then, in the Registry Editor, go to the following location.
HKEY_LOCAL_MACHINE\SYSTEM\CurrentControlSet\Control\Session Manager\Memory Management
In the right-hand pane, look for a value named PoolUsageMaximum. If it exists, double-click it to edit. If it doesn’t exist, right-click on an empty area, select New > DWORD (32-bit) Value, and name it PoolUsageMaximum.
Double-click the newly created or existing value. Make sure the Base is set to Decimal, then enter 60 in the Value data field. Click OK.
Close the Registry Editor and restart your computer for the changes to take effect.
2] Check System Resources (RAM and Page File)
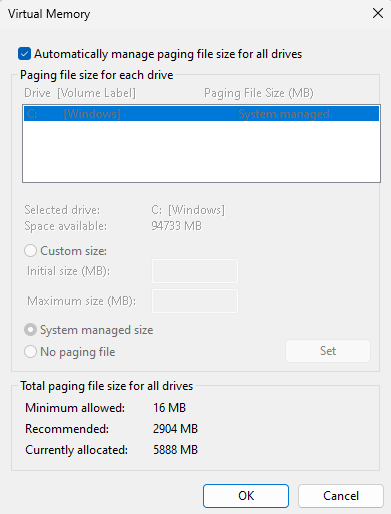
The system may genuinely be out of memory. If your physical RAM is nearly full and the page file is too small or disabled, services like VMSP cannot start.
So, open the Task Manager, check the Performance tab, and look at the Memory usage if it is consistently above 90%, close unnecessary applications.
Go to Settings > System > About > Advanced system settings. Under Performance, click Settings, go to the Advanced tab, and under Virtual memory, click Change. Ensure Automatically manage paging file size for all drives is checked. If not, select System managed size and click Set. Restart your PC.
3] Disable Memory Integrity/Core Isolation
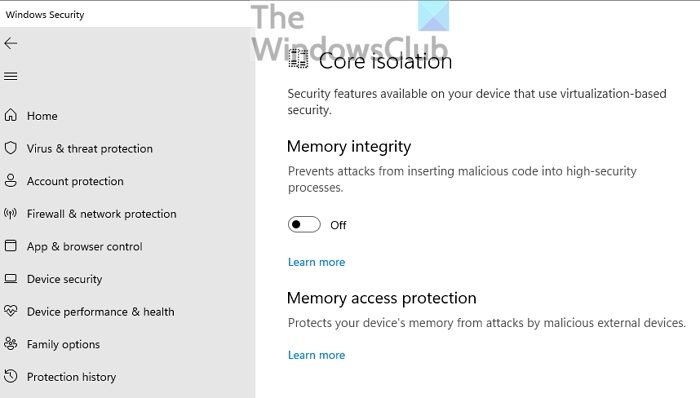
Windows 11 includes a security feature called Memory Integrity that protects your system by blocking untrusted code from accessing high-security memory areas. However, this feature can sometimes be too aggressive, blocking legitimate VMware services from accessing the memory pools they need to function. When this happens, Windows treats it as a resource access failure and displays the ‘insufficient system resources’ error, even though the issue is actually a security permission conflict rather than a true memory shortage. So, go ahead and disable Memory Integrity and see if the issue persists.
4] Repair VMware Installation
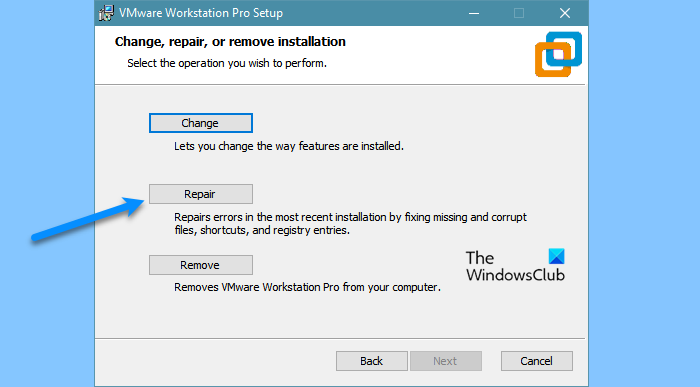
Sometimes the error message can be misleading. While Windows reports an insufficient system resources error, the actual problem could be that a corrupted or damaged VMSP service file is making improper requests to the system. When a service file is broken, it might request resources in a way Windows cannot process, leading to a failure that appears to be a resource shortage. Running the built-in repair tool scans all VMware components and replaces any corrupted files, restoring the service to a working state without requiring a full reinstall.
Follow the steps below to repair the VMware Installation.
- Open Settings by Win + I.
- Go to Apps > Installed apps.
- Look for VMware Workstation.
- Click on the three dots next to VMware Workstation and select Modify.
- When the installer wizard opens, look for the Repair option and select it.
- Follow the on-screen prompts to complete the repair process. This may take a few minutes.
- Once finished, restart your computer and check if the VMSP service starts correctly.
