If Task Manager is showing less cores or incorrect cores in Windows 11/10, here is how you can fix the problem. As there could be different reasons, we have listed some of the most common causes and solutions below, so that the original number of cores can be displayed.

What is “Core” in Task Manager?
A core denotes an individual processing unit to execute instructions or process independently. Whether you have a single-core or multi-core processor, Task Manager shows the number of cores and threads when you open the Performance tab and go to the CPU section.
Task Manager showing less cores in Windows 11
Follow these solutions if Task Manager is showing less cores in Windows 11/10:
- Check advanced boot configurations
- Check Hyper-Threading Technology settings
- Disable core parking
- Install and update chipset driver
- Tweak virtualization settings
- Check System Configuration
To learn more about these solutions, continue reading.
1] Check advanced boot configurations

The first solution involves checking the multi-core support in the BIOS. Every motherboard comes with an option to allow or block users from utilizing multiple cores. You need to check this setting by opening the BIOS.
For that, you need to open the BIOS and find the Multi-Processor settings or similar to that. For your information, this option is mainly placed in the Advanced settings panel.
Ensure that the Multi-Processor setting is turned on or enabled. If not, it is recommended to enable this setting.
2] Check Hyper-Threading Technology settings
In simple terms, Hyper-Threading lets you process a task by all the cores instead of using one core. However, some processors may not carry such settings due to a heavy workload. In such cases, you can try disabling Hyper-Threading.
To disable Hyper-Threading, you need to open the BIOS first. Then, go to the Processor or Processor Settings section. Here you can find the Hyper-Threading Technology setting.
You need to open the settings and choose the Disabled option.
3] Disable core parking
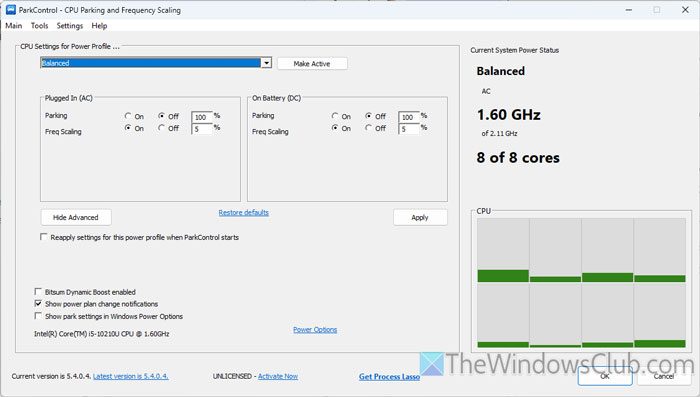
Core parking lets you keep a core stay in ideal condition. If you use such an app to enable core parking, you may encounter the same issue mentioned above. Therefore, it is highly recommended to check the tool you have been using for this purpose.
However, if you use ParkControl and you want to disable core parking, you need to open the wizard and choose the Balanced profile.
Alternatively, check the Parking setting and ensure it is set to OFF.
4] Install and update chipset driver
To install the chipset driver, it is highly recommended to download it from the official website of your motherboard manufacturer.
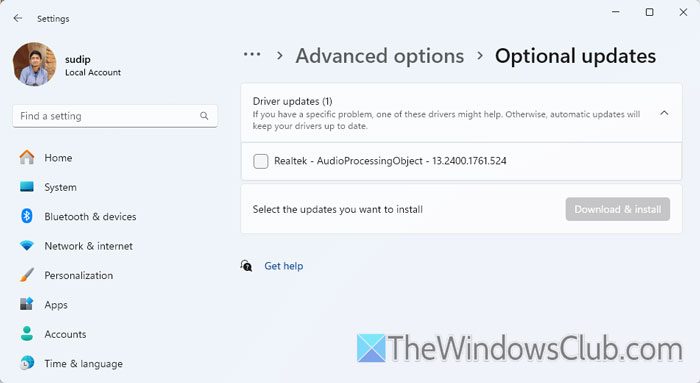
On the other hand, you can follow these steps to update the chipset driver:
- Open Windows Settings and go to Windows Update.
- Go to Advanced options > Optional updates > Driver updates.
- Select the update and click on Download & install.
You may have to restart the computer if needed.
5] Tweak virtualization settings
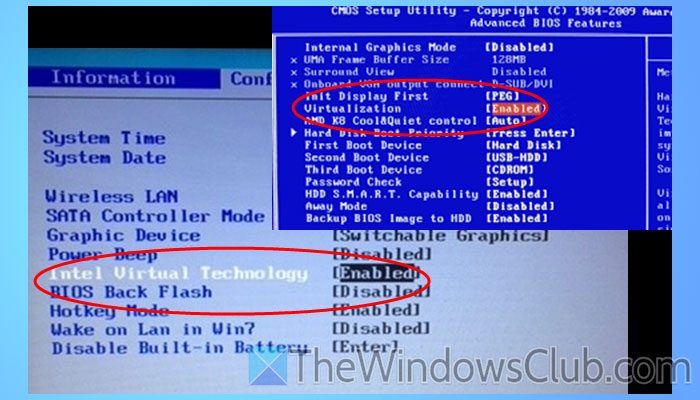
If virtualization is enabled in the BIOS, it is recommended to disable it temporarily and check if the problem persists. To disable hardware virtualization, you need to open the BIOS and find the Virtualization Technology or Intel Virtualization Technology, or anything similar to this.
Next, open the settings and disable them respectively. Once done, save all the changes and check if your Task Manager is displaying the correct number of cores.
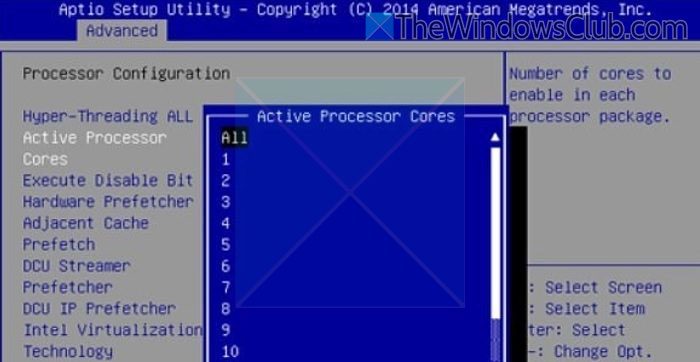
6] Check System Configuration
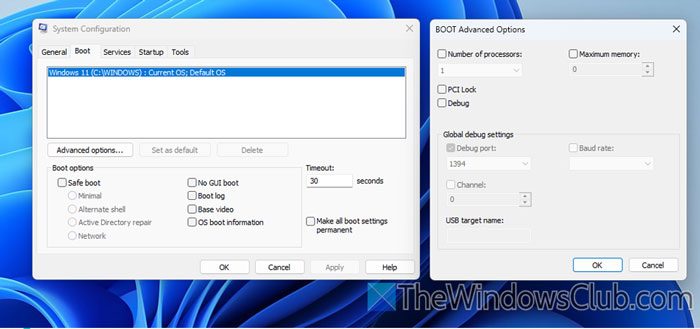
System Configuration, more specifically, BOOT Advanced Options, lets you choose the number of processors or cores you want to use. If you have enabled this setting, you need to disable it. For that, follow these steps:
- Press Win+R > type msconfig and hit the Enter button.
- Go to the Boot tab and click on Advanced options.
- Remove the tick from the Number of processors checkbox.
- Click the OK button.
Read: Task Manager not showing Network usage in Windows 11
Windows 11 shows only one processor core
If Windows 11 is showing only one processor core, even though your CPU has multiple cores, follow these suggestions:
- Open MSCONFIG, go to the Boot tab and click Advanced options. If Number of processors is checked, uncheck it, click Apply and restart your PC.
- Enter BIOS settings and locate CPU Configuration or Advanced Settings. Here, ensure that Multi-core support, Hyper-Threading, and EIST (Enhanced Intel SpeedStep Technology) are enabled. Save the changes.
How to enable more cores in Windows 11?
The easiest way to enable all CPU Cores on Windows is to open the MSCONFIG window and go to the Boot tab. Click on the Advanced options button and expand the Number of processors drop-down list. Then, choose a higher number and click the OK button.
How to see all cores in Task Manager in Windows 11?
To see all cores or the number of cores in Task Manager in Windows 11/10, press Ctrl+Shift+Esc to open the Task Manager. Then, go to the Performance tab and make sure that you are in the CPU section. Head to the Cores on the right-hand side.
How to enable all missing CPU cores in Windows 11?
To enable all missing CPU cores in Windows 11/10, open MSCONFIG, go to the Boot tab and click Advanced options. Here, select the box for Number of processors and select the highest number from the dropdown. Click OK/Apply, and restart your computer.
Read: GPU not showing up in Task Manager in Windows 11