If you are a Windows 11/10 user, you would probably know about hiding or locking a folder or file that has confidential data. We generally, use some folder encryption software to do these tasks. But, if you have many such folders and files, it is not a good idea to lock each and every folder. A better option would be to move all such files and folders which you want to hide or do not want others to know about their existence, to some drive on your PC. Then, hide that entire drive so that it is not visible to anyone.
That hidden drive will not be seen in Windows File Explorer but can be accessed through a Command Prompt or by typing the drive letter in Explorer’s address bar. So, when someone uses your Windows PC, they do not know that there is such a drive, and your confidential data is safe. I will guide you through the steps in Windows 11 and Windows 10.
Hide a Drive in Windows 11/10
There are 5 ways to hide a drive in Windows 11 and Windows 10. It is through Disk Management, using Group Policy, through Windows Registry, or by using Diskpart command in CMD. We will look into these steps in detail so that you can implement them to hide a drive in Windows 11/10.
- Hide Drive using Disk Management
- Hide drive using Group Policy
- Hide Drive using Windows Registry
- Hide Drive using CMD
- Hide Drive using free tool HideCalc.
1] Hide Drive using Disk Management
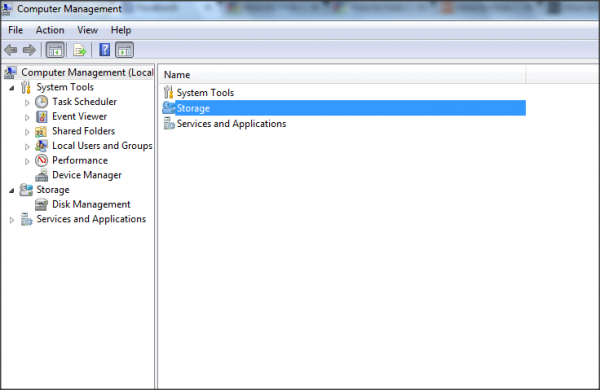
If you want to hide a drive in Windows 8 through Disk Management, you need to right-click on My Computer and then click Manage.
In Computer Management Console open Storage by double-clicking on it.
Now, double-click on Disk Management Snap-in.
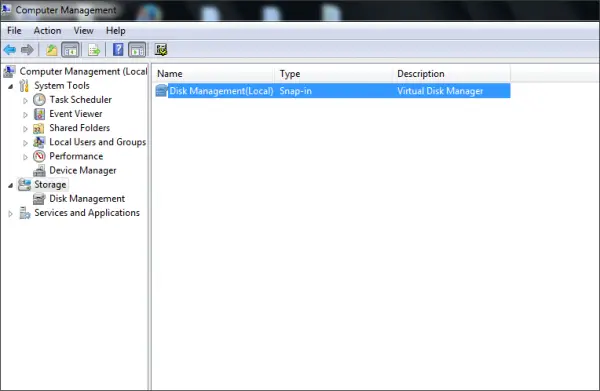
Disk Management Console opens up, and you can see all drives of your PC.
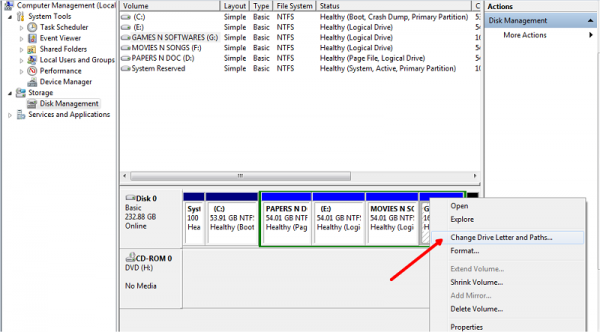
Choose the drive which you want to hide and right-click on it. Choose ‘Change Letter and Paths’ and click on Remove button.
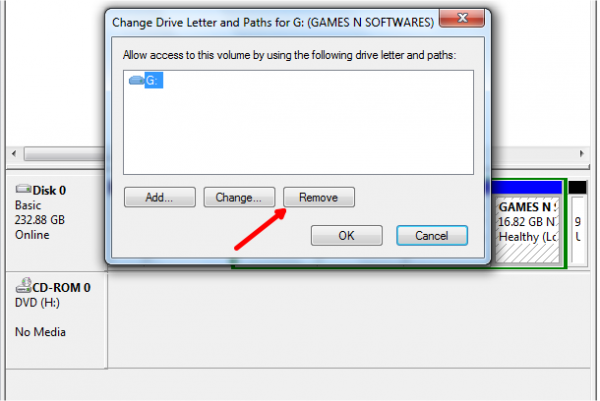
If it asks for confirmation, say ‘Yes’. Now, you cannot see the hidden drive in My Computer.

Read: How to change Drive letter in Windows 11.
2] Hide drive using Group Policy
Run gpedit.msc and navigate to the following settings:
User Configuration/Administrative Templates/Windows Components/File Explorer
Double-click Hide these specified drives in My Computer and select Enabled.
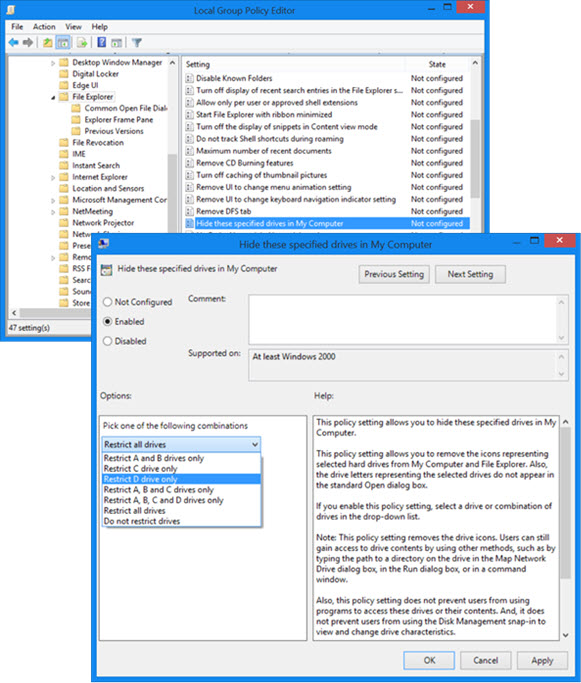
From the drop-down menu, select the Drive you want to hide.
This policy setting allows you to hide these specified drives in My Computer. This policy setting allows you to remove the icons representing selected hard drives from My Computer and File Explorer. Also, the drive letters representing the selected drives do not appear in the standard Open dialog box. If you enable this policy setting, select a drive or combination of drives in the drop-down list. This policy setting removes the drive icons. Users can still gain access to drive contents by using other methods, such as by typing the path to a directory on the drive in the Map Network Drive dialog box, in the Run dialog box, or in a command window. Also, this policy setting does not prevent users from using programs to access these drives or their contents. And, it does not prevent users from using the Disk Management snap-in to view and change drive characteristics. If you disable or do not configure this policy setting, all drives are displayed, or select the “Do not restrict drives” option in the drop-down list.
Save and exit.
Read: How to Show Drive Letters first before Drive Names.
3] Hide Drive using Windows Registry
In this second way, we will use the NoDrives registry key to hide a drive in Windows 8. As we add a key to the registry, I suggest you take the backup of your registry. Once it is done, proceed!
Press Windows Key+ R, type ‘regedit’ and hit Enter. The Registry Editor Console opens up. Navigate to the below path,
HKEY_LOCAL_MACHINE > Software > Microsoft > Windows > CurrentVersion >Explorer
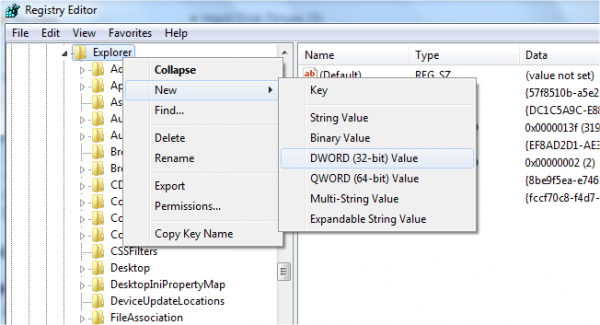
Here we are going to create a new DWORD value, so right-click on Explorer and choose New -> DWORD Value (32-bit).
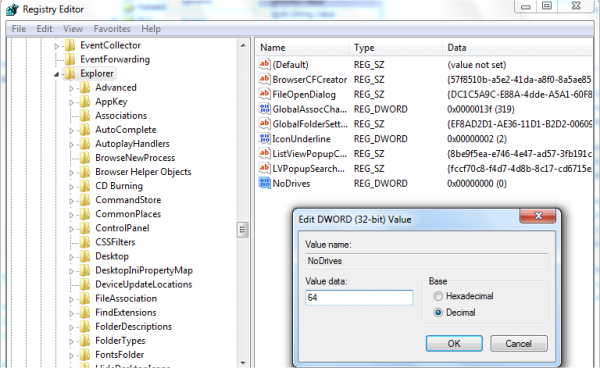
Give the name as ‘NoDrives’ and double click on it, to change the properties. Now, the console opens where we need to enter values. In Value data, choose the one based on the drive you want to hide. Each drive letter has unique value and values are as below,
A: 1, B: 2, C: 4, D: 8, E: 16, F: 32, G: 64, H: 128, I: 256, J: 512, K: 1024, L: 2048, M: 4096, N: 8192, O: 16384, P: 32768, Q: 65536, R: 131072, S: 262144, T: 524288, U: 1048576, V: 2097152, W: 4194304, X: 8388608, Y: 16777216, Z: 33554432, All: 67108863
Choose the corresponding value for the drive and enter that value in ‘Value data’. Choose ‘Decimal’ for the Base section. As I want to hide, drive ‘G’, I am entering the value as ‘64’.
If you want to hide two drives, say for example ‘E’ and ‘G’, you can enter value one value as ’80’ (E = 16 and G = 64) and it hides both the drives.
Restart your computer, and your drive will be hidden now. If you are supposed to get the drive back, change the value to Zero, or you can even delete the ‘NoDrives’ registry key.
4] Hide Drive using CMD
- Open an elevated command prompt, type
Diskpartand hit Enter. - Type
List Volumeand hit Enter. - Now type select and the numeral against the letter of the Drive (e.g. it could be G Drive), which you want to hide. For instance, it could be
Select Volume 6. - Hit Enter.
- Finally, type
Remove Letter G - Hit Enter.
You will see a message – Diskpart successfully removed the drive letter or mount point.
Show the hidden drive using CMD
- Open an elevated command prompt, type
Diskpartand hit Enter. - Type
List Volumeand hit Enter. - Now type select and the numeral against the letter of the Drive (e.g.,. it could be G Drive), which you want to hide. For instance, it could be
Select Volume 6. - Hit Enter.
- Now type
Assign Letter Dand hit Enter. - This will show the drive in Explorer.
5] Hide Drive using free tool HideCalc
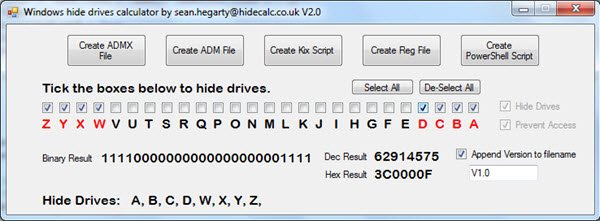
HideCalc is a free tool for Windows that lets you hide disk drives in Windows easily – and more! It allows you to:
- Export to ADMX Group Policy templates
- Export to ADM Group Policy Templates
- Export for Kix Scripts.
- Export for Powershell Scripts.
- Export to a .REG file.
- Hides Drives that you specify.
This prevents access to Drives that you specify. Some legacy applications’ file managers will undo the Hide Drive Setting; if they do, this stops access.
Running HideCalc will not alter anything in your Registry. It is the data files it creates that will make changes when executed. Download it here.
These are the five ways you can hide a drive natively, in Windows 11/10.
How can I hide a system drive?
There are different ways to hide a system drive in Windows 11/10 PC. The most efficient way to hide a drive is by using the Disk Management console. You can remove the drive letter from your desired drive to prevent it from being visible in File Explorer. Alternatively, you can use the Local Group Policy Editor to hide any drive on your Windows computer.
How do I find hidden drives in Windows 11?
It depends on which method you used to hide your drive in Windows 11/10 PC. For example, if you used the first method, you must open the Disk Management console and assign a drive letter. Similarly, if you used the GPEDIT method, you need to open the Local Group Policy Editor and revert the change.
How do I hide a drive in Windows 11 without losing data?
You can use any of the five methods mentioned in this article to hide a drive in Windows 11/10 without losing data. Whether it is a system drive or any other drive, you can hide it using Disk Management, Command Prompt, Registry Editor, Local Group Policy Editor, etc.