
In this guide, we will learn how to perform an in-place restore of Active Directory from a Windows Server Backup. For this, you need to meet two requirements: you need a valid backup that includes the “System State” of your Active Directory Domain Controller and the credentials of your DSRM.
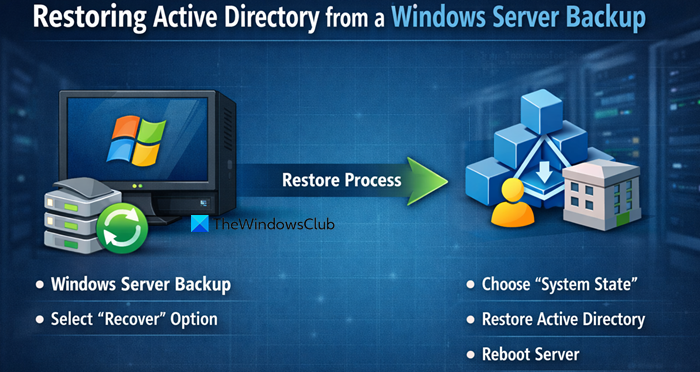
Restore Active Directory from a Windows Server Backup
If you want to restore Active Directory from a Windows Server Backup, follow the steps mentioned below.
- Boot into DSRM
- Restore AD
- Make final adjustments
Let us talk about them in detail.
1] Boot into DSRM
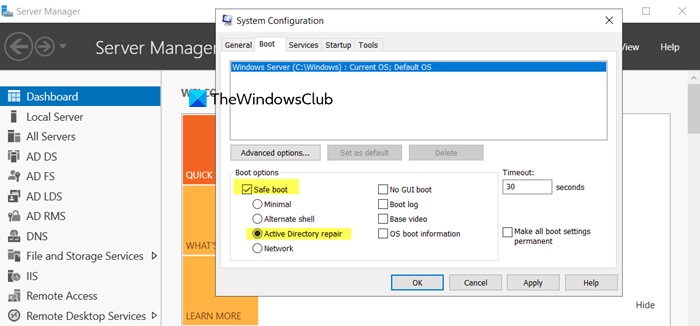
Directory Services Restore Mode (DSRM) is a special boot mode for Windows Server domain controllers, similar to Safe Mode, that allows administrators to perform critical maintenance, repair, or recovery of the Active Directory (AD) database when it’s corrupted or failing.
To restore directory services on your Domain Controller, first open Command Prompt and execute the ntdsutil command. Then, within the utility, run set dsrm password followed by the command reset password on server SERVERNAME, making sure to replace “SERVERNAME” with your actual server’s name. You will be prompted to type and confirm a new password. After successfully setting the password, press ‘q’ and Enter twice to exit the ntdsutil tool completely.
To boot the computer into Directory Services Restore Mode (DSRM), follow the steps mentioned below.
- First, press the Windows Key + R to open the Run dialog, type “msconfig,” and press Enter.
- Within the System Configuration utility, navigate to the Boot tab, select the Safe boot option, choose Active Directory repair, and click OK to confirm.
- Finally, restart the computer. Once the system reboots into the DSRM login screen, you must log in by typing .\Administrator as the username and entering the dedicated DSRM password you set previously, as domain credentials will not work in this mode.
Now, let’s go ahead with the configuration.
2] Restore AD

Follow the steps mentioned below to restore the Active Directory from the backup.
- After logging into Windows in DSRM mode, go to Start > Windows Administrative Tools > Windows Server Backup.
- In the Windows Server Backup utility, select Recover… from the Actions menu on the right.
- On the Getting Started screen, specify whether your backup is stored on This server (Local drives) or on A remote shared folder.
- Click Next.
- Select the correct backup date from the calendar that contains the System State you wish to restore. Click Next.
- Choose System state as the recovery type. Click Next. The backup must be a valid System State backup from a domain controller.
- Select the original location for the System State recovery. Click Next.
- Review your selections on the Confirmation screen. It is critical to check the box for Automatically reboot the server to complete the recovery process. Click Recover.
- A final dialog box will appear. Click Yes to begin the System State restoration. This process will take a significant amount of time.
- The server will reboot automatically once the restore is finished. Do not interrupt this process.
- After the server restarts, log in again using the local DSRM account: use .\Administrator as the username and your DSRM password.
- If the restoration was successful, a confirmation window will appear upon login. Press Enter to acknowledge and proceed.
Finally, we need to boot your computer in Normal state and make final adjustments.
3] Make final adjustments
We need to exit the Active Directory Repair utility mode now. For that, open Run, type msconfig.exe, and hit Enter. Go to Boot > Untick Safe Mode and then go to General > Normal startup > OK.
Now, we need to re-enable NETLOGON & SYSVOL Shares. For that, open Regedit and create a backup.
Press Win + R, type regedit, and press Enter. Go to the following location.
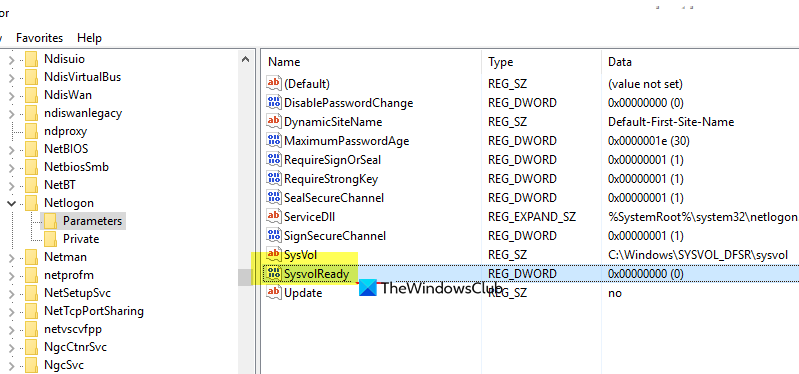
HKEY_LOCAL_MACHINE\SYSTEM\CurrentControlSet\Services\Netlogon\Parameters
On the right pane, open the SysvolReady REG_DWORD. Change the value data of SysvolReady from 0 to 1 and click OK. Then, close the Registry Editor.
Now open the Command Prompt and give these commands to restart the “netlogon” service.
net stop netlogon

net start netlogon
We need to verify if NETLOGON & SYSVOL shares are available now using the following command.
net share
Run dcdiag to check the status of your Active Directory.
You can go to Active Directory Users & Computers in your Domain Controller to confirm if all users are restored or not.
Read: How to backup and restore Active Directory in Windows Server
How to recover Active Directory from backup?
With the help of the Directory Services Restore Mode (DSRM) we can recover Active Directory from backup. First, boot into DSRM, then follow the steps here to restore AD, and finally verify its status.
Read: How to install Active Directory and add users
How to backup Active Directory with Windows Server backup?
To back up Active Directory using Windows Server Backup, you must perform the backup online while Active Directory Domain Services (AD DS) is installed. Using the Windows Server Backup GUI, launch the tool and select Backup Once, then choose either “Full server (recommended)” for a complete system backup enabling bare metal recovery, or select “Custom” and add “System State” to capture essential AD components like the NTDS database and SYSVOL. It is recommended to always confirm your selected items in the Custom option. You can store the backup on a local drive or a remote shared folder. For regular protection, set up a scheduled backup job and periodically test the restoration process to verify backup integrity.
Also Read: Account getting locked out frequently in Active Directory.
