
As the owner of a SaaS company, you should always see an online AI tool as a new opportunity to grow your user base for your application, software, or service. If so, Meta Muse is one of the newest players in the market and may already have caught your attention. Even if it didn’t, you might want to look at the Meta Muse Connector Platform from our point of view to expose your online service to more users.
What is Meta Muse?
Meta Muse is an AI tool that works as a personal agent. It can perform tasks based on complex queries instead of just showing random search results.
What is Meta Muse Connector Platform?
Before learning about the Meta Muse Connector Platform, you need to understand connectors. Connectors are the apps and services you need to connect to perform certain tasks. For example, if you want to ask Meta Muse to create a Google Calendar entry or save code in GitHub, you must connect a Google Calendar or GitHub account.
So far, everything was for a regular user. However, if you are a developer or an application owner and want to showcase your app on the Meta Muse repository, what’s coming next will be handy for you.
In simple terms, the Meta Muse Connector Platform helps developers connect their apps to Muse. Here you will learn almost everything about the Meta Muse Connector Platform so that you can start preparing your application for Meta Muse.
All requirements and checklist before submitting your app
Here is a detailed list of the most important things that you must have before submitting the app:
- You must have a running website for your app.
- Whether you submit an app or website, the URL must be in working condition.
- You must create a couple of prompts that could be used to show how your app/website can be connected or used through Muse.
- Basic things such as a 512×512 pixel icon, business name, work email address, support email, Privacy Policy page URL, Terms of Service URL, etc. are required.
Talking about the technical points, these things are mandatory:
- Valid API documentation.
- Valid authentication guide.
- Configured REST API or MCP service.
- MCP or API endpoint URL.
- HTTPS must be enabled.
- End-to-end encryption of user data.
- How you retain user data or delete it – it must be documented.
It mainly uses two authentication methods: API keys and OAuth with PKCE. Although they both achieve the same result, the underlying process differs significantly. With an API key, you use a private or secret key to authenticate, whereas OAuth uses direct access to the respective account.
How to submit your Connector for review in Meta Muse?
To submit your Connector for review in Meta Muse, they have created a dedicated website. For that, you can visit platform.muse.ai and start filling out your form.
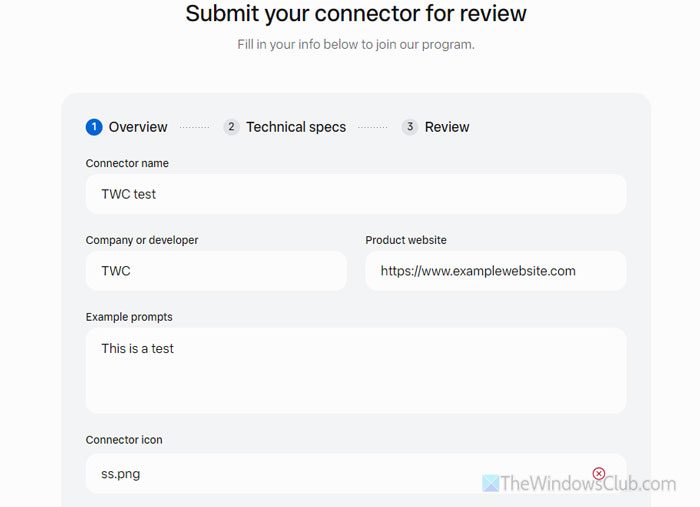
To get started, enter your Connector name, company details, product website, icon, prompt, etc. Then enter your name, work email address (@domain.com email address is highly recommended), etc.
Also, choose whether your product accepts payment.
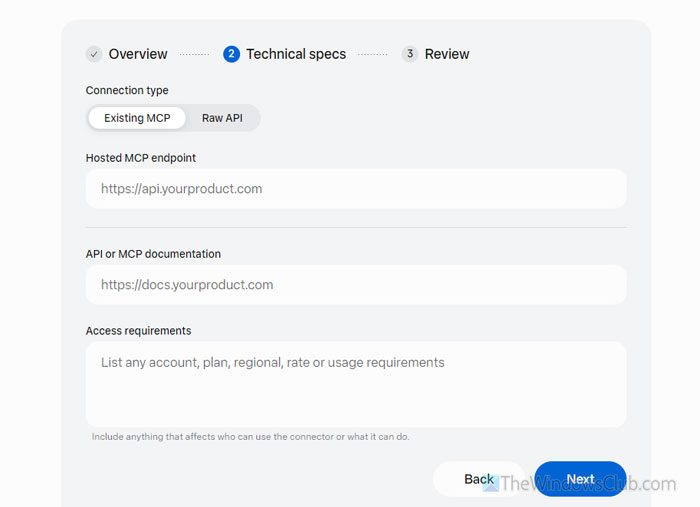
Once done, go to the Technical specs tab and enter this information:
- Whether you have MCP or RAW API.
- Enter MCP endpoint
- MCP documentation
- Access requirements
- API URL in case you opt for RAW API.
Once done, review all the details and submit for review.
Do’s and Don’ts
Let’s check out the things you must do and that you cannot find in the official documentation:
- Your application or website must have proper navigation. Having said that, if your website helps you book bus tickets, it must follow this type of route: User visits your website > enters details such as date, bus stops, number of people, etc. > it redirects the user to the payment page > completes the payment > gets the ticket in email.
- Do not put your user in a loop in any way. If users encounter a loop, Meta Muse will fall into that too, which may cause a bad impression.
- If you say that your website provides ten things or services, make sure that all those services are fully working.
- Always use a valid SSL certificate to secure your website.
- Always allow users to perform a particular task according to your Privacy Policy. If you mention that you collect user details, make sure you list all specific items you collect that fall under personal details.
- If the connector says your website does certain tasks, do not run any additional commands in the background. If you add a new feature, always notify users first.
- Always mention how you are going to use the collected data in the future. For example, if you want to use the data only for demographic purposes, mention it to users. It is suggested not to use the Meta Muse collected data for advertising purposes.
- If your Connector accepts payment, you must show the full price, terms, etc.
What happens after submission?
Once you submit your Connector, Meta reviews it thoroughly. For example, they will test every aspect from every possible angle. From example prompts to the MCP server, everything must work properly.
During testing, if they find any problem that might be corrected within moments, they will notify you. However, if they find a major issue, they will reject it immediately.
In the meantime, please check your account and your website/application. If you find any error in the server or your website, we recommend fixing it immediately.
Finally, if it’s approved, you’ll find it in the repository. In other words, open Settings > Connectors.
However, if it gets rejected, do not resubmit it immediately. Review the issues they mentioned, fix them thoroughly, and test everything from top to bottom first. Once you think that everything is working, resubmit it.
What do we think about Meta Muse Connector Platform?
Meta Muse is going to be a massive innovation, which is much more than a regular AI tool. As AI agents evolve in the coming days, it is wise to be around them. Also, Meta makes it pretty simple to submit a Connector, which is a plus point.
One thing to keep in mind is that Meta hasn’t stated any steps to follow if you want to withdraw your Connector. Otherwise, give it a try!
Read: How to use Opal in Copilot for Automation of Office tasks
