An MCP Server enables you to connect your AI Models to APIs and other third-party tools. We have seen how to create your own MCP Server using FastMCP and Tavily. Now we are going to talk about another tool, Gradio, as it offers an easy and efficient way to build MCP servers, enabling developers to create powerful AI tools effortlessly. In this post, we are going to see how you can install Gradio MCP Server on Windows.
What is Gradio MCP Server?
Gradio is a free tool that turns your Python programs into easy websites. It lets anyone use your code through a web browser, like turning a weather checker into a simple weather website. The MCP Server is Gradio’s special helper that makes apps work smoothly for many users at once, like a friendly traffic manager keeping everything running fast. This smart system helps share your apps widely while handling visitors efficiently, making sure everyone gets quick responses without crashes. Gradio’s MCP Server does the hard work so your creations can reach more people reliably.
How to install Gradio MCP Server on Windows computer
To install and build Gradio MCP Server on Windows, you need to follow the steps mentioned below.
- Install Gradio MCP
- Create a sample app
- Use the app
- Deploy your MPC Server to Hugging Face
Let us talk about them in detail.
1] Install Gradio MCP
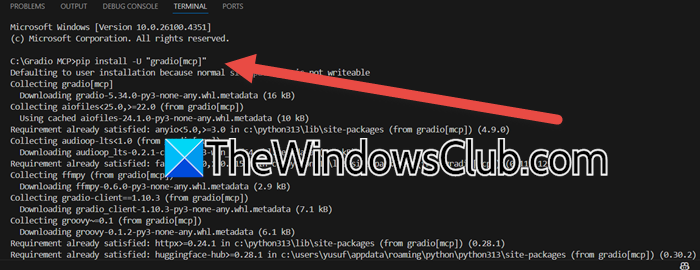
First of all, we need to install Gradio MCP on our computer. To do so, we will have to run a command in Windows Terminal (any CLI present on your computer). However, to make this process uncluttered, we recommend you launch Visual Studio Code, then open a folder where you want to install Gradio MCP, and click on Terminal > New Terminal. Now, run the following command.
pip install -U "gradio[mcp]"
Since we are not running the command in elevated mode, it will only be installed for your current user.
2] Create a sample app
Now, we can go ahead and build a Gradio app to check the time of any country. This is a sample program that creates a simple website where you can check what time it is in different countries right now. When you type a country name into the box and press Enter, the program looks at its world clock to find the current time in that country’s main time zone. It then shows you the time along with the timezone name (like “JST” for Japan). If you type a country it doesn’t recognize, it will suggest some countries it does know about. The whole thing works like a quick time-checking tool for different parts of the world.
import gradio as gr
from datetime import datetime
import pytz # Make sure to install pytz: pip install pytz

def check_time(country):
"""
Returns current time for a country (mock data for demonstration)

Args:

country (str): Country name to check time for

Returns:

str: Current time information
"""
# Mock time data for demonstration
time_data = {
"usa": "Eastern Time: " + datetime.now(pytz.timezone('US/Eastern')).strftime("%H:%M"),
"uk": "GMT: " + datetime.now(pytz.timezone('Europe/London')).strftime("%H:%M"),
"germany": "CET: " + datetime.now(pytz.timezone('Europe/Berlin')).strftime("%H:%M"),
"japan": "JST: " + datetime.now(pytz.timezone('Asia/Tokyo')).strftime("%H:%M"),
"australia": "AEST: " + datetime.now(pytz.timezone('Australia/Sydney')).strftime("%H:%M"),
"brazil": "BRT: " + datetime.now(pytz.timezone('America/Sao_Paulo')).strftime("%H:%M"),
"india": "IST: " + datetime.now(pytz.timezone('Asia/Kolkata')).strftime("%H:%M"),
}

country_lower = country.lower().strip()

if country_lower in time_data:
return f"Current time in {country.title()}: {time_data[country_lower]}"
else:
return f"Time data not available for {country}. Try: USA, UK, Germany, Japan, Australia, Brazil, India"

# Create Gradio interface
demo = gr.Interface(
fn=check_time,
inputs=gr.Textbox("USA", label="Enter country name"),
outputs=gr.Textbox(label="Current Time"),
title="Country Time Checker",
description="Enter a country name to check the current time (mock data)",
examples=[["Japan"], ["Germany"], ["Brazil"]],
)

if __name__ == "__main__":
demo.launch()
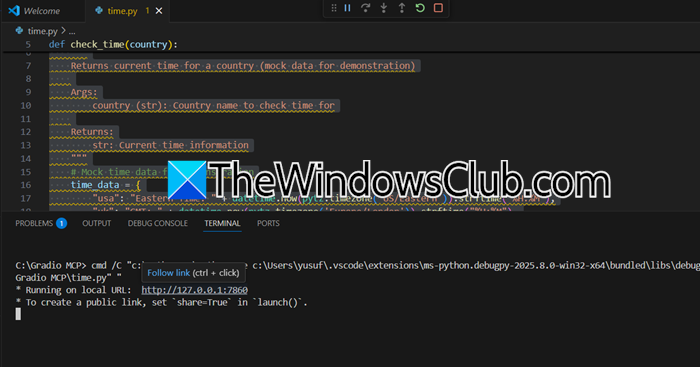
You need to save this as a Python file. So, create a new file inside your folder and name it time.py. Save the lines of code mentioned earlier.
Now, you need to run the file. So, click on Run > Start Debugging. Give it a few minutes, and it will give you the output with the local URL to launch your server. Click on the URL and then click on the Follow link, or hold Ctrl and then click on the link.
3] Use the app

When you open the local URL, you will have the option to use the application. Since we have created an app to tell time based on the country, all you have to do is enter the time and click on Submit.
You can even make some changes to the app by clicking on Settings and then changing the language or the theme of the program.
Read: How to configure MCP server on Windows using Claude?
4] Deploy your MCP Server to Hugging Face
To launch your MCP server on Hugging Face Spaces, first create a requirements.txt file containing tavily-python==0.7.3. Then deploy using Git commands:
To stage files:
run git add .
To save changes:
git commit -m "Country Time MCP"
To upload:
git push
The Space will automatically build, making your “Country Time” app live at “Country Time MCP” in about a minute.
Finally, set your Tavily API key: in Space Settings, click “New Secret” and enter your access token as an environment variable. This completes the setup for your MCP server powered by Tavily’s services.
Do keep in mind that the steps mentioned earlier are just a demo that you can follow to build your server.
Read: How to create your own MCP Server using FastMC1
How do I add MCP to my Gradio app?
To create your app in a Python file using import gradio. Design your interface with inputs and outputs. Add mcp_server=True inside the launch() command at the end. This turns on the multi-user support feature when you run the app. However, before doing so, it’s crucial to install Gradio MCP on your computer. We recommend you follow the steps mentioned earlier to do the same.
Also Read: Find best MCP Servers for your AI framework.