The Tavily MCP Server is a tool designed to integrate AI systems with various data sources and tools using the Model Context Protocol (MCP). This allows us to bypass the age-old problem of the knowledge cutoff date by providing the model’s ability to search the web, yet summarize details. In this post, we are going to see how you can install Tabily MCP Server in VS Code on Windows 11/10.
Install Tavily MCP server in VS Code on Windows 11/10
The Tavily MCP Server seamlessly connects AI with external tools and data sources through the Model Context Protocol (MCP). It enables real-time web searches using “tavily-search” and facilitates intelligent data extraction via “tavily-extract.” It is also fully compatible with platforms like Cursor and Claude Desktop, it requires Node.js and a Tavily API key for setup, ensuring secure and efficient integration between AI systems and MCP clients.
To install the Tavily MCP server in VS Code on Windows, you can follow the steps mentioned below.
- Download Node.JS
- Meet the prerequisites
- Install Tavily MCP Server
Let us talk about them in detail.
1] Download Node.JS
Node.js is a JavaScript runtime environment that allows developers to execute JavaScript code outside of a web browser. You can download Node.js from nodejs.org and then run the installer to install it on your computer. Once done, move on to the next step.
2] Meet the prerequisites

Next up, we need to go ahead and meet the prerequisites needed to install the MCP Server. Since, we are going to be using VS Code, go ahead and install it.
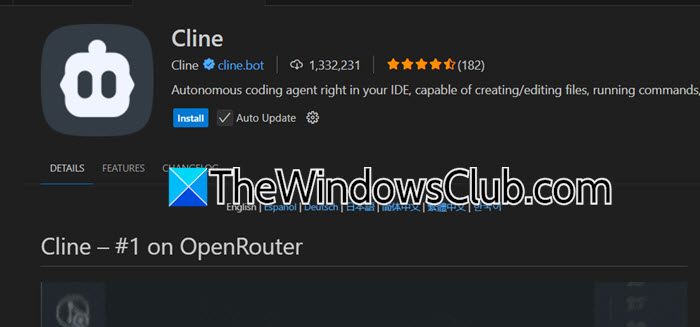
Now, we need to install the Cline extension. The Cline extension is a tool designed for integrating and managing MCP (Model Context Protocol) servers, like the Tavily MCP Server, within platforms such as VS Code. To do so, open Visual Studio Code, click on Extensions, search for “Cline”, and then install it.
You need to hit Ctrl + Shift + P, type “Terminal: Select Default Profile”, and then select PowerShell.
3] Install Tavily MCP Server

Now, to install Tavily MCP Server, you need to follow the steps mentioned below.
- In VS Code, click on the Cline icon from the left panel.
- Now, sign up and create your account by clicking on Start for free.
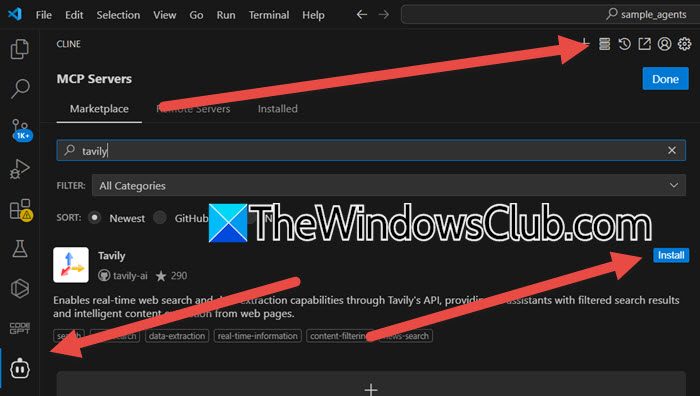
- You need to click on the MCP icon from the top panel of Cline, search for “Tavily”, and click on Install.
- It will process the API request, load the MCP documentation, and ask for your permission to create the environment. You need to click on Run Command whenever prompted.

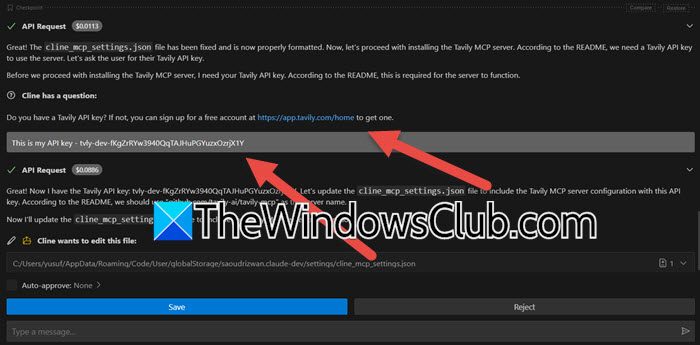
- Now, you need to create a Tavily API key. Cline will ask you the question, “Do you have a Tavily API key?” and will give you a link. Click on the URL and log in to your account.
- Once you have the API, just type This is my API key – <API-KEY>, and hit Enter.
- Now, answer the prompt when asked and set up Tavily.
Finally, you can switch the model in GitHub to start using Tavily MCP Server.
Read: How to configure MCP server on Windows 11 using Claude?
What is the role of Node.js in the Tavily MCP server setup?
Node.js is essential in the Tavily MCP server setup as it provides the environment to run the server. It ensures smooth communication between the AI system and other tools or clients. Tavily MCP uses Node.js to execute commands and handle integrations efficiently. Having Node.js installed is crucial for the server to function properly.
Read: How to setup LocalGPT on Windows for beginners
How do I verify the Tavily MCP server installation in VS Code?
To verify the Tavily MCP server installation in VS Code, restart VS Code and open the Cline tab. Now, check the “MCP Servers” section to see if Tavily is listed and activated. Ensure the Tavily API key is added and configured correctly. You can also run a basic server command to confirm it works without errors.