If you want to scan your network in any organization, Nmap is one of the best software you can use on Windows 11 and Windows 10 PC. This article explains all the possible options, filters, and situations you can use Nmap in.
What is Nmap?
Nmap is a free network scanning software available for Windows, Linux, macOS, etc. This open-source freeware can be used to check ping status, scan the entire network, check the uptime of any host, and much more.
Download and install Nmap in Windows 11/10
To download Nmap for Windows 11 or Windows 10, you can visit nmap.org. From here, download the latest version of this software and double-click on the executable file to start the installation process.
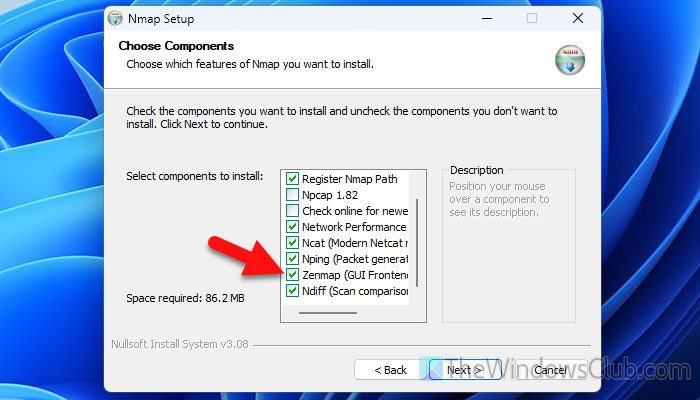
During installation, it asks you to choose various components. It is suggested to check all the checkboxes, including Register Nmap Path, Network Performance, Zenmap, etc.
One of the most important things to know is that Zenmap is the official cross-platform graphical user interface (GUI) for the Nmap Security Scanner. If you want the raw experience of Nmap, you do not have to install Zenmap GUI. However, if you want a better user interface, it is suggested to install Zenmap GUI.
How to use Nmap on Windows PC
Before using Nmap with the Zenmap GUI on a Windows 11/10 PC, you need to know about the options you get in the network scanning tool.
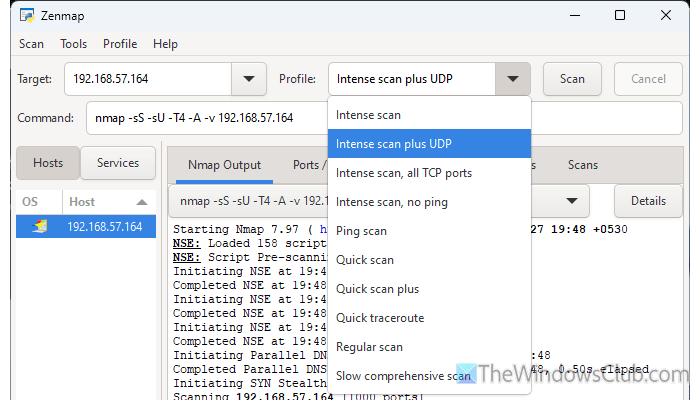
There are mainly nine options, and they are:
- Intense scan
- Intense scan, all TCP ports
- Intense scan, no ping
- Ping scan
- Quick scan
- Quick scan plus
- Quick traceroute
- Regular scan
- Slow comprehensive scan
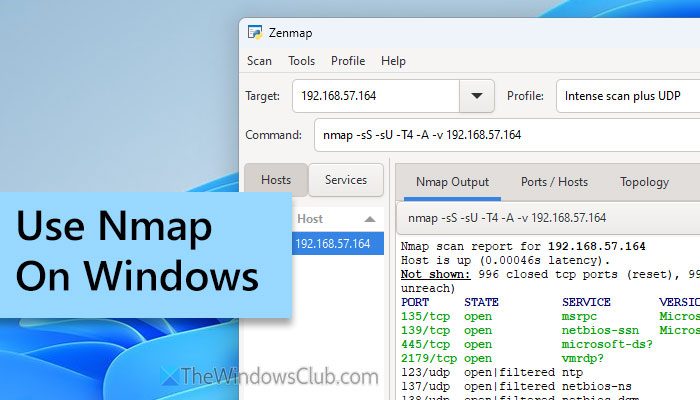
Depending upon the situation or desired result, you need to choose an option. However, here we are about to show how you can get every single information about your local host using Nmap.
First, obtain the IP address of your local host. In case you don’t know the process, you need to open the Command Prompt or Terminal, and enter this command:
ipconfig
In the result window, you can find a row called IPv4 Address. Copy this IP address and open the Nmap window.
Then, paste it in the Target box. Next, expand the Profile drop-down list, and choose any option among these:
- Intense scan
- Intense scan, all TCP ports
- Intense scan, no ping
You can also choose the Quick scan or the Regular scan as well. However, these options do not fetch information about various intense things, such as TCP port, NSE completion time, etc.
Finally, click the Scan button. Once done, you can find a result like this:
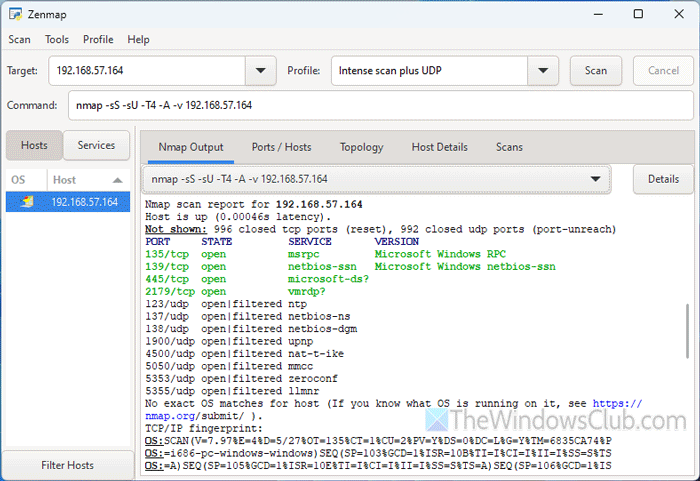
From here, you can switch to the Hosts tab on the left-hand side, and choose any service such as Microsoft-ds, mmcc, msrpc, netbios-ns, etc.
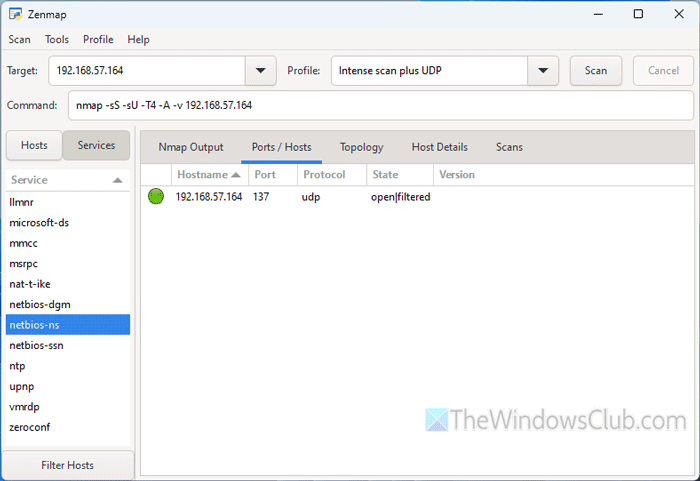
Once you do that, it displays the UDP or TCP port uptime. You can also switch to the topology tab to find a map-like window that includes all the running hosts.
To check the host details, you need to switch to the choose a host section on the left-hand side, and switch to the Host Details tab.
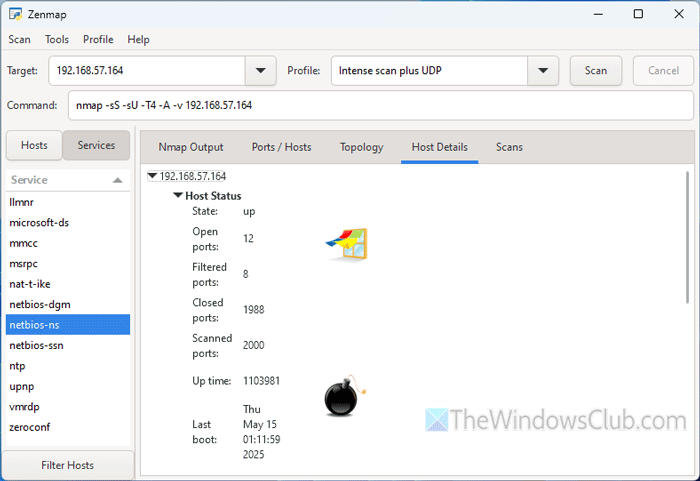
It indicates whether a host is up or down, the number of open and closed ports, the last boot time, and other relevant information.
The Scans tab is kind of a log, which stores all the commands you have executed earlier. You can click on any command and switch to that window instantly.
Other options of Nmap for Windows
Some of the other notable options of Nmap for Windows are:
- Separate windows: You can separate windows for separate commands.
- Print result: In case you need to print results for a hard copy, you can do that.
- Compare results: It is possible to run two different commands and compare them. It is handy when you need to check the after and before results of making a change in your network.
- Filter hosts: You can find this option in the Tools tab. It helps you filter a specific host in your network so that you can include or exclude it for further commands.
- Search Scan Results: You can search for a specific IP or anything else using this option. It is available on the Tools tab.
- Dark mode: You can enable or disable dark mode in the tool. For that, go to the Profile section and choose the Toggle Dark Mode
Read: Best Free WiFi Network Scanner Tools for Windows PC
Is it safe to install Nmap on Windows?
Yes, it is entirely safe to install and use Nmap on Windows. We have been testing and using this software for a couple of days, and so far, we have encountered no issues with our workflow, network, or system.
Is scanning with Nmap illegal?
Although it is legal to scan the local host and all the hosts authorized to you in your organization, it is completely illegal to scan any unauthorized port or host using Nmap. You can certainly use it in your home network or your organization without any problem.
Read: How to use Wireshark Tool on Windows PC for Security Audits?