
Open WebUI is a free, self-hosted web application that provides a user-friendly chat interface for interacting with Large Language Models (LLMs). You can install and use any LLM on Open WebUI, provided your system should have the required hardware configuration to run that model. Updating Open WebUI is not straight forward as other applications. You need to execute the required commands to update Open WebUI to the latest version. The biggest risk while updating Open WebUI is data loss. Therefore, executing the right commands is necessary. This article shows how to update Open WebUI without losing data.

How to update Open WebUI without losing data
To update Open WebUI to the latest version without losing data, you need to execute the right commands. This article shows a step-by-step method to update it to the latest version without any data loss. However, for safety, I recommend backing up all your Open WebUI data before proceeding. To update Open WebUI to the latest version, you have to go through the following methods:
- Checking the current version of Open WebUI
- Creating a backup of Open WebUI
- Installing the update
- Restoring the backup (if required)
These steps apply to Open WebUI installed through Docker. Let’s start.
1] Checking the current version of Open WebUI
First, check the current version of Open WebUI. This step will also show whether an update is available.
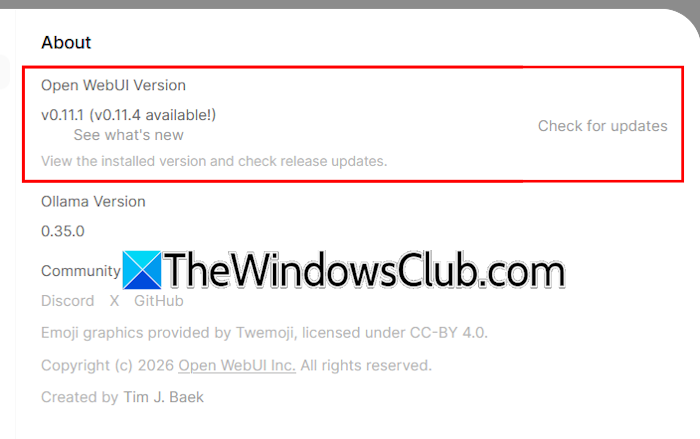
Follow these steps:
- In your web browser, log in to Open WebUI.
- Click on your profile icon on the bottom-left side and select Settings.
- Select About from the left side.
You will see the current version of Open WebUI. If an update is available, it will be shown there. However, you can also check for updates manually by clicking the Check for updates link.
2] Creating a backup of Open WebUI
If an update is available, the next step is to back up your Open WebUI data. The backup file size depends on how much data you have in Open WebUI. First, stop the Open WebUI Docker container (if it is running). In Windows PowerShell, type the following command. After that, press Enter.
docker stop open-webui
Now, if you see the Open WebUI container in Docker, you will find it stopped.
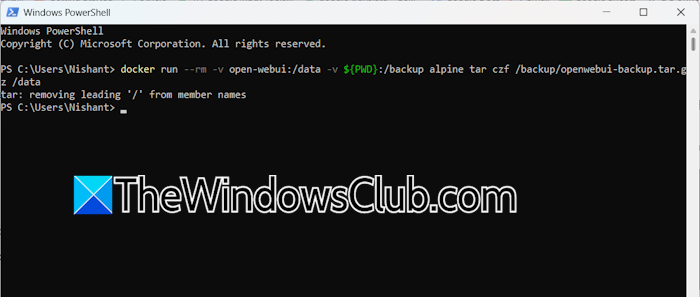
The next step is to run the command to create a backup. Copy the following command, paste it in the same PowerShell window, and hit Enter:
docker run --rm -v open-webui:/data -v ${PWD}:/backup alpine tar czf /backup/openwebui-backup.tar.gz /data
The above command will take time, depending on how much data you have in Open WebUI. After the command is executed successfully, use the following command to start Open WebUI:
docker start open-webui
If you see the Open WebUI container in Docker, it should be running. The file will be saved to the location at the following path:
C:\Users\Username
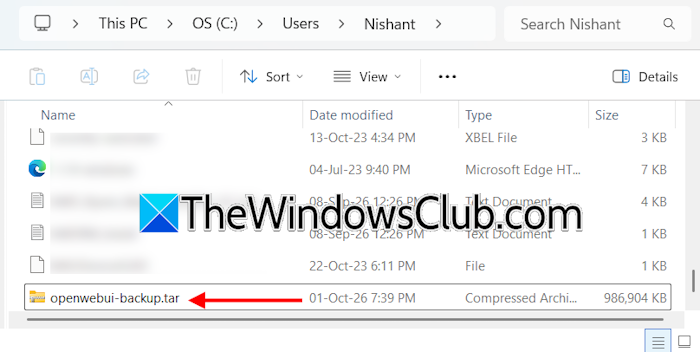
Go to the path above in File Explorer to find the downloaded file. If you do not find the file there, run the following command in Windows PowerShell to verify the download:
dir openwebui-backup.tar.gz
The output of the command above will show the path to the downloaded file.
3] Installing the update
Now, install the update. Previously, the easiest way to update Open WebUI to the latest version without losing data was by using the Watchtower command. But Watchtower is no longer maintained and doesn’t work with Docker 29+. Therefore, you need to update Open WebUI manually.
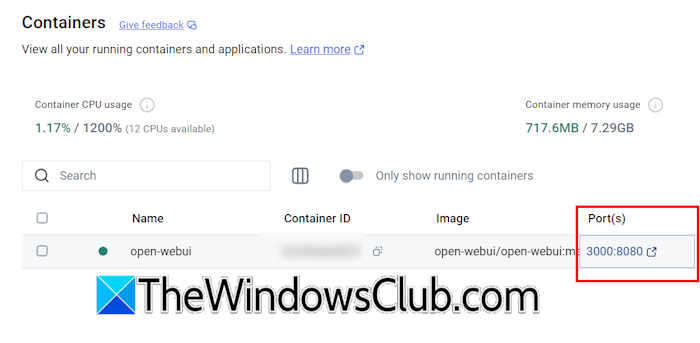
First, verify the current port mapping in Docker. Refer to the above image. Next, stop the container before pulling the latest Open WebUI image. To stop the Docker container for Open WebUI, use the following command in Windows PowerShell:
docker stop open-webui
Now, copy the following command and paste it into the same PowerShell window. After that, hit Enter.
docker pull ghcr.io/open-webui/open-webui:main
The command will take time, depending on your internet speed. After that, remove the old Docker container for Open WebUI by executing the following command:
docker rm open-webui
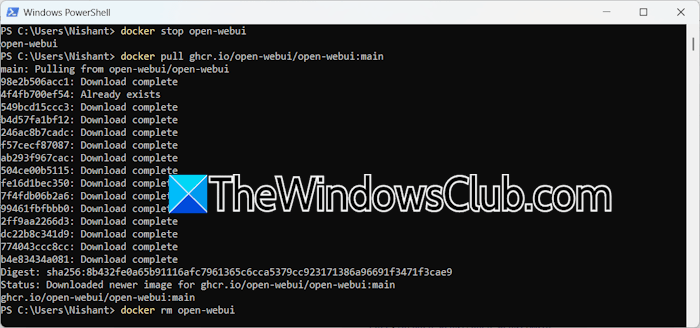
Now, create a new container in Docker for Open WebUI. Use the following command in PowerShell:
docker run -d -p 3000:8080 -v open-webui:/app/backend/data --name open-webui --restart always ghcr.io/open-webui/open-webui:main
This command creates and starts a new container. If the container does not start, you can start it manually in Docker by clicking the Play/Start button.
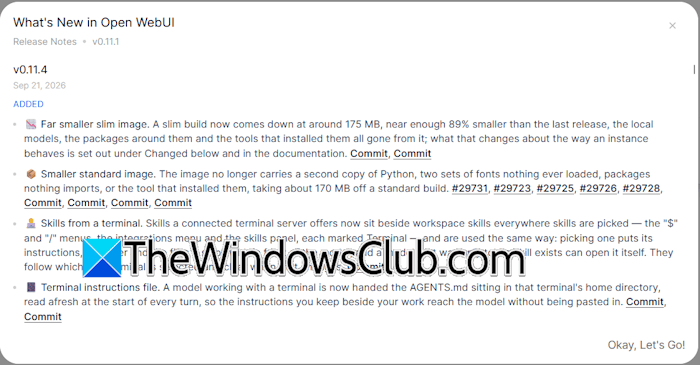
The Open WebUI has been updated to the latest version. You can confirm the same by signing in to Open WebUI. When you sign in, you will see the What’s New in Open WebUI window. Alternatively, you can check the Open WebUI version in its Settings.
4] Restoring the backup (if required)
You can restore the Open WebUI data (if required). First, move the Open WebUI backup file to the following location:
C:\Users\Username
Replace the Username in the above path with your username.
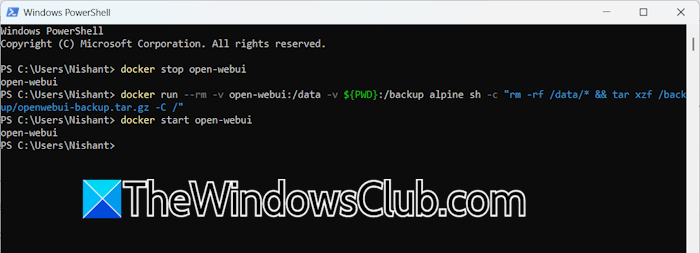
Now, execute the following commands one by one. Press Enter after typing each command.
docker stop open-webui

docker run --rm -v open-webui:/data -v ${PWD}:/backup alpine sh -c "rm -rf /data/* && tar xzf /backup/openwebui-backup.tar.gz -C /"

docker start open-webui
That’s it. I hope this helps.
Does Open WebUI have memory?
Yes, Open WebUI has a sophisticated memory system that lets models remember facts, preferences, and context across conversations. The memory system stores snippets of information about the user. The user can manage memories (edit or delete them) in Settings > Personalization > Memory.
What is the newest version of Open WebUI?
The newest version of Open WebUI changes as new updates and releases become available. You can check the current version in Settings. To check for updates, click the Check for updates button. If an update is available, you need to install it manually.
