If you are looking for an AI assistant to run locally on your computer, OpenClaw is your answer. It can be directly accessed from your Discord server. In this post, we will see how to prepare your environment, configure a bot token, and run OpenClaw locally using Discord.

How to run OpenClaw locally using Discord
OpenClaw, also known as Clawbot and formerly known as Moltbot, is a free and open-source AI tool you can run on your own hardware. It works as a personal assistant that connects to messaging apps you already use, like Discord, WhatsApp, and Telegram. This allows you to chat with it just like you would with a friend. Since it runs locally, OpenClaw can read your files, manage your calendar, run commands on your system, and remember details from past conversations. It keeps your data private and secure.
If you want to run OpenClaw locally, follow the steps mentioned below.
- Prepare your environment
- Install OpenClaw
- Create and Configure your Discord Bot
- Onboard OpenClaw
Let us talk about them in detail.
1] Prepare your environment
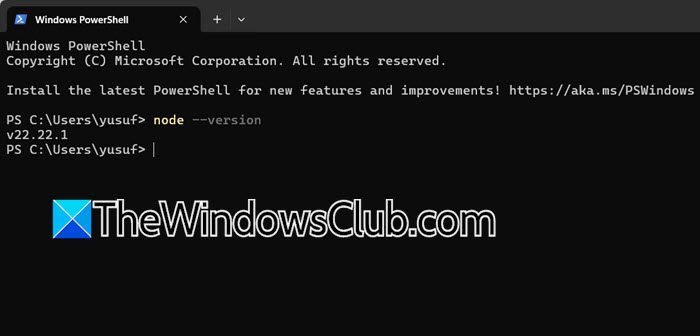
The only essential requirement is to have Node.js (version 22 or higher) and a package manager installed on your system. The recommended package manager for OpenClaw is pnpm.
Open your terminal and run node –version. The output must be v22.x.x or higher.
If Node.js is missing or outdated.
- Method A (Recommended for beginners): Download and install the latest LTS version from the official Node.js website.
- Method B (For developers using macOS/Linux): Use nvm (Node Version Manager) to install Node.js safely. After installing Node, you can enable pnpm by running corepack enable pnpm.
Once you have Node.js on your computer, move to the next step.
2] Install OpenClaw
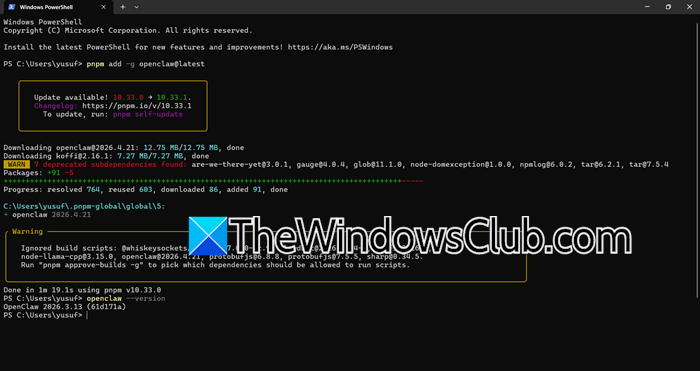
With the prerequisites ready, you can install OpenClaw using pnpm. Run the following command in your terminal.
pnpm add -g OpenClaw@latest
This will install the OpenClaw package globally on your system. After the installation finishes, you can verify it was successful by checking the version.
OpenClaw --version
If you see a version number printed, the installation was successful.
In some cases, you may see that pnpm is not recognized. In that case, run – npm install -g pnpm.
Now, restart Terminal.
If it still fails, stating – ERR_PNPM_NO_GLOBAL_BIN_DIR Unable to find the global bin directory, you need to manually set the PNPM_HOME environment variable and add it to PATH.
$pnpmHome = "$env:USERPROFILE\.pnpm-global"
mkdir $pnpmHome -Force
[Environment]::SetEnvironmentVariable("PNPM_HOME", $pnpmHome, "User")
$oldPath = [Environment]::GetEnvironmentVariable("Path", "User")
$newPath = "$oldPath;$pnpmHome"
[Environment]::SetEnvironmentVariable("Path", $newPath, "User")
Restart your command-line interface, and run the install command as mentioned earlier.
3] Create and Configure your Discord Bot
OpenClaw needs a Discord bot account to listen and respond in your server. You’ll create this on the Discord Developer Portal (discord.com). Follow the steps mentioned below to do the same.
- Go to the Discord Developer Portal, click New Application, give it a name (like “MyOpenClaw”), and agree to the terms.
- Navigate to the Bot tab on the left sidebar and click Reset Token.
- Authenticate with your password to generate a token. Save this token somewhere safe, as you’ll need it in the next step, and it’s like a password for your bot.
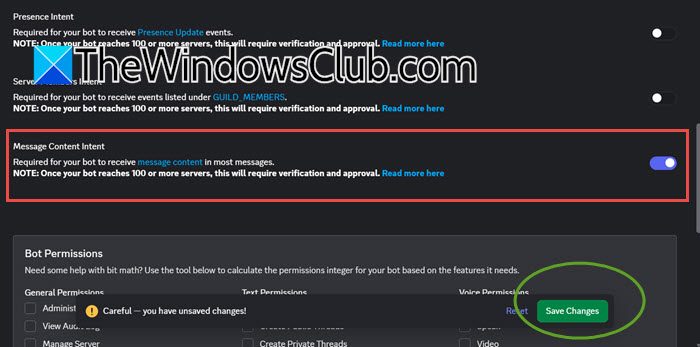
- Still on the Bot page, scroll down to the Privileged Gateway Intents section and toggle ON the Message Content Intent. This is required so the bot can read your commands. You can also enable the other intents if needed.
- Invite the Bot to Your Server.
- Go to the OAuth2 tab and then URL Generator.
- Under Scopes, select bot and applications.commands.
- Under Bot Permissions, select the necessary permissions, including Send Messages, Read Message History, and View Channels.
- Copy the generated URL at the bottom of the page, paste it into your browser, and use it to invite your new bot to a Discord server where you have administrator privileges.
Now, let us go for Onboarding.
4] Onboard OpenClaw
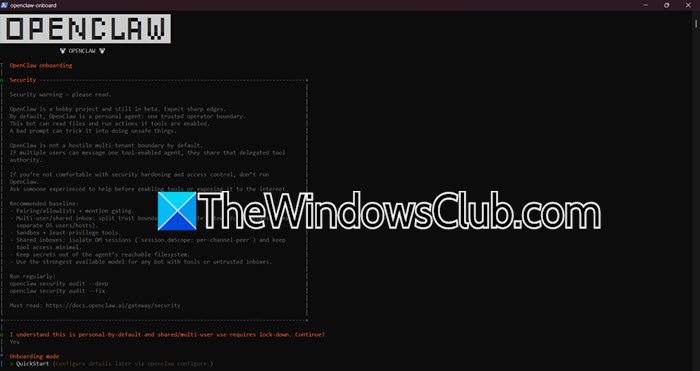
Now you’ll run an interactive setup wizard that connects your local OpenClaw installation to your Discord bot and an AI provider.
In your terminal, run the following command to start the onboarding process.
OpenClaw onboard --install-daemon
The wizard will guide you through a few simple choices
- Choose QuickStart mode for a streamlined setup.
- Select Local (this machine) when asked about the setup mode.
- Choose your preferred AI provider (e.g., Anthropic for Claude, OpenAI for GPT, or others) and the specific model you want to use.
- Select Discord as the channel you want to connect to.
- Paste the Bot Token that you copied from the Discord Developer Portal
After the wizard completes, you can check the status of your OpenClaw gateway to ensure everything is working. Now, run the command to check the status.
OpenClaw status
Hopefully, with these steps, you will be able to connect to and use OpenClaw.
Read: How to add BOTS to Discord server on Mobile or PC
Can you host a Discord bot locally?
You can absolutely host a Discord bot locally on your own computer or a home server. This allows you to have full control over its code, data, and uptime, without depending on a third-party hosting provider. By using the bot token generated from the Discord Developer Portal, your locally run script or application can connect directly to Discord’s API to receive and respond to events, just like a bot hosted in the cloud.
Read: How to add Arcane bot on Discord
What does Ctrl+K do in Discord?
Pressing Ctrl+K (or Cmd+K on macOS) in Discord opens the Quick Switcher. This tool helps you quickly find and go to any server, channel, or direct message without using your mouse. It is especially useful for users who want to navigate Discord more easily. You can make your search better by using symbols, such as # for text channels, @ for users, and ! for voice channels.
Also Read: Enable Developer Mode on Discord for PC and Web.