Nutanix is a hypervisor platform that lets you run virtual machines just like VMware vSphere, Hyper-V, and VirtualBox. If you already have an environment created in VMware and want to migrate it to Nutanix, they have provided the Nutanix Move utility. In this post, we are going to see how you can migrate VMware VMs to Nutanix using this utility.
How to migrate VMware VMs to Nutanix
To migrate VMware VMs to Nutanix using the Nutanix Move utility, follow the steps below.
- Meet the prerequisites
- Deploy and configure Nutanix Move
- Create a virtual machine
- Configure the Migration
- Add Destination Environment
- Add Destination Environment
- Start the migration
Let us discuss them in detail.
1] Meet the prerequisites
When planning your migration, the first step is to map your VMware product suite to the corresponding Nutanix components. This isn’t always a direct one-to-one replacement. For example, vSphere and vCenter are replaced by the Nutanix AHV hypervisor managed through Prism Central. vSAN functionalities are integrated into Nutanix AOS storage fabric, while VMware NSX corresponds to Nutanix Flow for software-defined networking and security. Additionally, the cloud management features of the vRealize Suite are handled by the Nutanix Cloud Manager (NCM).
Conduct a thorough inventory of your source VMs, noting their configurations, resource usage, and interdependencies. This helps in sizing the target Nutanix cluster accurately, for which you can use the Nutanix Sizer tool.
Apart from that, for the Nutanix move, check the following points.
- VMware Tools are installed and up to date on all VMs to be migrated.
- VM Hardware Version is 7 or later.
- Changed Block Tracking (CBT) is enabled on the source VMs.
- Credentials with administrative privileges for vCenter and the Nutanix Prism Element.
- Network Connectivity between the ESXi hosts and the Nutanix cluster (ports TCP/443 and TCP/902).
After meeting the prerequisites, you can begin the migration.
2] Deploy and configure Nutanix Move
In this step, we will configure the move appliance. To do so, follow the steps below.
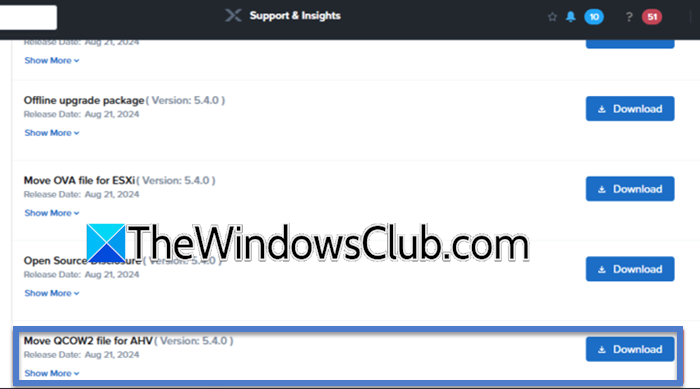
- From portal.nutanix.com, download the Nutanix Move QCOW2 image. You need to be a Nutanix customer to download it.
- In Nutanix Prism Center, click on the cog icon to open Settings.
- Go to Image configuration > Upload image.
- Enter the required details, make sure to select Disk as the storage container.
- In the Image source section, click on Upload a file > Browse, and select your image (the one we downloaded).
- Click on Save.
After uploading the image, our next job is to create a virtual machine for the migration.
3] Create a virtual machine
To create a virtual machine, you can follow the steps mentioned below.
- In the Prism Center, check for the drop-down menu that says Settings. Click on it, and select VM.
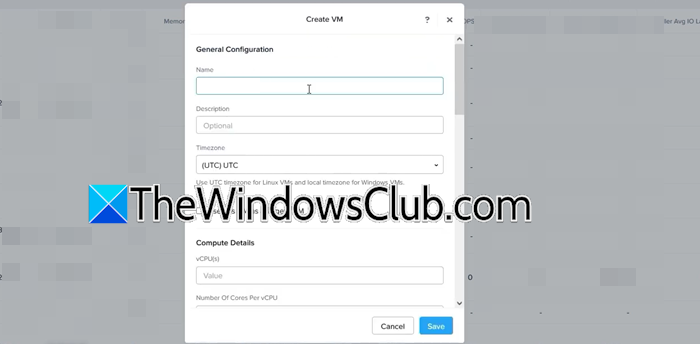
- Click on Create VM.
- Enter the name, the description, and set vCPUs depending on the expected load and the number of VMs.
- Set RAM (Memory) based on your requirement.
- In the Boot Configuration, select Legacy BIOS, and click on Add New Disk.
- Set Operation to Clone from Image Service.
- In the Image, select the Nutanix image you added earlier (in the second step), and hit Add.
- Click on +Add New NIC from the Network Adapter (NIC) Settings.
- Configure the NIC as per your preference and click on Add.
- Click on Save to confirm the creation of the VM.
- Once it is created, right-click on the VM and select Launch Console.
Move on to the next step.
4] Configure the Migration

Before we go ahead with the Migration, we need to find the IP address of the newly created virtual machine. You can get that from the Prism Center console. Once you have the IP address, go ahead with the configuration.
- Copy the IP address and paste it into a browser.
- You will be asked to sign an agreement, do that, and move ahead.
- Enter your password twice to set and confirm it, and click on Set password.
- Now, log in using your credentials, and go ahead.
- Once you are on the Migration type screen, click on VM.
- Now, click on Add Environment, select VMware ESXi as the Environment type.
- Populate the dialog box as per your will, but make sure to enter the IP address and administrative credentials of the vSphere or ESXi host that you are using, and click on Add.
You may see an error message that asks you to upload VDDK.
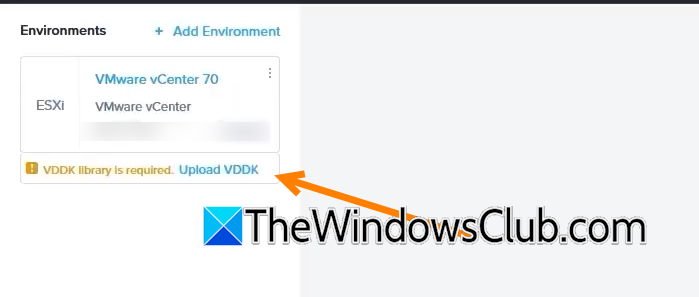
If you click on the Upload VDDK link, you will get to know which version you need to download. Go ahead and download the exact VDDK version from the VMware/Broadcom website. Once downloaded, click on the Upload VDDK link again and upload the file.
5] Add Destination Environment
After uploading the VDDK file, our source is configured, and we need to configure the destination Nutanix environment. Follow the steps mentioned below to do the same.
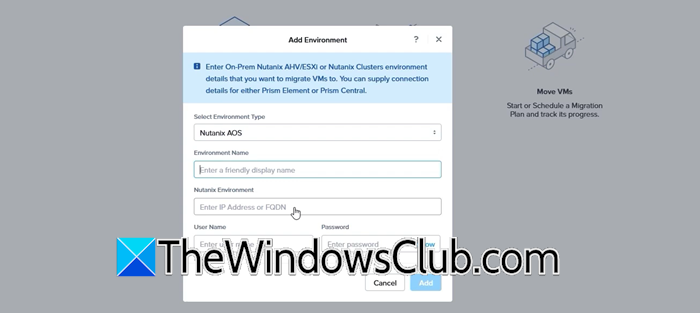
- Click on Add Environment on the Prism Center page.
- In the Select Environment type, choose Nutanix AOS.
- Enter the environment name, IP of the Nutanix, along with the admin credentials.
- Click Add.
Now, we have added both source and destination details, we can go ahead with the configuration.
6] Start the migration
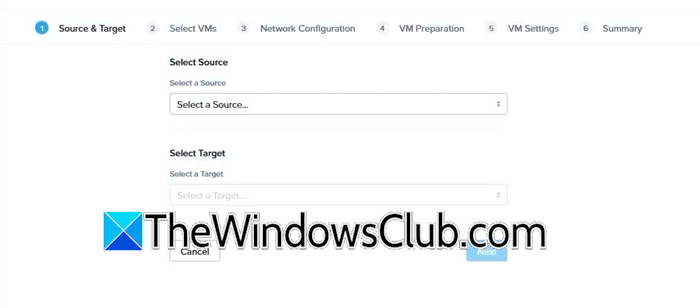
We need to create a migration plan and start migrating in this step. Follow the steps given below.
- Click on Create a Migration Plan.
- Give a plan name and click on Proceed.
- Now, select the source and target and click on Next.
- Select the VM(s) you want to migrate (it is recommended that the VMs are in the running state and VMware Tools are installed).
- Finally, populate the information and follow the on-screen instructions to complete the migration.
With that, your migration is completed.
Read: How to migrate or import VMs from VMware ESXi to Proxmox
Can VMware run on Nutanix?
Yes, the Nutanix platform supports multiple hypervisors, including VMware ESXi. This allows you to run the Nutanix Acropolis Operating System (AOS) with your existing VMware infrastructure, providing a potential transitional path.
Read: How to convert VMware to Hyper-V and vice versa
How can Nutanix replace VMware?
Nutanix replaces VMware by offering its own built-in AHV hypervisor alongside Prism Central for management. This integrated stack delivers a natively converged solution for compute, storage, and virtualization, effectively consolidating the functions of separate VMware products into a single, simplified platform.
Also Read: Convert Virtual Machine to Physical Machine.