You can load a specific theme for new users on Windows 11 and Windows 10 using this guide. It is possible to force the theme for new users using the Local Group Policy Editor and the Registry Editor. Here we have outlined both steps, and you can follow either to turn on this setting.
How to load a specific Theme for new users in Windows 11
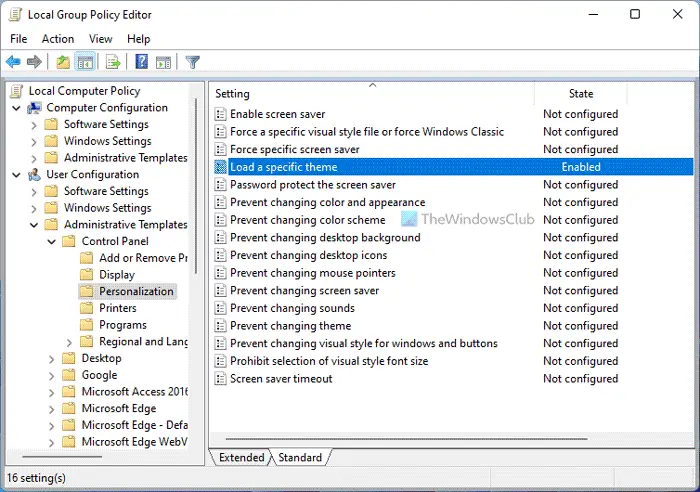
To do so, type gpedit.msc in Start Search and hit Enter to open the Group Policy Editor.
Navigate to
User Configuration > Administrative Templates > Control Panel > Personalization
Now in the right pane, double click on Load a specific theme.
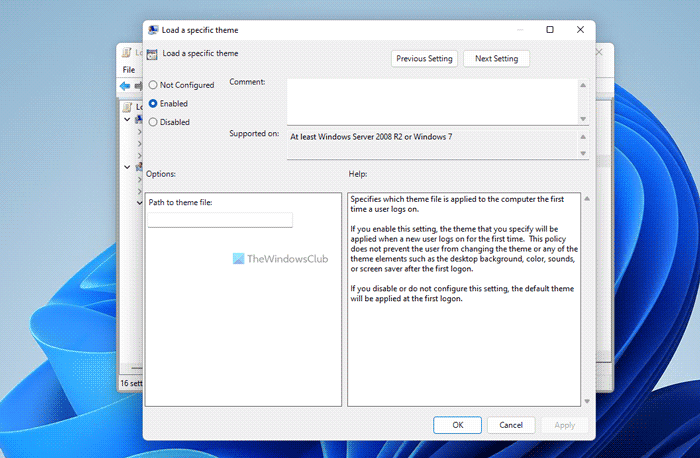
A new window will open. Select Enabled and enter the path of the .theme file you’d like to load, in the Options box.
Specifies which theme file is applied to the computer the first time a user logs on.
If you enable this setting, the theme that you specify will be applied when a new user logs on for the first time. This policy does not prevent the user from changing the theme or any of the theme elements such as the desktop background, color, sounds, or screen saver after the first logon.
If you disable or do not configure this setting, the default theme will be applied at the first logon.
Themes are located in C:\Users\Username\AppData\Local\Microsoft\Windows\Themes\ folder.
Click Apply > OK.
This setting specifies which theme file is applied to the computer when a user first logs on.
If you enable this setting, the theme that you specify will be applied when a new user logs on for the first time. This policy does not prevent the user from changing the theme or any of the theme elements such as the desktop background, window color, sounds, or screen saver after the first logon.
How to Load a specific theme for users using Registry
To load a specific theme for users using Registry Editor, do the following:
- Press Win+R to open the Run prompt.
- Type regedit > click the OK button > click the Yes button.
- Navigate to Personalization in HKCU.
- Right-click on Personalization > New > String value.
- Name it as ThemeFile.
- Double-click on it and set the Value data as the theme file.
- Click the OK button and restart the PC.
To learn more about these steps, continue reading.
First, you need to open the Registry Editor on your computer. For that, press Win+R to open the Run prompt, type regedit, hit the Enter button, and click the Yes option in the UAC prompt.
Once it is opened, navigate to the following path:
HKEY_CURRENT_USER\Software\Policies\Microsoft\Windows\Personalization
Right-click on the Personalization > New > String Value and set the name as ThemeFile.
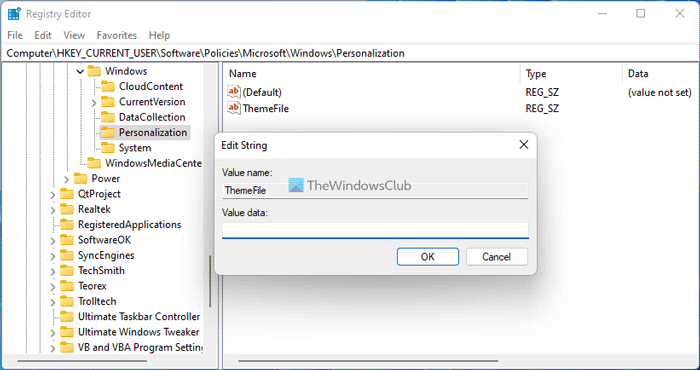
Double-click on it to set the Value data as the theme file.
Click the OK button, then restart your computer to apply the change.
If you disable this setting or do not configure it, the default theme will be applied at first logon.
How do I install custom themes on Windows 11?
To install a custom theme on Windows 11, you first need to create a custom theme. Open the Settings app and access the Themes section present in the Personalization category. There you will see Background, Color, Sounds, and Mouse cursor options on the top part. Access each option one by one and set them. When all the options are configured, return to the Themes section and press the Save button, then give it a name. Finally, you can apply that theme. You can also browse themes from the Microsoft Store and install them.
How do I save a custom theme in Windows 11?
To save a custom theme in Windows 11 or Windows 10, you can use the Windows Settings panel. Press Win+I to open Windows Settings, then go to the Personalization tab. After that, choose the Theme option and adjust all settings to customize the theme. Finally, click the Save button to save the theme.
Read: How to Force a specific visual style for all users in Windows 10.