
Gemini CLI brings Google’s Gemini AI directly to the Windows Terminal. Instead of opening a browser every time you want to ask Gemini something, you can run it from PowerShell and use it to work with files, write or explain code, troubleshoot errors, and perform other tasks from the command line. In this post, we will see how you can use Gemini CLI on Windows 11.
How to install and use Gemini CLI on Windows 11
The setup is fairly straightforward, although there are a couple of things to check before installing it. Gemini CLI requires Node.js, and Windows users should also make sure they are running a supported version of Windows 11. So, before installing Gemini CLI, make sure your PC meets the basic requirements.
- Windows 11 24H2 or later
- Node.js 20 or later
- An active internet connection
- A Google account for the recommended sign-in method
Once you meet the requirements above, you can proceed with the installation.
To install and use Gemini CLI on Windows, follow the steps mentioned below.
- Check for Windows Version
- Install Node.js on Windows 11
- Install Gemini CLI
- Start Gemini CLI
- Start using Gemini
Let’s cover each step in detail.
1] Check for Windows version
First, check which version of Windows 11 you are using. To do so, press Win + R, type winver, and press Enter. The Windows version window will appear. Make sure you are running Windows 11 version 24H2 or newer. If Windows Update offers a newer feature update, install it before continuing.
2] Install Node.js on Windows 11
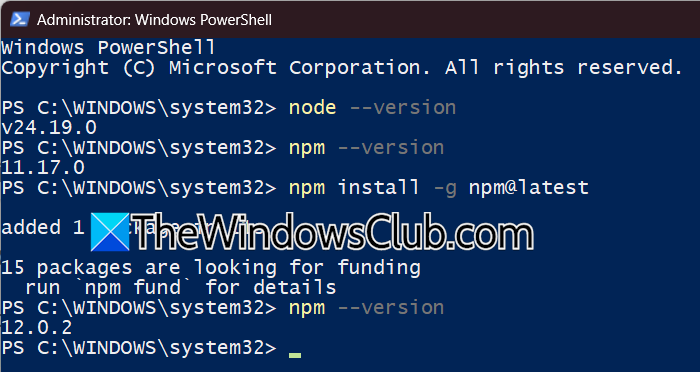
Gemini CLI is distributed as an npm package, so Node.js needs to be installed first. Open the official Node.js website (nodejs.org) and download a current LTS release. During setup, leave the default options selected unless you have a reason to change them.
After the installation finishes, close and reopen PowerShell. You can check whether Node.js was installed correctly by running the following command.
node --version
You should see a version number beginning with v20 or higher.
It is also worth checking npm using the command mentioned below.
npm --version
If both commands return version numbers, Node.js is ready. But if you want, you can update npm to its latest version using the command – npm install -g npm@latest.
3] Install Gemini CLI
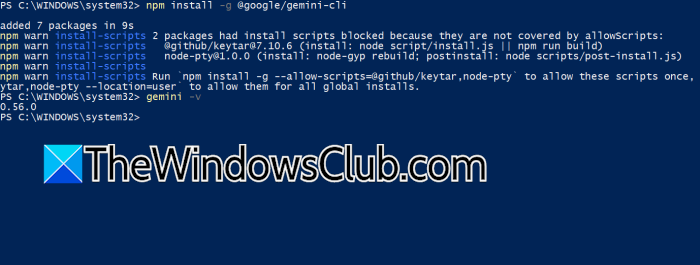
To install the Gemini CLI, open PowerShell and run the following command.
npm install -g @google/gemini-cli
The -g option installs Gemini CLI globally. This means you can launch it from a new PowerShell window without having to navigate to the folder where it was installed. Wait for npm to finish installing the package and its dependencies. To confirm the installation, run the following command.
gemini –version
You can also use gemini -v
If a version number appears, Gemini CLI is installed successfully.
4] Start Gemini CLI
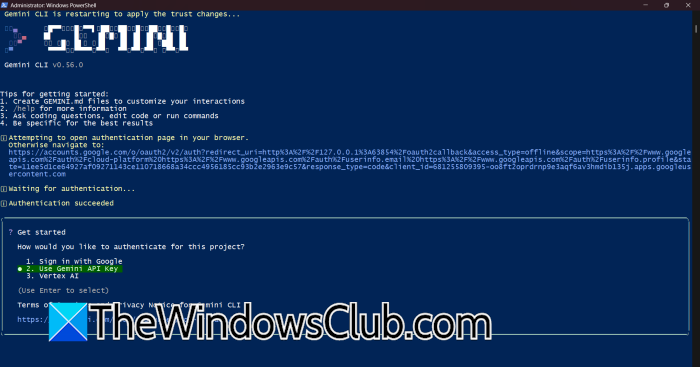
Once the installation is complete, simply type gemini and press Enter. The first time you start Gemini CLI, it will ask you to choose an authentication method. For this guide, we will use a Gemini API key to authenticate Gemini CLI. This is particularly useful if you don’t want to sign in with your Google account through the CLI. Gemini CLI supports API-key authentication using the GEMINI_API_KEY environment variable.
Before continuing, you need to get an API key from Google AI Studio.
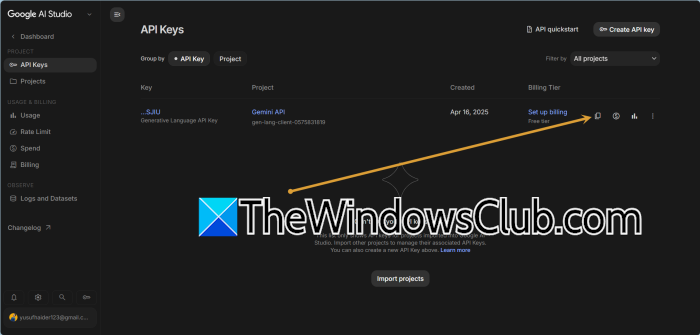
Open Google AI Studio in your web browser and sign in with your Google account. From the AI Studio dashboard, open the API Keys page. Google AI Studio can automatically create a project and API key for new users. If you do not already have a key, click Create API key and follow the instructions to create one.
Once the key is generated, copy it and keep it somewhere safe. Do not share your API key publicly or add it to a public GitHub repository, as anyone who gets access to the key may be able to use the associated API resources.
Now, come back to PowerShell and select Use Gemini API Key. Paste the key we copied earlier using right-click (not Ctrl + V) and hit Enter to submit.
You see a message saying: Authentication succeeded.
Read: How to Install Gemini AI in Windows 11?
5] Start using Gemini
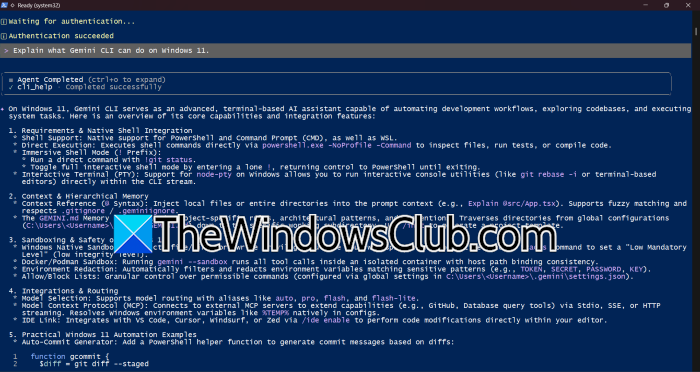
Now that we have installed and authenticated Gemini, all that’s left to do is start prompting. You can start with a simple prompt like: Explain what Gemini CLI can do on Windows 11.
You can easily analyze files using Gemini by specifying the file path with the @ symbol. For instance, if you have a file located at C:\Users\Yusuf\Documents\test.txt, you would enter @C:\Users\Yusuf\Documents\test.txt Summarize this file.
Alternatively, if you’re already in the folder where the file resides, you can simply type @test.txt Summarize this file.
For a more practical demonstration in your article, work in a standard directory rather than the System32 folder.
Begin by exiting the Gemini CLI using the /quit command, then open PowerShell and create a new directory with mkdir C:\GeminiTest followed by cd C:\GeminiTest to navigate into it and start Gemini. Once running, you can prompt it to Create a simple PowerShell script that displays the current date and time, showcasing the utility of the Gemini CLI.
Finally, to illustrate its file capabilities, you can create a text file in C:\GeminiTest and request, @notes.txt Summarize this file and list the important points.
That’s it!
Read: How to use Gemini Code Assist in Windows 11?
Is Gemini CLI free?
Yes, Gemini CLI can be used for free, although the available usage depends on the authentication method and applicable limits. When using the Gemini API, Google provides a Free Tier with access to certain models and free input and output tokens, subject to rate limits. You can move to a paid tier if you need higher limits or access to additional features.
Read: How to install Google Gemini Live AI in Windows 11 as default?
Can I use Gemini CLI without a Google account?
Yes, you can use Gemini CLI without signing in with a personal Google account by authenticating with a Gemini API key or Vertex AI. For API-key authentication, you can create a key through Google AI Studio and set it as the GEMINI_API_KEY environment variable. Vertex AI is another option, but it requires a Google Cloud project and additional configuration.
Also Read: Use Gemini for Education from Google for AI in School.
