In this post, we explain how to get a crosshair cursor and how to make a crosshair appear for your mouse pointer in Windows 11/10. Generally, Windows 11/10 uses a crosshair cursor for precision selection. However, you can use it for regular purposes with the help of this guide.
There are two ways to get crosshair cursors for Windows 11 and Windows 10. First, you can use the in-built Mouse Properties panel. Second, you can use PowerToys. If you want to change the mouse pointer only, you can use the built-in settings. But if you want to enable or disable the crosshair cursor using a keyboard shortcut, and get more customization options, you can use Microsoft PowerToys.
How to get Crosshair Cursor for Windows 11/10
To get Crosshair Cursor for Windows 11/10, follow these steps:
- Press Win+I to open Windows Settings.
- Go to Bluetooth & devices > Mouse.
- Click on Additional mouse settings.
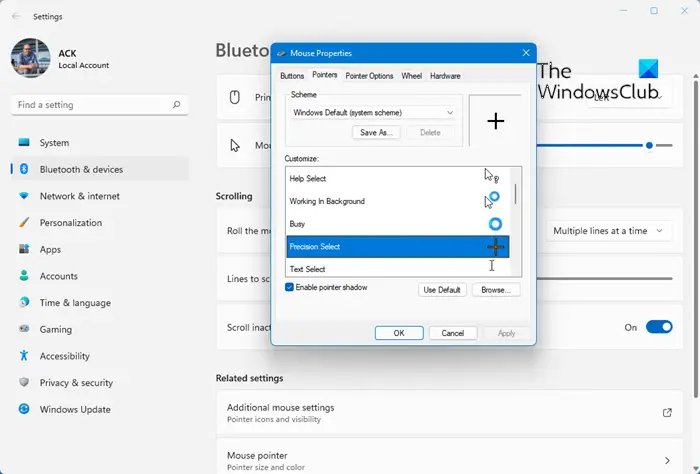
- Switch to the Pointers tab.
- Select Normal Select > Browse.
- Choose the crosshair mouse pointer and click on Open.
- Click the OK button.
First, you need to open the Windows Settings panel by pressing Win+I. Then, go to Bluetooth & devices and click on the Mouse settings. Here you can find the Additional mouse settings setting. Click it to open the Mouse Properties panel.
Once it is opened, switch to the Pointers tab and click on the Normal Select option. Then, click on the Browse button.
Next, select a crosshair cursor you like, then click the Open button.
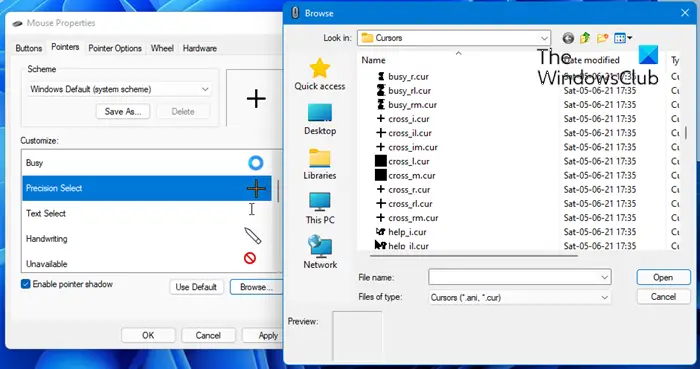
Once it is selected, click the OK button to save the change.
Enable Mouse Pointer Crosshair in Windows 11
To enable Mouse Pointer Crosshair in Windows 11/10 using PowerToys, follow these steps:
- Open PowerToys on your computer.
- Switch to the Mouse utilities tab.
- Toggle the Enable Mouse Pointer Crosshairs button.
- Press Ctrl+Alt+P to open the crosshair cursor.
Let’s check out these steps in detail.

First, you need to open PowerToys on your computer. If you haven’t installed it already, follow this guide to install PowerToys on Windows.
Once installed, open PowerToys, and switch to the Mouse utilities tab. Here you can find a section called Mouse Pointer Crosshairs. You need to find the Enable Mouse Pointer Crosshairs option and toggle the respective button to turn it on.

Then, press Ctrl+Alt+P to open the crosshairs cursor on your screen.
As mentioned earlier, there are tons of customization options available in PowerToys. For example, you can change the color, opacity, center radius, thickness, border color, border size, etc.
That’s all! I hope this guide helped.
Read: How to customize Mouse Buttons, Pointer, and Cursor in Windows 11/10
How do I download cursors for Windows?
If you want to change your mouse cursors, there are plenty of websites that offer mouse cursor downloads. Once you download them, you can change the cursor via Windows Settings > Mouse > Additional mouse settings.
Read: Crosshair stuck on Screen in Windows 11
Can Windows have 2 cursors?
No, Windows cannot have two cursors active simultaneously. However, there are some paid software programs available that allow you to add this feature to your Windows.
Related reads: