When trying to fit a large Excel table in Word, you may have noticed that the table exceeds the border of the page. There are methods to navigate around this issue and insert tables in Word. In this post, we are going to discuss these methods and see how you can insert large Excel tables in Word without cutting off their borders.
How to fit a large Excel table in Word
To fit a large Excel table in Word, follow the method mentioned below.
- AutoFit to Window
- Landscape Orientation for Selected Text
- Paste as Picture
Let us talk about them in detail.
1] AutoFit to Window
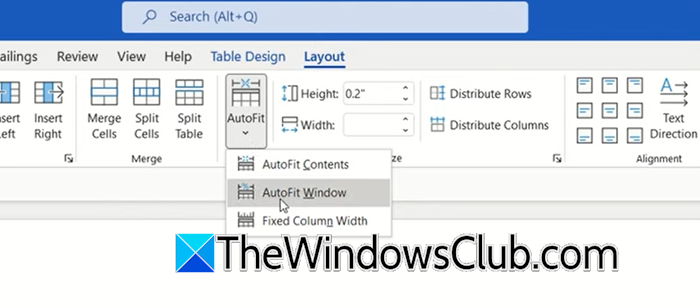
This is the most efficient solution for tables that only slightly exceed the page margins. It automatically compresses the columns to ensure the entire table fits nicely within the document’s boundaries. Follow the steps mentioned below to do this.
- Click anywhere inside the problematic table to select it.
- Navigate to the Layout tab in the top ribbon.
- Locate and click on the Auto Fit button.
- Select Autofit to Window from the drop-down menu to instantly resize the columns.
This works for a reasonably large table, but if it doesn’t work or you are not satisfied with the result, move on to the next method.
2] Landscape Orientation for Selected Text

For tables with many columns, forcing them into a portrait layout can make the data look squishy and difficult to read. An alternative is to rotate only the specific page containing the table into a landscape orientation. Follow the steps mentioned below to do the same.
- Highlight the entire Excel table you wish to adjust.
- Go to the Layout tab on the ribbon.
- Open the Page Setup menu and select Landscape as the Orientation
- Look for the Apply to setting and choose Selected Text to ensure the rest of your document remains in portrait mode.
What it does is that it will put the table into a separate page and make that page landscape.
3] Paste as Picture
If you want to maintain the exact formatting and aspect ratio from Excel without manual adjustments, this method is ideal. By inserting the table as a graphic, you gain the flexibility to resize it manually to fit any page.
You need to copy the desired data range from your Excel spreadsheet. In Word, click the drop-down arrow located under the Paste button on the HOME tab. Choose the option to Paste as Picture. Once pasted, click and drag the corners of the image to resize the table until it fits perfectly.

That’s it!
Read: Microsoft Word table not splitting across pages
How to fit a big Excel table in Word?
Copy the table, then in Word, use Paste Special > Microsoft Excel Worksheet Object to resize proportionally. Alternatively, paste as a picture or link. Adjust page orientation to Landscape and margins to Narrow under Layout. For better control, scale the table within Excel first (View > Page Break Preview) before copying, ensuring columns fit within one page width.
Read: How to create and add Custom Bullets in PowerPoint or Word
How to get a large table to fit in Word?
Use Layout > AutoFit > AutoFit to Window to shrink columns proportionally. Additionally, switch to Landscape orientation and reduce the page margins. Decrease font size or cell padding. Enable Allow row to break across pages in Table Properties to prevent overflow. If still too wide, split the table into two or hide non-essential columns, or place the table on a legal-size sheet.
Also Read: Top and Bottom Margins missing in Word.