
You can effectively manage your Outlook Mailbox by creating rules. This allows you to automatically organize incoming emails based on specific conditions, such as a particular sender, specific keyword(s), subject line, etc. For example, you can set up a rule to move an email from a particular sender to a specific folder to organize your Outlook Inbox. This article shows how to create rules in Microsoft Outlook, the New Outlook app, and Outlook.com.
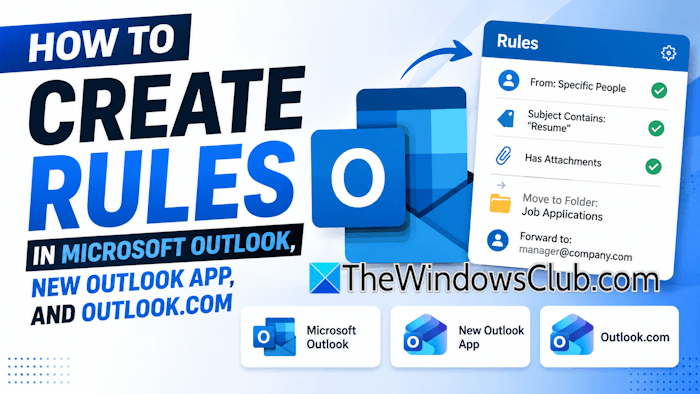
The steps to create rules in Outlook are different for Microsoft Outlook and the New Outlook app. We will explain the steps for Microsoft Outlook, the new Outlook app, and Outlook.com separately.
How to create rules in Microsoft Outlook
Follow these steps to create rules in Microsoft Outlook:
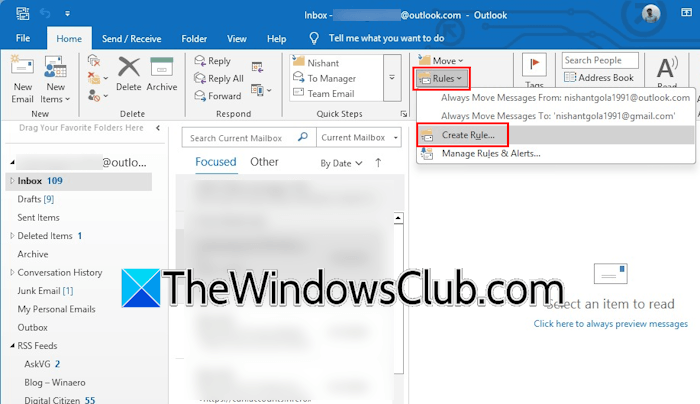
- Launch Microsoft Outlook.
- Navigate to the Home tab.
- Click Rules under the Move group.
- Click Create Rule.
Below, we have explained these steps in detail.
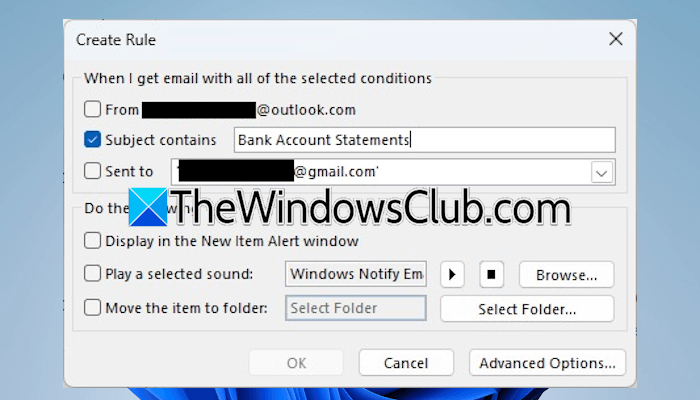
When you click Create Rule, a new window will appear where you define the rule. For example, if you want to move all the emails you receive from your bank containing the monthly bank statement to a particular folder, you can define it here. For this, select the Subject contains option and type the required subject. In this example, we are talking about the emails containing your bank statements; therefore, the subject would be Bank Account Statements. In the next step, select the checkbox “Move the item to folder” and click the Select Folder button. A new small window will appear where you have to select the targeted folder. If you want Outlook to play a sound for this rule, enable the Play a selected sound checkbox. To change the default sound for Outlook rules, click the Browse button. When you are done, click OK. Microsoft Outlook will show you a confirmation message that the rule has been created. This is the simple way of creating rules in Microsoft Outlook. However, Microsoft Outlook also offers advanced options that let you create more complex rules to manage your Inbox.
Creating Advanced Rules in Microsoft Outlook
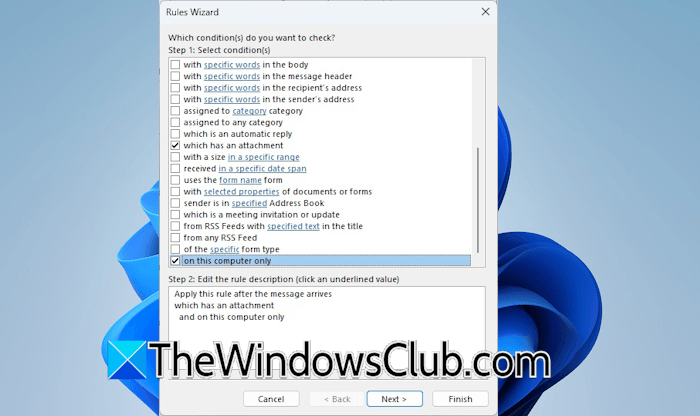
Let’s talk about how to create advanced rules in Microsoft Outlook. In Microsoft Outlook, navigate to Home > Rules > Create Rule. A new window will appear. Instead of defining your rule here, click Advanced Options. Now, you will see many advanced options for your rules (refer to the image above). For example, you can create a rule for emails that contain attachment(s) and only on that computer. In this case, you can select these options:
- On this computer only
- Which has attachment
Now, let’s modify this rule further. Suppose you receive many emails that contain attachments. These attachments include bills, invoices, monthly bank statements, resumes for job applications, etc. In this case, moving all the emails with attachments to one specific folder will not help. Instead, create a separate folder for each email and move it to the appropriate folder. Now, you can select one more option in the rule “with specific keywords in the body.”
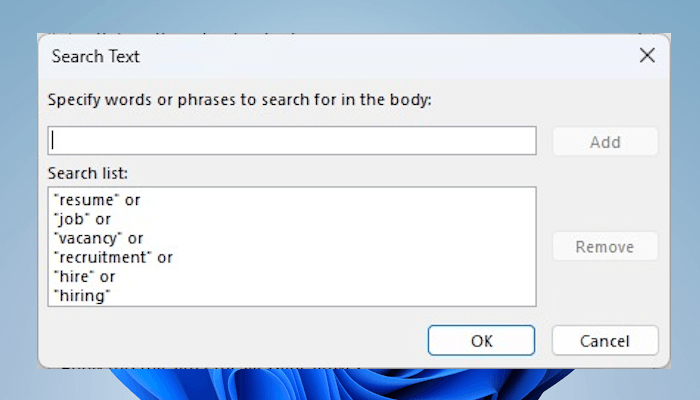
For example, in the case of job applications with attached resumes, you can define the following words or phrases in your rule:
- resume
- job
- vacancy
- recruitment
- hire
- hiring
When you are done, click Next.
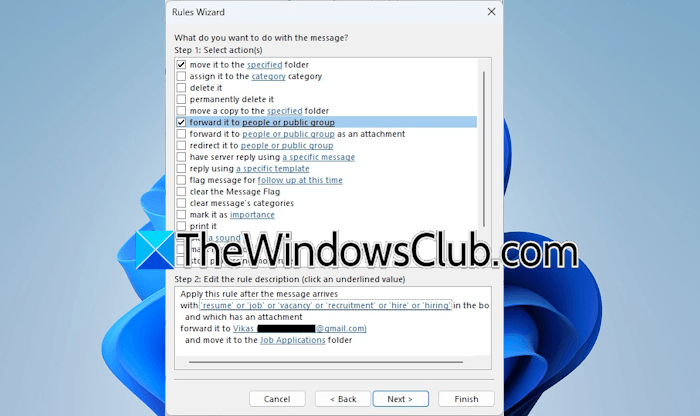
On the next screen, you have to define the action you want Microsoft Outlook to take with such emails. Let’s say you want to move the job applications of candidates with attached resumes to a specific folder, say Job Applications; define that action. If you also want to forward such emails to your senior in the organization, define that too. In this case, you can define the following actions:
- move it to the specific folder
- forward it to the people or public group
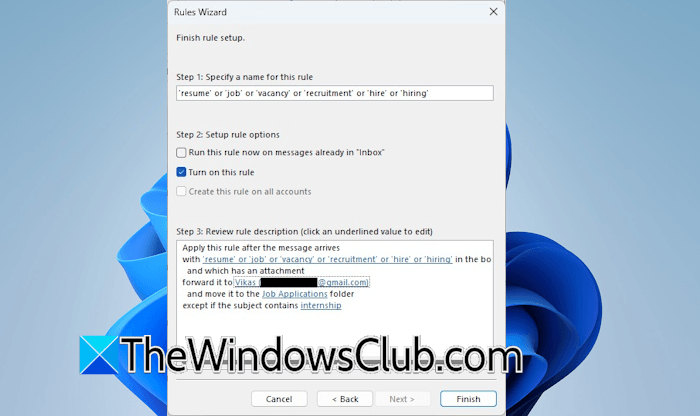
Now, select the destination folder and add the email addresses of the people you want to forward the job application emails to. When you are done, click Next. On the next screen, you can add exceptions to your rule. For example, if the email contains the word internship, you don’t need to apply the rule. In this case, you can select the “except if the subject contains specific words” option and define the word “internship” there. When you are done, click Next. On the last screen, select the “Turn on this rule” checkbox. If you want to run this rule for all previous messages in Inbox, select the “Run this rule on messages already in Inbox” checkbox. Click Finish to save the rule.
This is how you can create rules in Microsoft Outlook. Now, let’s see how to manage rules.
Managing Microsoft Outlook rules
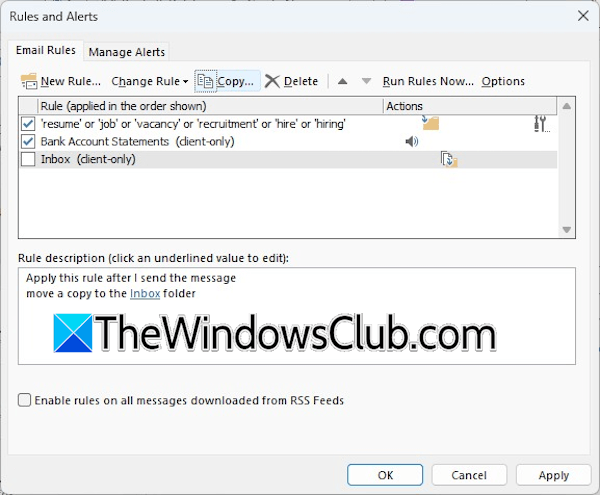
To manage rules in Microsoft Outlook, click Rules > Manage Rules & Alerts under the Home tab. A new window will appear showing you all the rules you created in Microsoft Outlook. Here, you can edit a rule by double-clicking on it, copy it to another Outlook profile, and delete it. If you want to disable specific rules, uncheck their respective checkboxes. When you are done, click Apply to save the changes.
If you selected the “on this computer only” option in your rule, that rule will work only on that computer. If you view that rule in the Manage Outlook window, you will see the client-only text for that specific rule.
How to create rules in new Outlook app and Outlook.com
The steps to create a rule are the same for the New Outlook app and Outlook.com. The following instructions will help you:
- Launch the New Outlook app or log in to your Outlook account in your web browser.
- Click the Settings icon on the top right side.
- Navigate to Mail > Rules.
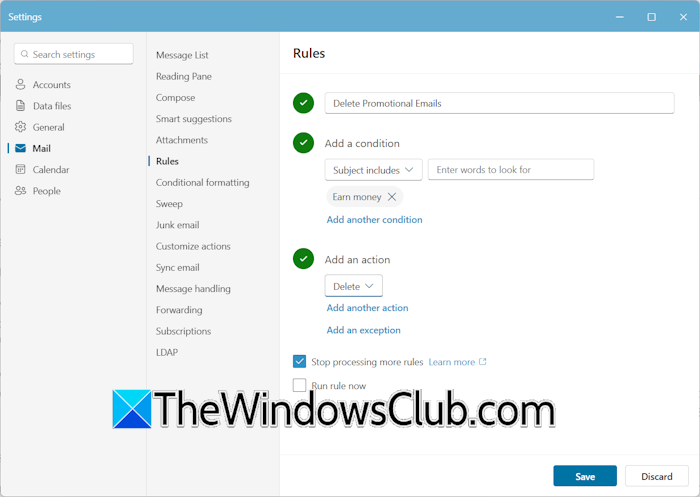
All rules you created in Microsoft Outlook that are currently active will appear there. To create a new rule, click Add rule. Now, name the rule and add a condition and action. For example, if you want to delete all promotional emails that contain the phrase “Earn money” in the subject, select Subject includes and then type the phrase. After that, hit Enter. Now, select Delete in the Action. You can also add another condition, another action, and an exception. When you are done, click Save.
Managing rules in the New Outlook app and Outlook.com
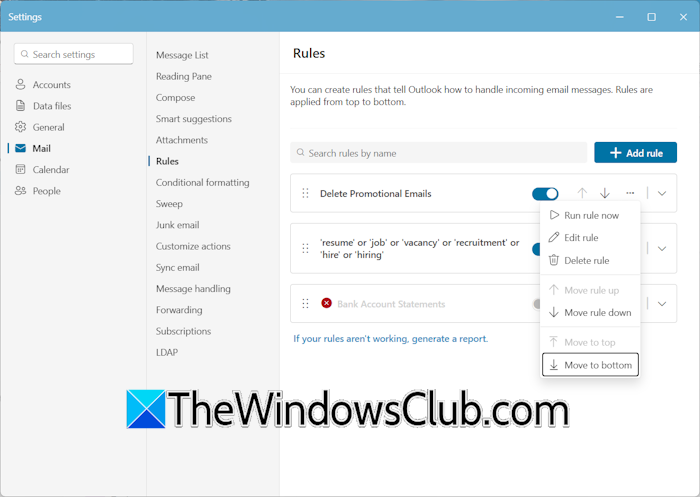
Managing rules in the New Outlook app and Outlook.com is easy. Open Settings, then navigate to Mail > Rules. You will see all the rules there. To manage a rule, click the three dots next to it and select the option you need. To disable a rule, turn off its switch.
That’s it. I hope this helps.
Can I use Rules in New Outlook?
Yes, you can use rules in the New Outlook app. The rules that you create in Microsoft Outlook and Outlook.com also remain available and accessible in the New Outlook app. You can manage and use those rules there.
Why are Rules not supported for my Outlook account?
If you receive the Outlook rules are not supported error, this may mean that the administrator has disallowed you from creating and managing the rules. Contact your administrator. Another reason for this issue is that the rules were created only for a particular computer.
Read next: Error downloading the file content in Outlook.
