Converting a physical server to a virtual machine (VM) on Hyper-V is called Physical-to-Virtual (P2V) migration. This process is important for consolidating servers, recovering from disasters, and updating old systems. Virtualizing a physical server can help you save money on hardware, use resources more effectively, simplify backups, and make your IT operations more flexible. In this post, we will explain how to convert a physical server into a Hyper-V VM.
How to convert a Physical Server to Hyper-V VM
If you want to convert a physical server to a Hyper-V VM, follow the steps mentioned in this guide. Do keep in mind that this physical server doesn’t have to be a server; it can be any computer, be it a client or a server. That being said, let’s go through the steps to follow.
- Check your system for compatibility
- Download Disk2vhd on your physical computer
- Export your server/computer to a VHDX file
- Create the Hyper-V VM
Let us talk about them in detail.
1] Check your system for compatibility
Before going forward with the actual setup, we need to ensure that Hyper-V supports the physical server’s OS. Generally, Windows Server 2008 R2 and later, and Windows 11/10 are well-supported. If you are running an older version, you will likely encounter compatibility issues, as they often lack the necessary integration services.
Additionally, verify that your critical applications and services (e.g., databases, custom services) will function correctly in a virtualized environment.
2] Download Disk2vhd on your physical computer
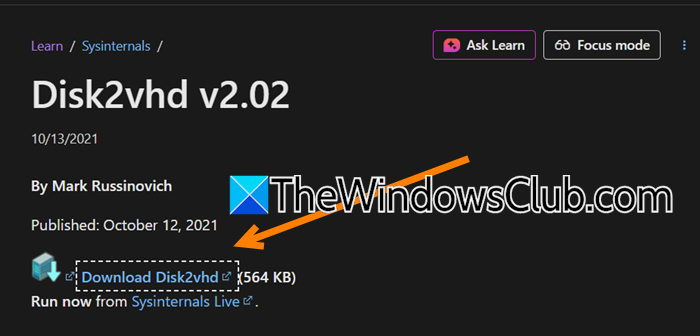
Microsoft provides a straightforward path for this conversion, primarily through a powerful, free tool called Disk2vhd. So, our first steps include downloading this tool from the Microsoft Sysinternals website.
Navigate to learn.microsoft.com and click on Download Disk2vhd. Once the ZIP file is downloaded, extract it.
3] Export your server/computer to a VHDX file

The extracted Disk2vhd folder will have multiple files; we need to select the right one for your computer. Since mine is running on a 64-bit architecture, I would double-click on disk2vhd64. Click on Agree when prompted.
Once the Disk2VHD wizard appears, tick the following options.
- Use Vhdx
- Use volume shadow copy (uncheck it only if you are using an external drive). This ensures data consistency by creating a point-in-time snapshot without requiring a reboot.
- All the hidden volumes
- C:\ and any other partition on your computer, although it is optional.
- Choose a network share (e.g., \\HYPER-V-HOST\ConversionSource) or a local drive with enough free space to hold the entire VHDX file. The space needed is roughly equal to the used space on the volumes, not their total capacity.
Click Create. Disk2vhd will now create the VHDX file(s). This process can take a long time (from 30 minutes to several hours), depending on the amount of data and network speed. The server will remain operational during this process, but performance may be impacted.
You need to copy the VHDX file(s) from the server to the machine where you will run the VM. If it’s the same system, you can skip copying.
4] Create the Hyper-V VM
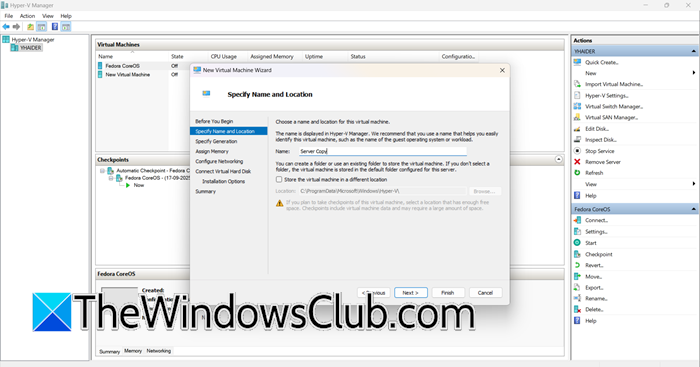
Hyper-V is a Windows tool, so you don’t have to download it from the website. However, you do need to enable it from Windows Features. Once done, open Hyper-V Manager, and follow the steps mentioned below to create the virtual machine.
- Click on New > Virtual Machine > Next.
- Give your VM a name, and click on Next.
- If you are importing a new OS, select Generation 2; if it’s an older version, select Generation 1.
- Enter a memory for the machine and click on Next.
- Once you are on the Configure Networking tab, select a virtual switch from the drop-down menu.
- When you are in the Connect Virtual Hard Disk section, select Use an existing virtual hard disk:, click on Browse, navigate to the location where you have stored the exported VHDX file(s) from the physical machine, and select them.
- Click Next > Finish.
This will create a new virtual machine, which will be a copy of our existing physical server.
While exporting, if Disk2VHD created more than one file (it would do that if you are exporting an external disk, too), we need to attach them to our virtual machine. To do the same, right-click on the virtual machine and click on Settings. Now, go to the SCSI Controller tab, select Hard Drive, and click on Add. Click on Browse and select the VHDX file(s). Click on Apply > OK.
Finally, start your virtual machine.
That’s it!
Read: How to create and set up new VHD or VHDX File in Windows 11
How to convert a physical server to a Hyper-V VM?
To convert a physical server to a Hyper-V VM, use the free Microsoft Disk2vhd tool. Run Disk2vhd on the physical server to create a VHDX file of its volumes. Then, create a new Generation 2 VM in Hyper-V Manager and attach the newly created VHDX file as its boot disk. Finally, start the VM and install Hyper-V Integration Services for optimal performance.
Read: How to convert VHDX file to VHD using PowerShell
Can Hyper-V use VHD files?
Yes, Hyper-V can use both VHD and VHDX file types. However, it is better to use VHDX for new virtual machines. VHDX supports larger disk sizes (up to 64 TB compared to 2 TB) and protects against data loss during power failures. It also provides better performance. The older VHD format is primarily useful for compatibility with older versions of Hyper-V or for use with other virtualization platforms, such as Microsoft Azure.
Read: Convert VHD to VHDX using Hyper-V Manager.