While using Photoshop on Windows 11/10, if you encounter a GPU error or GPU incompatibility error, here is how you can fix the issue. It could happen due to not updating your graphics driver, a glitch, a bug, or many other reasons. That is why we have gathered some of the most common reasons along with the solutions to troubleshoot the Your graphics processor is incompatible error in Photoshop.

Fix GPU Not Supported Photoshop error on Windows 11/10
To fix the GPU Not Supported error in Photoshop, follow these solutions:
- Change Graphics Processor settings
- Change GPU preference
- Update graphics driver
- Change cache level
- Attach GPU to virtual machine
- Enable OpenCL
- Reset Photoshop preferences
To learn more about these solutions, continue reading.
1] Change Graphics Processor settings
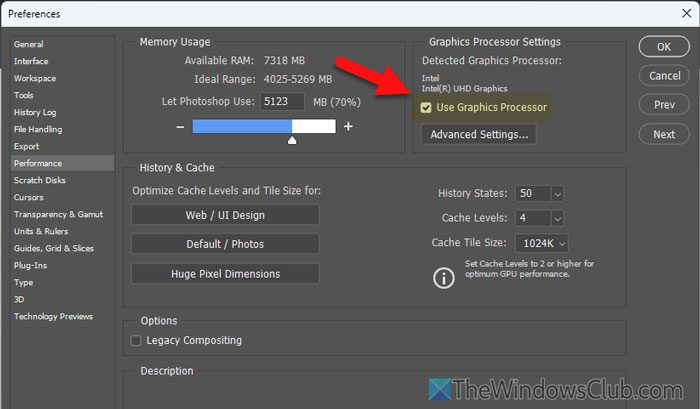
Photoshop gives you an option to use or disable the installed graphics processor so that you can find a better result from your tool. If you want to solve this problem temporarily, you can opt for your internal graphics instead of a dedicated third-party graphics card.
For that, do the following:
- Open Photoshop.
- Go to Edit > Preferences > Performance.
- Remove the tick from the Use Graphics Processor checkbox.
- Click the OK button.
Then, you need to restart Photoshop to apply the change.
2] Change GPU preference
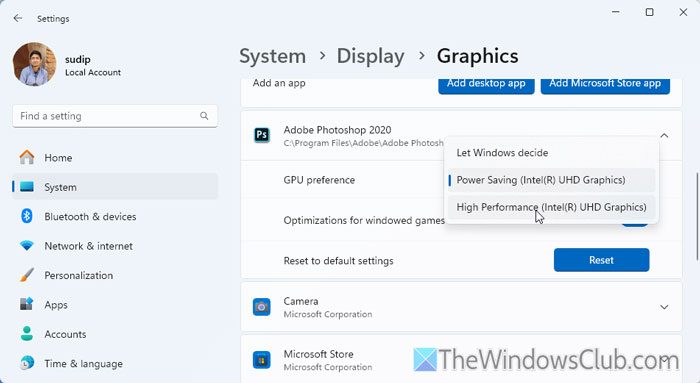
Windows 11 allows you to change the GPU preference from the Windows Settings panel. Here is how you can do that:
- Press Win+I to open the Windows Settings.
- Go to System > Display > Graphics.
- Click the Add desktop app button and choose Photoshop.
- Expand the section and click on the GPU preference drop-down list.
- Choose the High Performance option.
However, if it was already selected when you got the error, it is recommended to opt for the Let Windows decide option.
3] Update graphics driver
This problem can arise due to an outdated graphics driver as well. That is why we would suggest that you update the graphics driver as soon as possible. For that, you can open the Windows Settings and go to Windows Update > Advanced options > Optional updates > Driver updates.

If an update is available, download and install it.
4] Change cache level
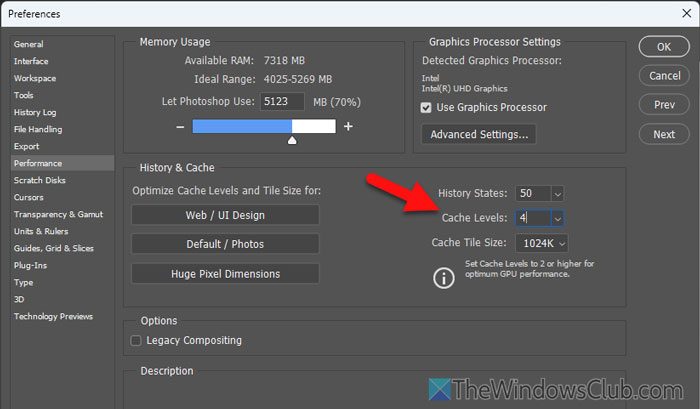
The cache level is directly accountable for providing better or higher GPU performance. If it is set to anything lower than 2, you won’t find any difference, and it may also cause the aforementioned issue. That is why follow the following steps to change the cache level:
- Open Photoshop and go to Edit > Preferences > Performance.
- Find the Cache Levels
- Enter 4 and click the OK button.
- Restart Photoshop.
5] Attach GPU to virtual machine

Many times, you need to attach the graphics card to your virtual machine for different purposes. If you use Photoshop on a virtual machine, there is a chance of getting this error due to the lack of a GPU. That is why you should try GPU Passthrough to attach a GPU to a virtual machine. You can go through this detailed guide to attach a physical video card to your Hyper-V host. Similarly, you can do it for VMware and VirtualBox as well.
6] Enable OpenCL
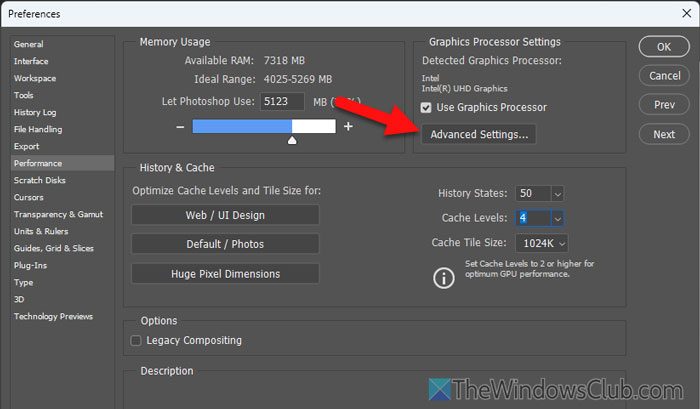
Although OpenCL is not a mandatory feature, it is required for different purposes while using Adobe Photoshop. In simple terms, OpenCL improves your GPU performance while performing different operations such as sharpening your image, improving image size with predefined details, etc. However, if you try to do those without enabling OpenCL, there is a chance of getting the above-mentioned error.
For that, do the following:
- Open Photoshop.
- Go to Edit > Preferences > Performance.
- Click on Advanced Settings.
- Tick the Use OpenCL checkbox and click OK.
- Restart Photoshop.
However, if the Use OpenCL option is grayed out, there is nothing you can do since it depends on the installed GPU.
7] Reset Photoshop preferences
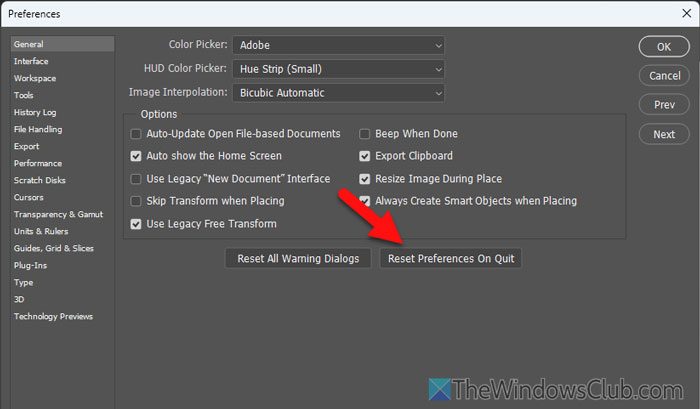
At times, it could be a bug that may appear when you change a few settings in Photoshop. That is why you can try resetting your preferences and check if it resolves the issue or not. For that, do the following:
- Open Photoshop.
- Go to Edit > Preferences > General.
- Click on Reset Preferences On Quit.
- Click the OK button and restart Photoshop.
Read: Adobe Photoshop Graphics Processor not detected
How to fix GPU compatibility in Photoshop?
To fix the GPU compatibility error in Photoshop, you need to change the Graphics Processor settings, tweak graphics preferences in Windows Settings, update the graphics driver, attach a physical video card to a virtual machine, turn on OpenCL, etc. There are many more things you can do that are mentioned in this article.
Why is Photoshop not using my GPU?
If the Use Graphics Processor option is not enabled, Photoshop won’t use your GPU. Instead, it uses your internal graphics card. To enable it, open the Preferences > Performance and tick the Use Graphics Processor checkbox.
Read: Photoshop has encountered a problem with the display driver