Windows OS usually connects to networks in this order: Ethernet, Wi-Fi, and then Mobile broadband. Whenever you connect to a new Wi-Fi network, Windows OS adds it to the list of profiles. The details stored in the profile could include its name, password, encryption method used, SSID, etc. Over time, this list of profiles can grow. At such a time, or to preserve your privacy, you may want to delete or remove the profiles. While there are multiple ways to delete WiFi Network Profile, in this post, we will see how you can remove, delete, or forget Wireless Network Profiles using Windows Settings app.
How to forget Wi-Fi networks in Windows 11
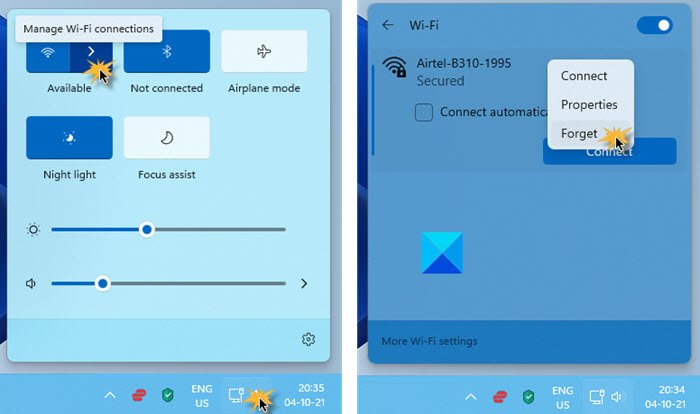
To make your Windows 11 computer forget a WiFi Network, do the following:
- Click on the Network/Speaker icon on the right side of the Taskbar
- From the Quick settings flyout, click on the arrow against Wi-Fi connections
- Select the WiFi network you want your Windows 11 to forget
- Right-click on it and select Forget.
Remove or forget Wireless Network Profiles in Windows 10
Press Win+I to open the Settings app. Select Network & Internet. Next click on Wi-Fi in the left panel. There you will see a link Manage Wi-Fi Settings. Click on it.
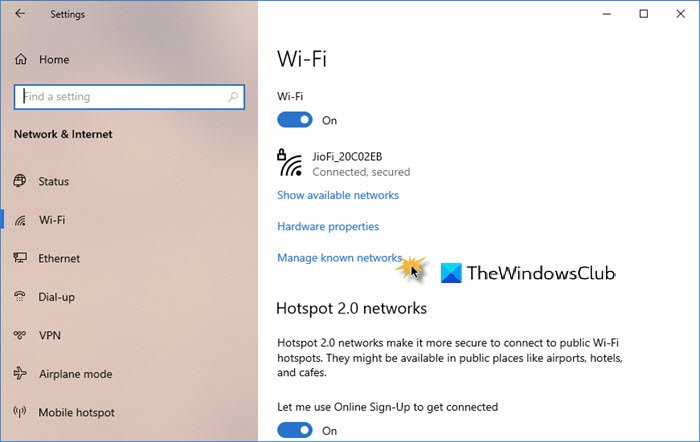
In the window which opens, you will see two settings – Wi-Fi Sense and Manage known networks. Under Manage known networks, select the network, and you will see two options – Share and Forget.
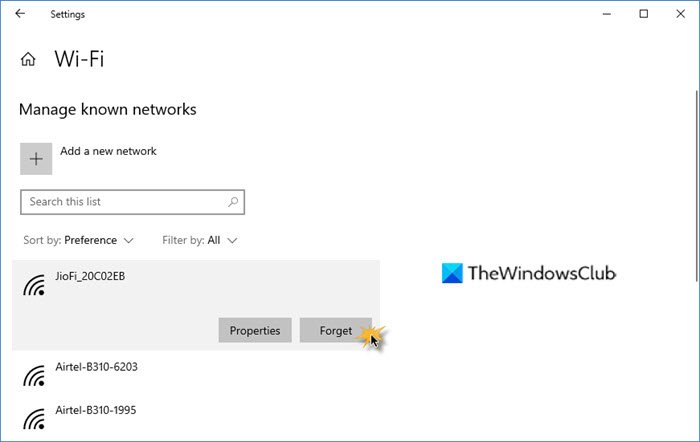
Click on Forget.
This will delete the Wireless Network’s profile and connection details.
Let us know if this helped.